
Attach ODF sources
If you have attached sources in WorkFusion Studio, you get a convenient way to navigate quickly to the source code in the ODF Core library.
While attaching the source, avoid changing ODF Core in your implementation. This complicates upgrading to a newer ODF Core version.
To attach ODF sources, follow the steps below:
Download the zip file with the ODF Core sources. See the Source code access page for the options to get the archive.
Use the Ctrl+click combination to select any class provided by Core, for example, the
Appclass incom.wf.odf.odflab.app.AppExample. Open theAppExampleclass from a different root level of your Project Navigator view (that means, not nested in the root project).Starting from ODF 10.1.0.6, sources are downloaded automatically into your
.m2once you build a project. WorkFusion Studio pulls them whenever you Ctrl+click any class provided by ODF. In case WorkFusion Studio cannot link sources automatically, do it manually by right-clicking a module and selecting Maven > Download Sources.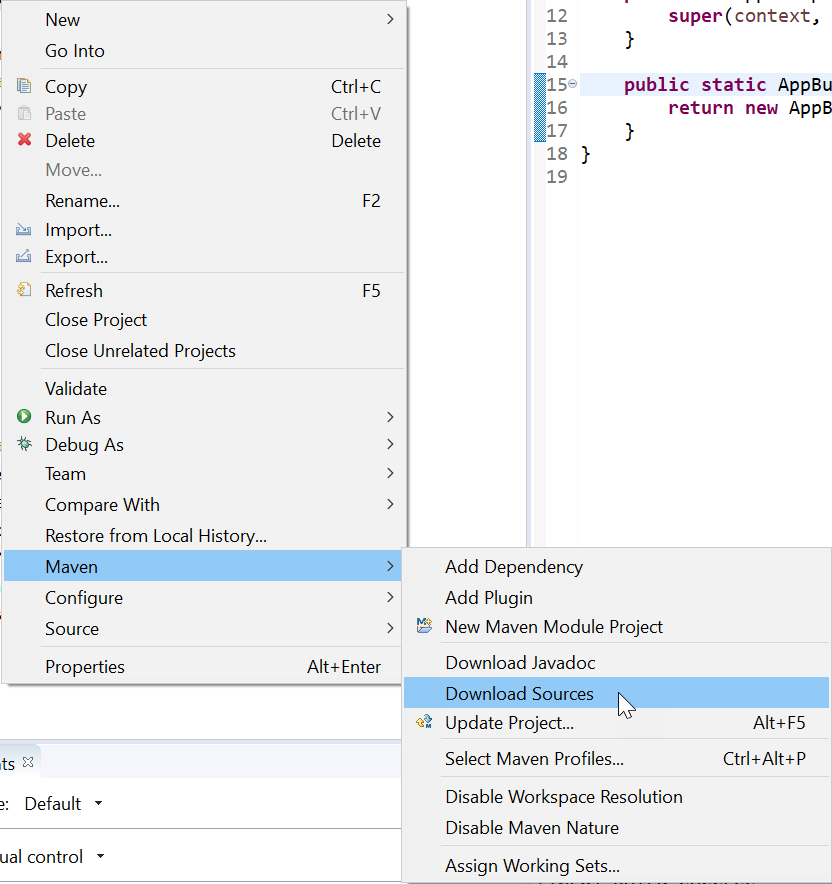
On the Source not found screen, you will see the Attach Source... button. Click the button once you have the ODF Core archive on your machine.
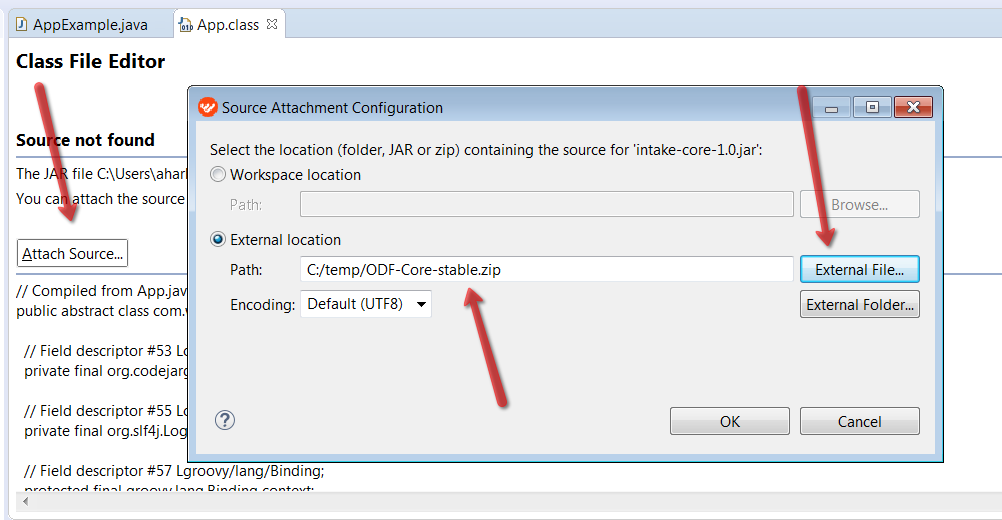
Select the External location radio button, click the External File button, and select the downloaded zip containing the ODF Core sources.
Next time you click any class from ODF Core, WorkFusion Studio will open its source code automatically.
Similarly, you can attach the source code from the ODF Components library.