Orchestrate AI Agent
The instruction describes running, stopping, and scheduling Business Processes based on the ODF 2 example project.
Set up Business Processes
After you've fetched the Example project, check the following four zip files inside the odf2-example-project-package/src/main/resources/business-process folder:
Data_Intake.ziptakes data from external sources, validates, sanitizes, and prepares it to be processed.Data_Processing.zipprocesses the prepared data.Data_Submission.zipis responsible for aggregating results, creating reports, and submitting data to other systems.Error_Handling.ziphandles exceptional cases raised by other processes.
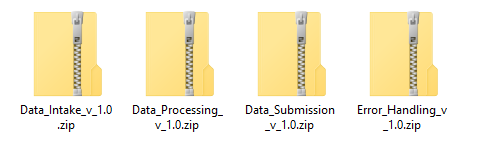
Each file represents a Business Process that can be imported to a Control Tower instance. All processes operate out of the box. No extra configuration is required.
You can import the Business Processes to Control Tower using the bundle-maven-plugin. After completing the import, you should see all the processes grouped by the AI Agent name and version on the Use Cases page in Control Tower.

You might have different versions of the same project. You can navigate to the imported processes by clicking on the specific version.
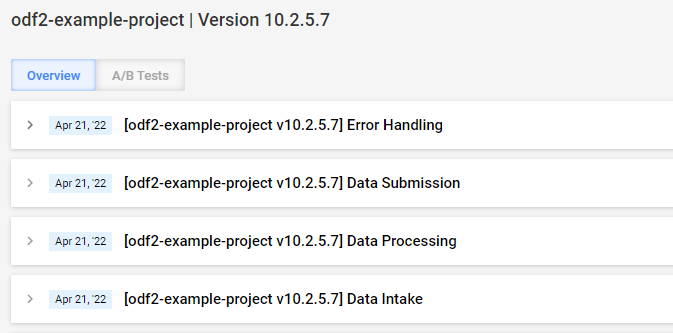
To start a process, click on it and navigate to the Run tab. You can start a process immediately (no input data is required) as any other Business Process by clicking the Run This Process button.
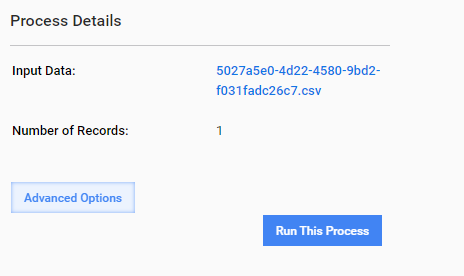
The ODF 2 Example Business Processes depend on each other and should be started one by one. For example, the Submission process waits for the data from the Processing process. In turn, Processing can only take results from the Intake process.
Each Business Process starts with a particular Bot Task called a Monitor Task. Once a Business Process is started, a Monitor Task regularly wakes up. Each time it wakes up, it can pass some records to the next step of its Business Process. By default, Monitors are configured to work during the infinite time and to wake up once a minute. It means that a Business Process works infinitely until stopped manually, and new records are produced once a minute. You can change this default behavior.
Monitors can be configured via JSON configuration. For each class of a Monitor Task, there can be an object in the "monitors" array at the root of the configuration object. If no such object is provided for a Task, it uses default configuration values.
{
  "monitors": [
    {
      "monitorClass": "EmailMonitorTask",
      "pollingInterval": "PT1M",
      "sleepTime": "PT15S",
      "maxLoops": 5,
      "maxRunningTime":"P1D"
    },
    {
      "monitorClass": "SomeOtherTask",
      "pollingInterval": "PT30S",
      "sleepTime": "PT5S"
    }
  ]
}
Configuration object for any given MonitorTask is expected to have the following fields:
monitorClassis the name of a Java class that represents a Monitor, for example,EmailMonitorTask.pollingIntervaldefines the time a Monitor Task leaves between consequent polls for data. By default, the interval is equal to 60 seconds.sleepTimedefines an interval, after which the Monitor wakes and checks ifpollingIntervalis elapsed. This interval cannot be less than 60 seconds because of the Control Tower limitation. By default, it is equal to 1/4 of thepollingInterval.maxLoopsis the number of polls after which the Monitor stops working. By default, the number of polls is unlimited.maxRunningTimedefines a period after which the Monitor finishes execution. By default, the Monitor execution time is unlimited.
A Configuration object must have the monitorClass field; all other fields are optional. If the optional field is missing, the default value will be used.
A Configuration object should not contain any other fields. The whole object is ignored if an unexpected field is encountered, and the default configuration is used instead.
Specify the pollingInterval, sleepTime, and maxRunningTime parameters in the ISO-8601 duration format.
For example, "P1D" means one day, and "PT1H30M10S" means one hour, 30 minutes, and 10 seconds.
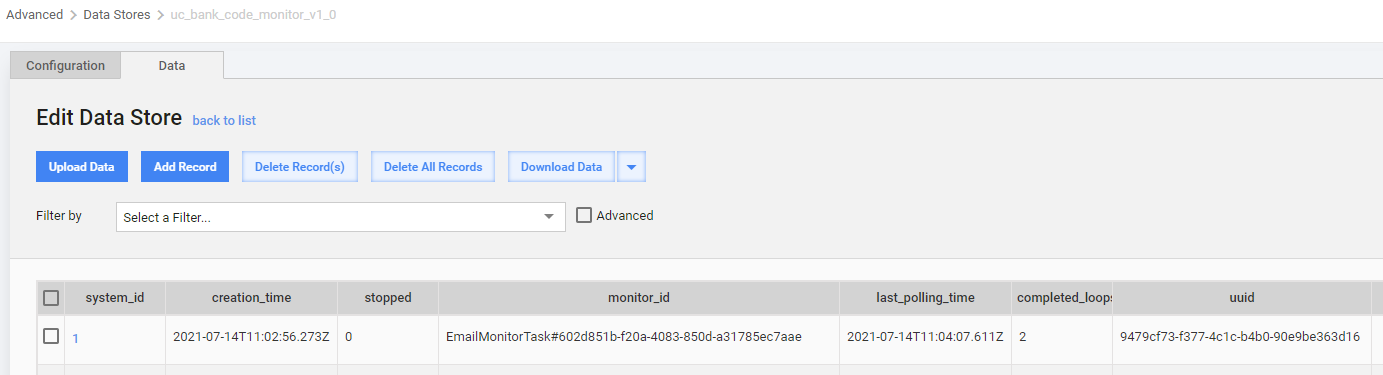
Find the state of each running Monitor Task instance in the monitor Data Store. You can stop any monitor manually by setting a stopped
field of the corresponding record to "1".
Run Business Process once
The ODF 2 Example Business Processes are designed to run continuously, handing data as it appears. Sometimes, you require to run a Business Process for one time only. This is especially useful during the development phase of your project or when testing capabilities.
To run a Business Process only once, set the maxLoops parameter for its Monitor Task to 1.
{
  "monitors": [
    {
      "monitorClass": "EmailMonitorTask",
      "maxLoops": "1"
    }
  ]
}
Stop Business Process
There are two options to stop a running Business Process instance:
Navigate to the monitor Data Store, find the Monitor entity responsible for the Business Process instance, and set the "1" value to the stopped field. The Business Process continues running transactions that had already been started, but the Monitor won't produce new transactions. Once all in-progress transactions are finished, the Business Process is marked as stopped.
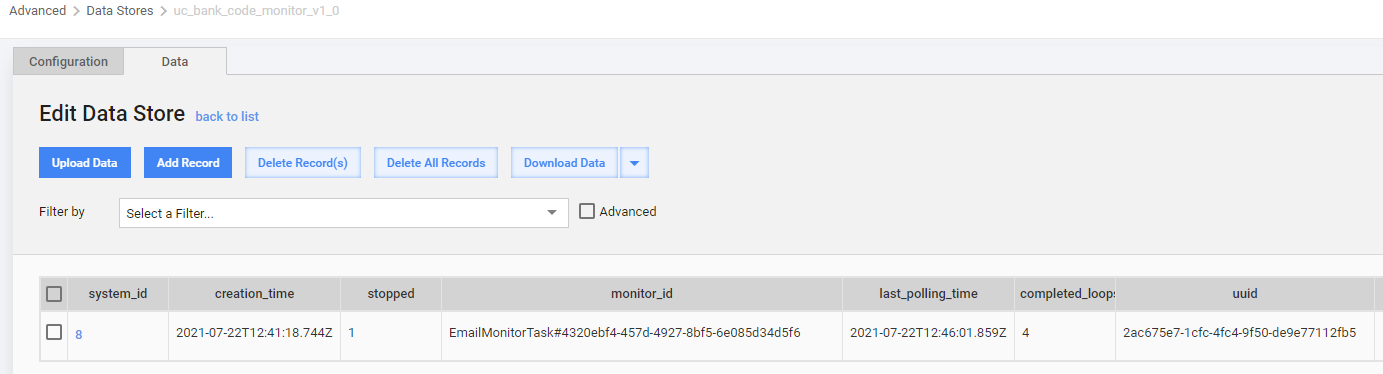
Go to Control Tower > Business Processes and navigate to the Business Process you are planning to stop. Click the Stop button from the ... menu. When you stop a Business Process this way, it leads to a near-instant stop of the execution. Transactions not processed by that time won't be processed, while processed transactions advance to the following Business Process.
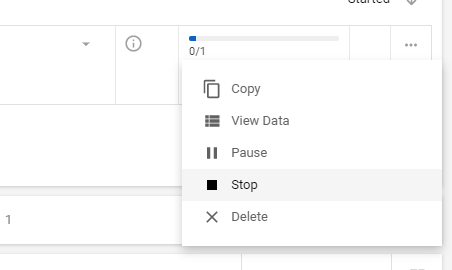
To find a Monitor entity responsible for a particular Business Process, check the monitor_id column. It consists of the Monitor task name and the ID of a Business Process run. For example, to stop the Intake Business Process with the run ID 351133f9-2c8e-410b-9323-cfd4f3e97250, find the record with the monitor_id equal to EmailMonitorTask#351133f9-2c8e-410b-9323-cfd4f3e97250.
If you stop a Business Process with the Stop button, it is essential to set the value "1" to the stopped field of the corresponding record in the monitor Data Store later. Without it, subsequent runs of this Business Process Monitor Task may not work correctly.
Schedule Business Process
With Monitor Tasks available, it is logical to keep Business Processes running for a long time. However, Control Tower's limitations make this approach impractical. The recommended approach is to schedule the process execution at regular intervals and configure Monitors accordingly.
For more details on Business Process scheduling, refer to the WorkFusion documentation.
The example below shows how to configure the Intake Business Process to run regularly, one hour per day.
To configure the EmailMonitorTask Monitor to work for one hour only, set the maxRunningTime parameter for its Monitor Task to PT1H.
{
  "monitors": [
    {
      "monitorClass": "EmailMonitorTask",
      "maxRunningTime": "PT1H"
    }
  ]
}
In this case, the Monitor ensures that the Business Process is stopped after one hour of the execution. However, to start the process, you need to create a Business Process scheduler. The scheduler is responsible for starting the process once a day. Using both the Monitor and the scheduler, you can fulfill any requirements regarding Business Process working hours.
To create a new scheduler, follow the steps:
Navigate to Advanced > Schedules and click the Create button.
On the next page, specify the following parameters:
- Task or Process Definition: select the Business Process to run.
- Input Data: select
Emptyas you don't require any Input Data. - Schedule Period: set a schedule period by selecting dates from the calendar.
- Schedule Name: specify the schedule name.
- Schedule Frequency: type in or select the required frequency values from the dropdown menu.
Click Save.
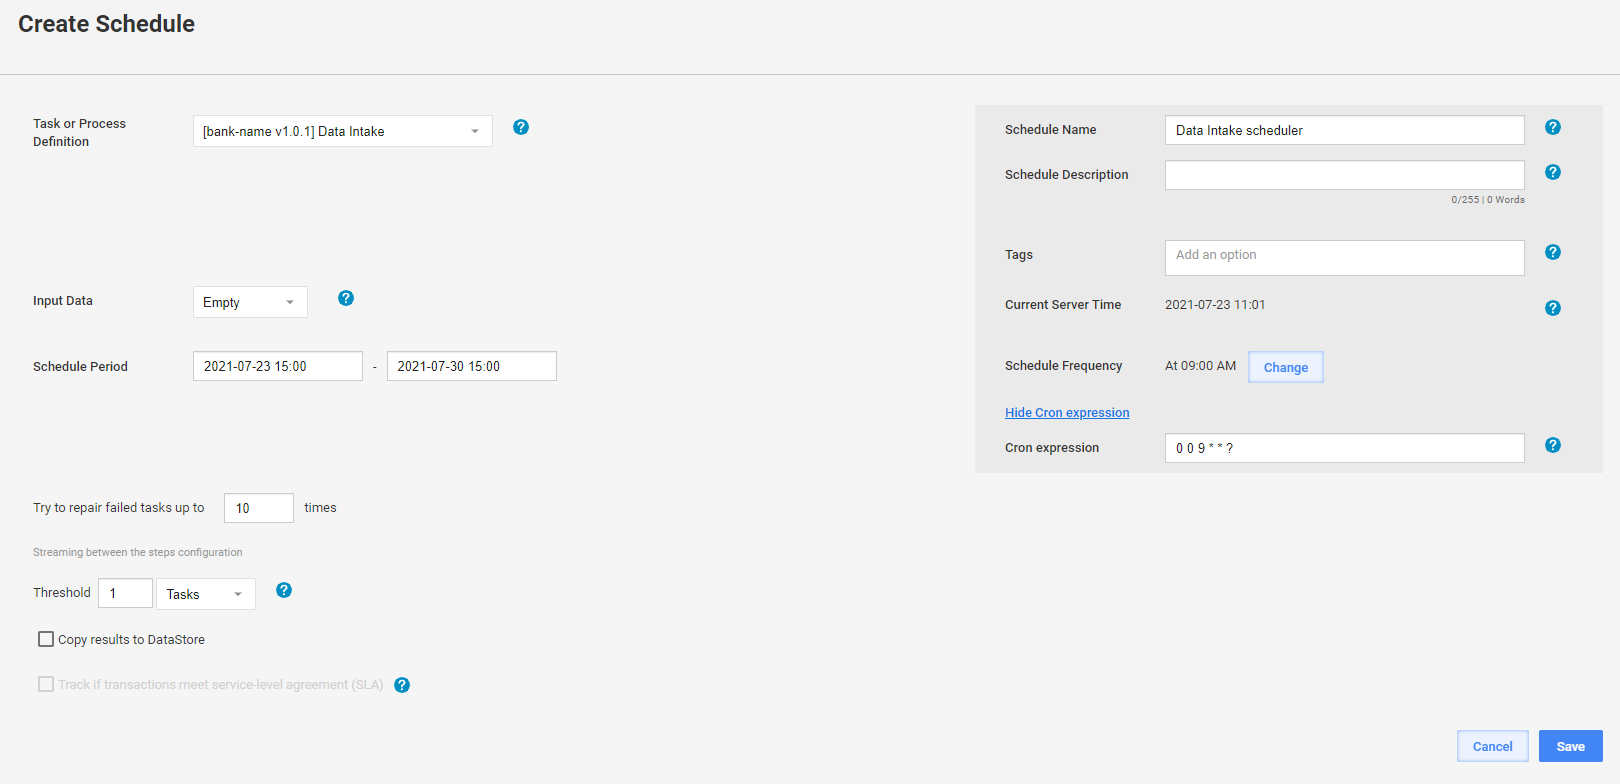
The 0 0 9 * * ? Cron expression means "every day at 09:00".
Once you save the schedule, you cannot edit it. To edit a saved schedule, copy it, and edit the copy. You can pause and start a running schedule and delete a schedule at any time.
When the scheduler starts a Business Process, it creates a separate instance of this process.

Configure 24/7 schedule
Regarding the 24/7 schedule, ensure that only one instance of a Business Process runs. For example, you don't want to let the same two Intake processes work together since it might create duplicated transactions.
If you run your process 24/7 and the process can stand for 12 hours non-stop, configure the scheduler to start a new process instance every 12 hours, and set up your Monitors to run no longer than 11 hours and 59 minutes.
Let's take a look at the Monitor configuration for EmailMonitorTask that works no longer than 11 hours and 59 minutes:
{
  "monitors": [
    {
      "monitorClass": "EmailMonitorTask",
      "maxRunningTime": "PT11H59M"
    }
  ]
}
Each Business Process will have the same Monitor configuration in your setup. The only thing that changes is the Monitor name. Out-of-the-box processes use the following Monitor names:
- Data Intake:
EmailMonitorTask - Data Processing:
ProcessingMonitorTask - Data Submission:
SubmissionMonitorTask - Error handling:
ErrorMonitorTask
To create a separate scheduler for each Business Process to start twice a day in 12 hours, follow the steps:
Navigate to Advanced > Schedules and click the Create button.
On the next page, specify the following parameters:
- Task or Process Definition—select the Business Process to run.
- Input Data—select
Emptyas you don't require any Input Data. - Schedule Period—set a schedule period by selecting dates from the calendar.
- Schedule Name—specify the schedule name.
- Schedule Frequency—type in or select the required frequency values from the dropdown menu.
Click Save.
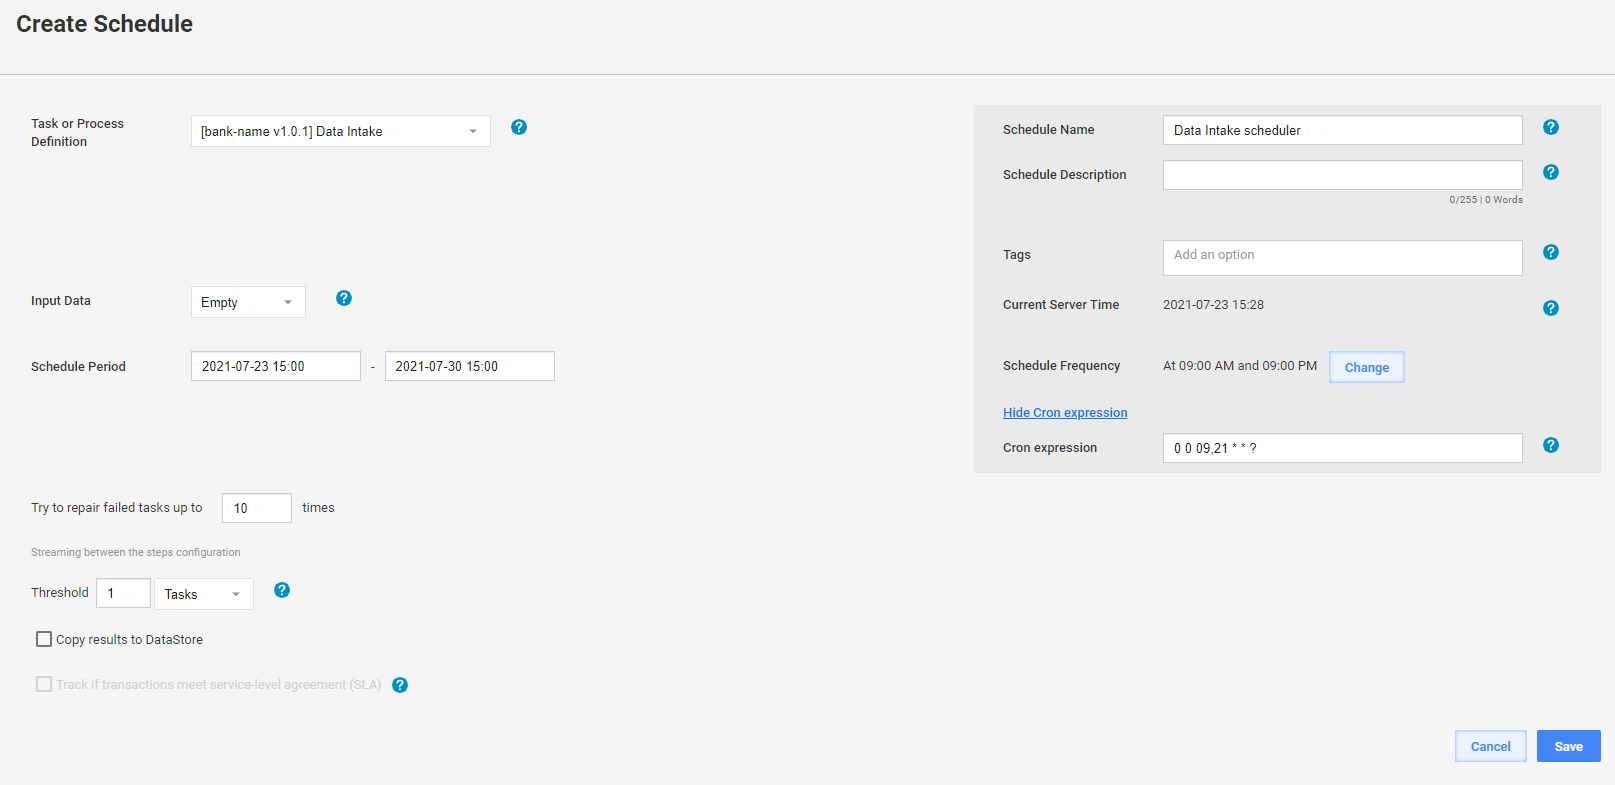
The 0 0 09,21 * * ? Cron expression means "every day at 09:00 and 21:00".