Run screening
Start screening
From Control Tower
To start the name screening, do the following:
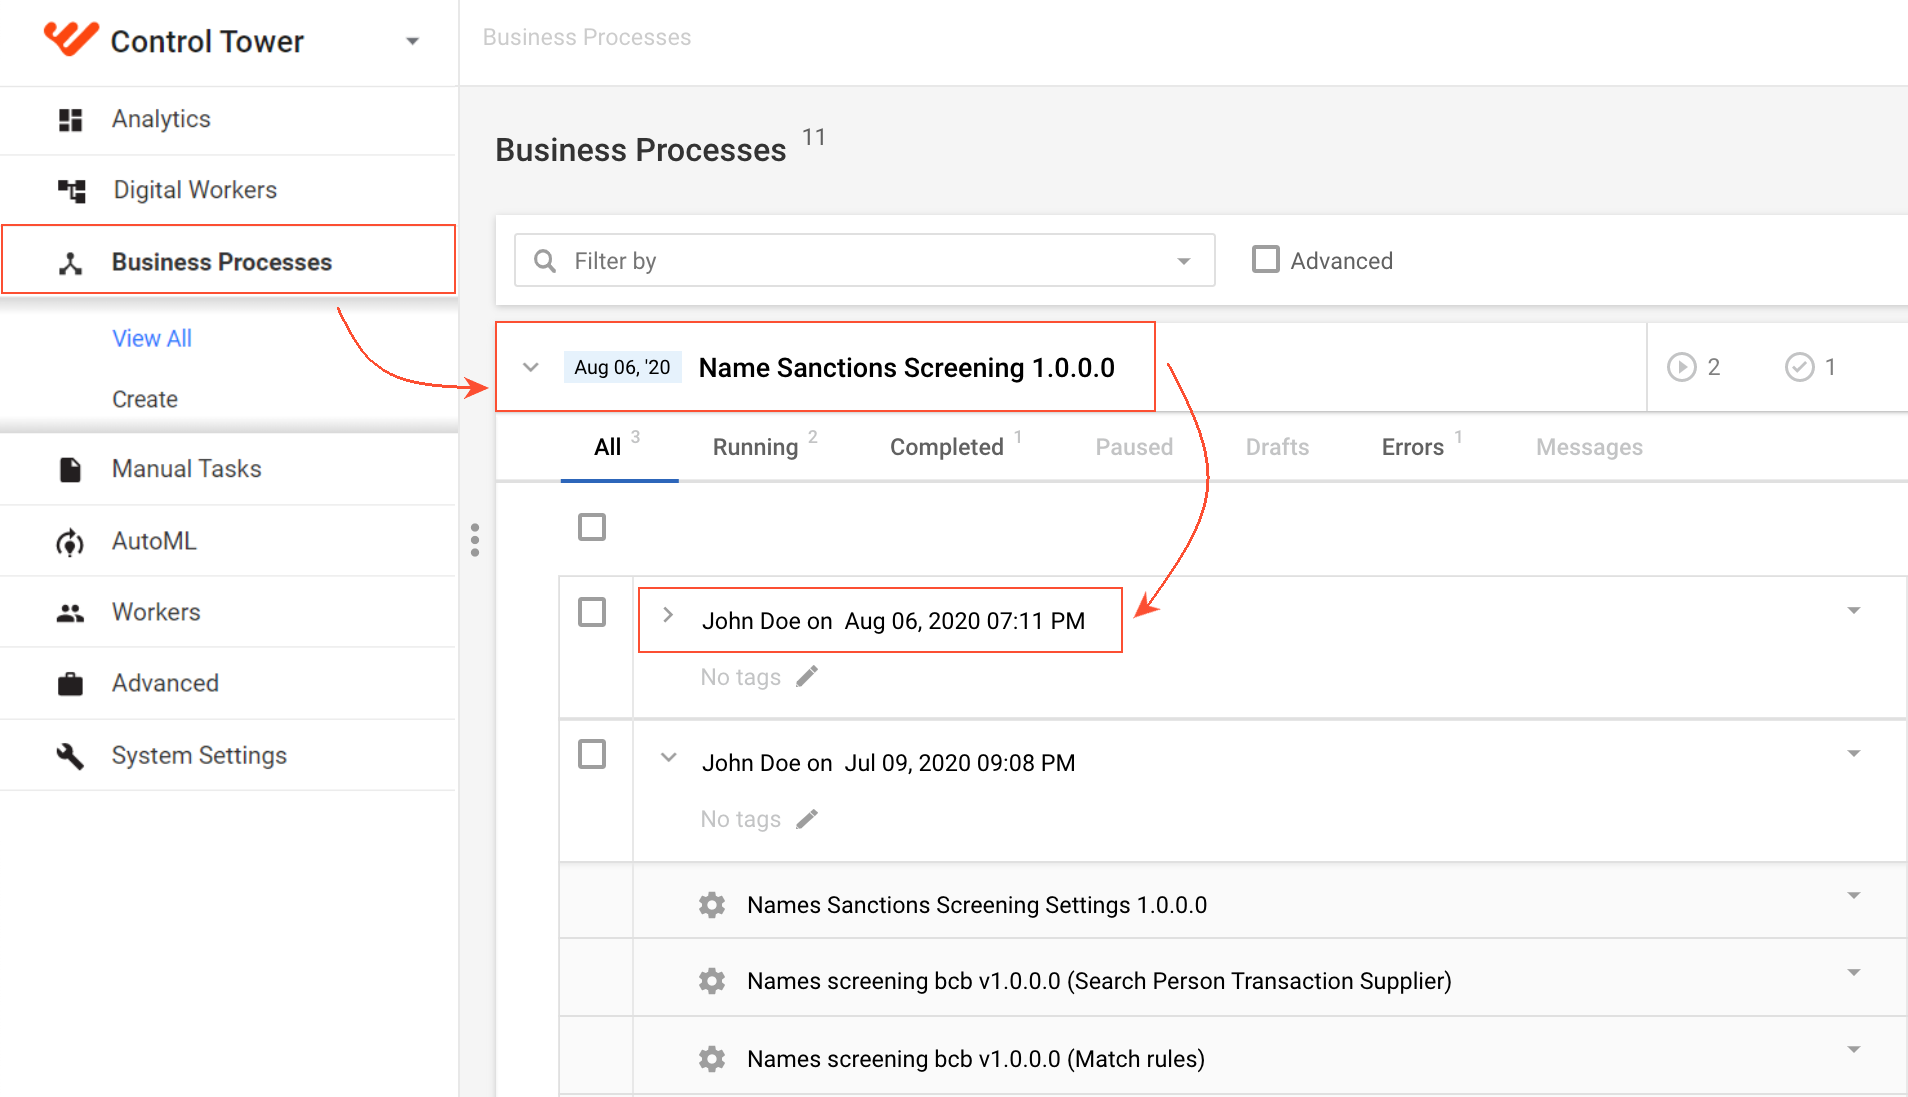
In the Control Tower menu, click Business Processes, click the name of the required process to expand the process definition, and then click the process name. The BP window appears.
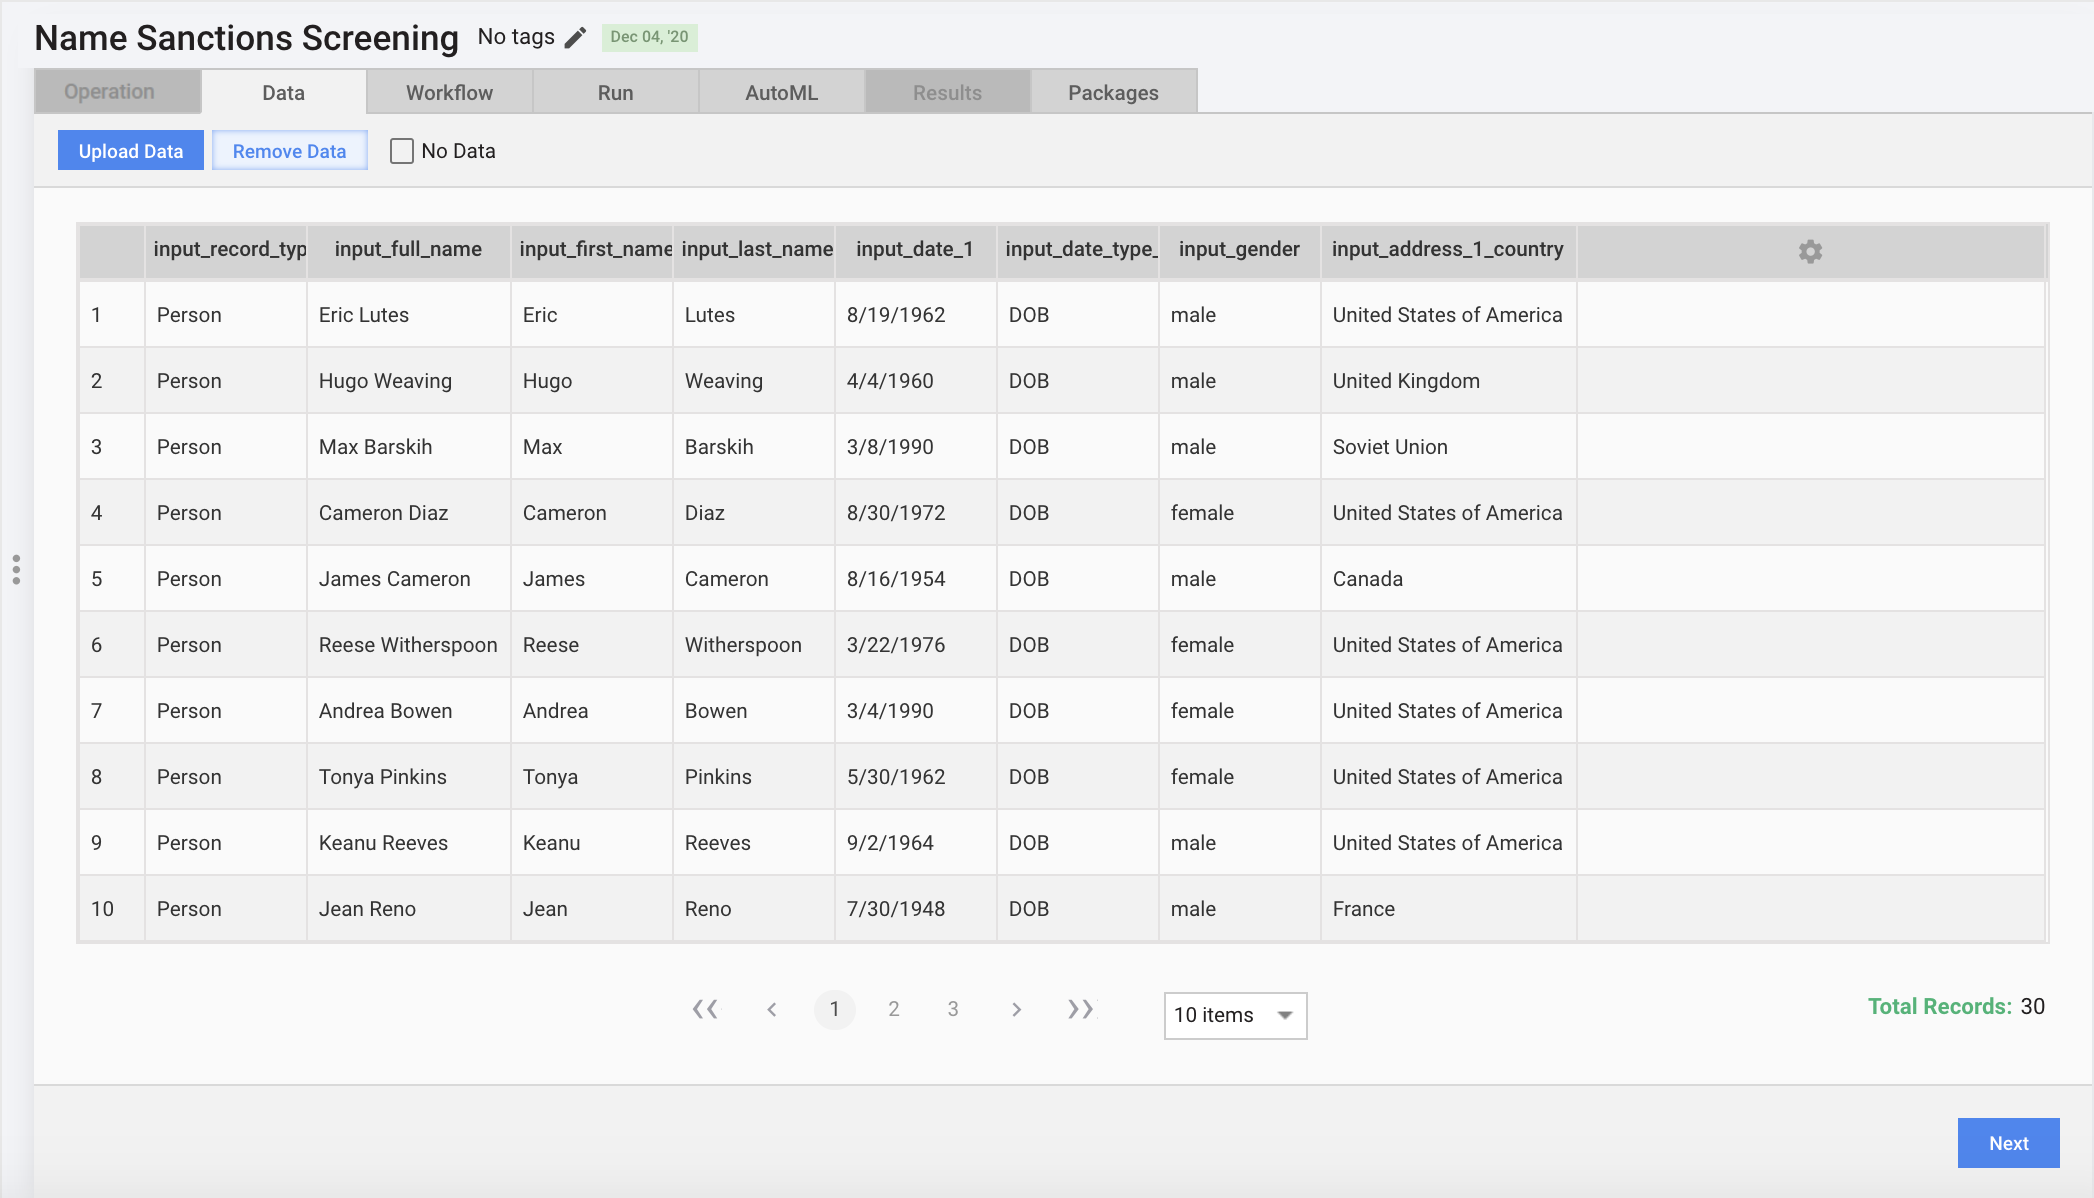
Go to the Data tab, and click Upload Data. The Upload your main data window appears.
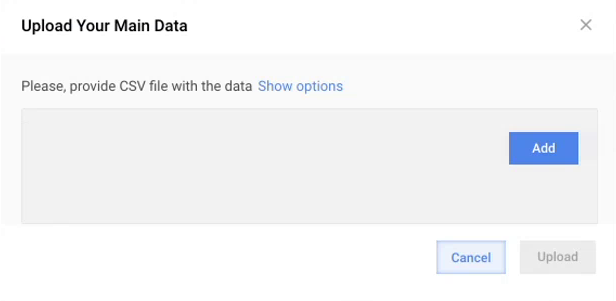
In the window, click Add, select the CSV input file with the names to be screened, click Open, and then click Upload. The names are uploaded to the Business Process.
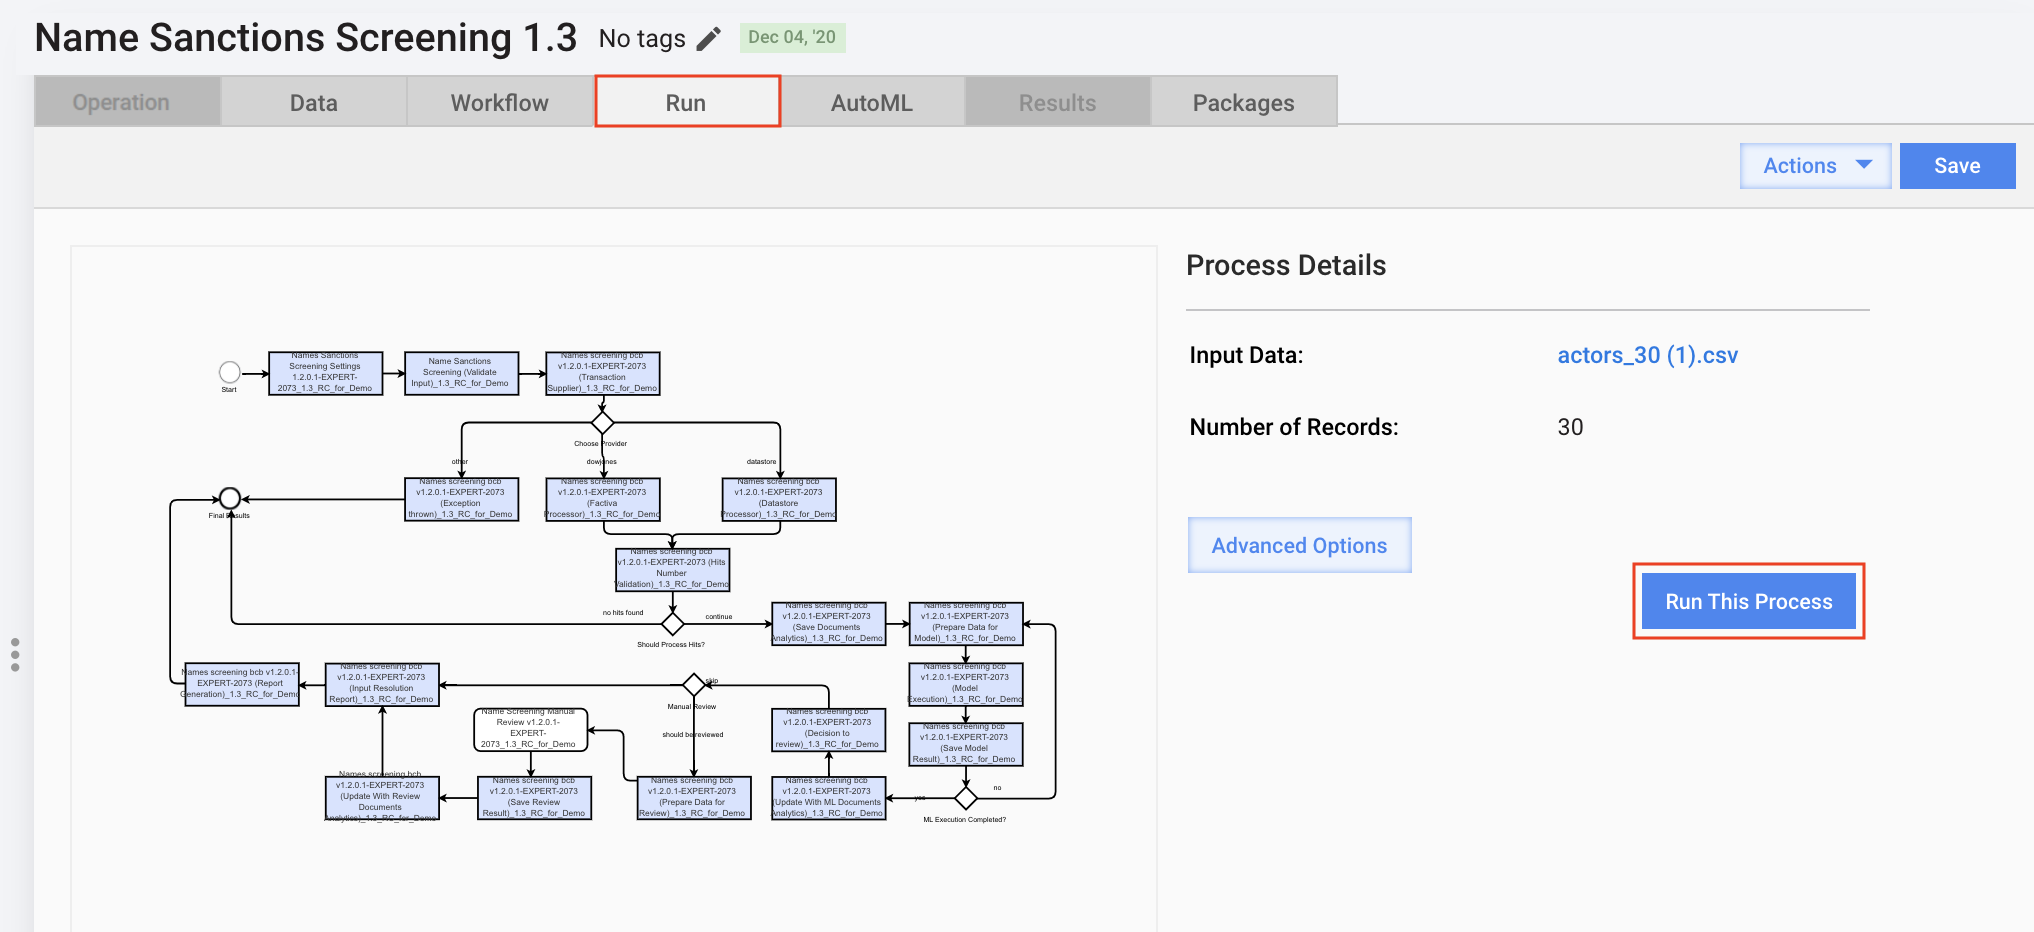
After the parameters are saved, go to the Run tab, and click Run This Process.
The information window with the message "Business Process started successfully" appears.

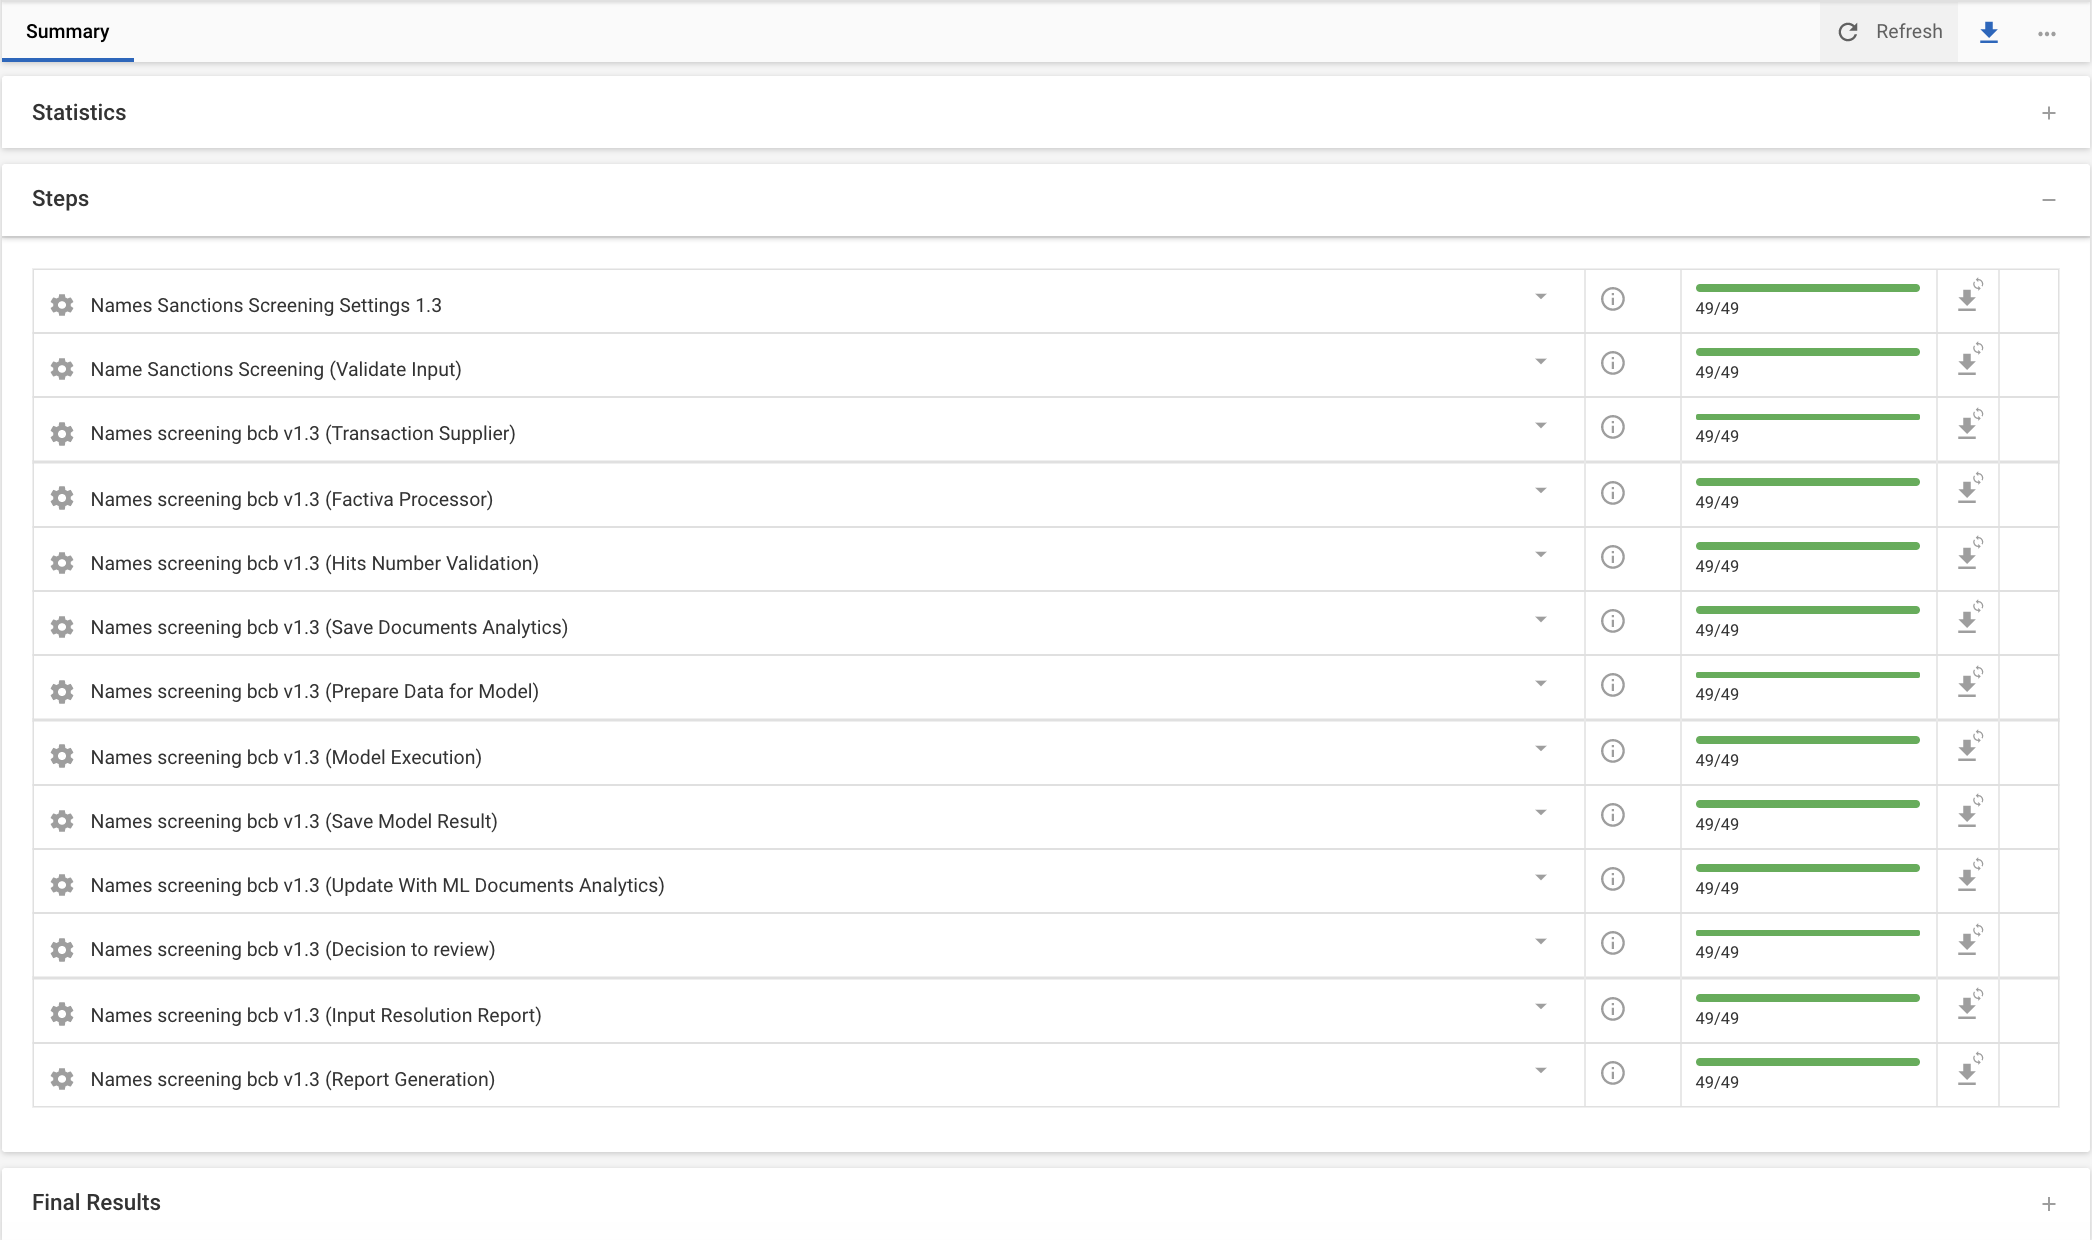
Click View Results to see the detailed information on the process execution.
Via API
You can also start the name screening via API. For that, you have to place info into WorkFusion Data Store and then trigger the BP via API.
Get data files for screening
The input data is an Excel file with the buyer or seller data used by AI Digital Workers.
This data can be delivered from a file storage:
MinIO S3 within the IA Cloud platform.
Any outside the IA Cloud platform.
A client's server can also host the files. However, WorkFusion IA Cloud needs to access the files via traditionally accepted methods—S3 Object Storage, HTTP, FTP.
- IA Cloud MinIO S3
- S3 Object Storage
- HTTP
- FTP
The MinIO client for interacting with WorkFusion MinIO S3 can be written in Java, Go, Python, JS, .NET, and other languages.
WorkFusion MinIO is available at https://HOSTNAME-minio-lb1.workfusion.com/minio/. Remember to insert your URI instead of the placeholder.
The WorkFusion MinIO URL is outside the Intelligent Automation Cloud platform. Therefore, use the access key and secret key authentication:
Access key: HHVDVFJFT3GHHJKJ43FG
Secret Key: KNJkljJHGJHgjhJGHKjgy666RryfrftFk6589890
For more information on how to upload and download files, refer to the MinIO SDK guide.
You have to create a bucket in the following format in advance:
https://HOSTNAME-minio-lb1.workfusion.com/minio/media_check/input_data/.
Verify that the file transfer is working by checking the following MinIO SDK methods (JavaScript Client API Reference):
bucketExistschecks if a bucket exists:https://docs.min.io/docs/javascript-client-api-reference.html#bucketExists.putObjectuploads an object from a Stream or Buffer:https://docs.min.io/docs/javascript-client-api-reference.html#putObject.In case of a successful file transfer, the response contains the
etagandversionIdstrings of the uploaded object.
When using S3 Object Storage, WorkFusion IA Cloud can access stored files with the credentials provided by the user in the following format:
Access key: HHVDVFJFT3GHHJKJ43FG
Secret Key: KNJkljJHGJHgjhJGHKjgy666RryfrftFk6589890
In case of HTTP links, WorkFusion IA Cloud can access stored files with the credentials provided by the user in the following format:
Username and password authentication:
headers: {
        username: USERNAME,
        password: PASSWORD
        }
Secret key in the HTTP headers:
headers: {
        secret-key: secretKey
        }
Secret key specified as a get-parameter in the link to the file:
https://client_domain.com/media_check_input_data/file1.xlsx?key=JKJH778sdfusdf678f678dfs78s^yjhhjwdkl754HMAC-based one-time password:
API_KEY = c3b290df-d560-493c-86ca-0ab552f24490a
SECRET = 06d9BLvnPwpj/DFKJ6iGb5oiFO7wZK+dl+C9aflIu/9DIXMXqEyR0Qi1y5BjFi8NcSJl4b62vpK9v3JB1223339g==

headers: {
        authorisation: Signature keyId="${API_KEY}",algorithm="hmac-sha256",headers="(request-target) host date",signature="${HMAC_GENERATED_SIGNATURE_VIA_SECRET}"
        }
When you use an FTP server for storing input files, WorkFusion IA Cloud downloads these files with the following credentials provided by the user:
Protocol: FTP / SFTP
Port: 21
host: ftp://client_domain.com
remote root: /www/media_check_input_data/
username: USERNAME
password: PASSWORD
At the end of execution, the BP saves the updated files to the MinIO S3 storage at https://HOSTNAME-minio-lb1.workfusion.com/minio/media_check/output_data/.
The BP generates a final report with temporary links to these files. You can retrieve the report via API. For details, read Check BP for results.
Start Business Process
Once logged in, call the WorkFusion REST API to start the Business Process while passing a link to the CSV file with associated entities for screening.
The command to start a Business Process takes the following form:
Method:
POSTURL:
https://HOSTNAME/workfusion/api/v2/workfusion/task/fileHeaders required:
JSESSIONID: from the Auth API response, see Form-based authentication.X-CSRF-TOKEN: from the Auth API reponse, see Form-based authentication.Content-Type: application/json; charset=utf-8
Body:
JSON object
{
    "campaignUuid" : "UUID of the Combined UC Campaign",
    "mainData" : ".csv file in the text representation."
}

// An example of building mainData string
var main_data_example = "wf_screening_input\n" + // name of the column
    "file_s3_path_1\n" +
    "file_s3_path_2";

var mainData = JSON.stringify(main_data_example ));
Response: UUID of the started Business Process
Below is a Postman example:
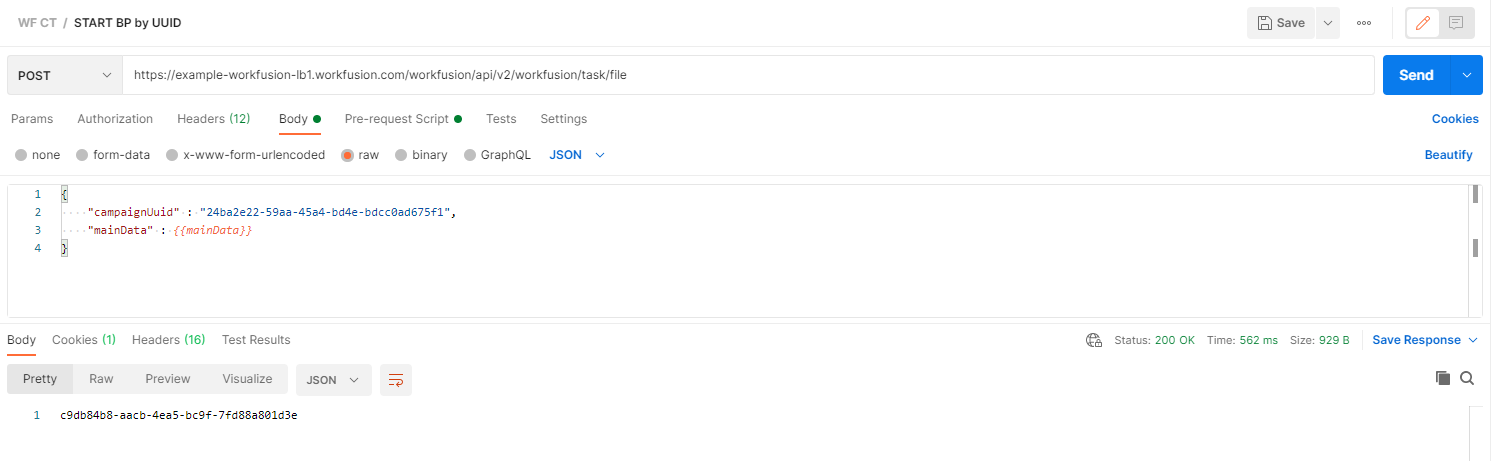
The return of a UUID indicates a successful start of the Business Process with the provided CSV file.
Review screening results manually
To perform manual review of the results produced by the AI Digital Worker, go to the corresponding Manual Task in Workspace.
To review results in Manual Task:
In the Workspace top menu, click Tasks > Miscellaneous Tasks > Screening Manual Review, and click View. The list of search results appears.
Click Accept task. Optionally, select the Automatically accept the next task check box to accept all tasks and have them load automatically after you review the hit.
The hit interface looks as follows:
The top section contains the screened name of an individual or a company from the input file.
The table contains all found hits. Note that the table columns for types Individual and Company are different (for example, "Date of birth" vs "Date of registration").
The tasks that require particular attention are displayed at the top of the table.
The Evaluation column contains resolution made by the AI Digital Worker.
The dot indicates that the results is not viewed yet.
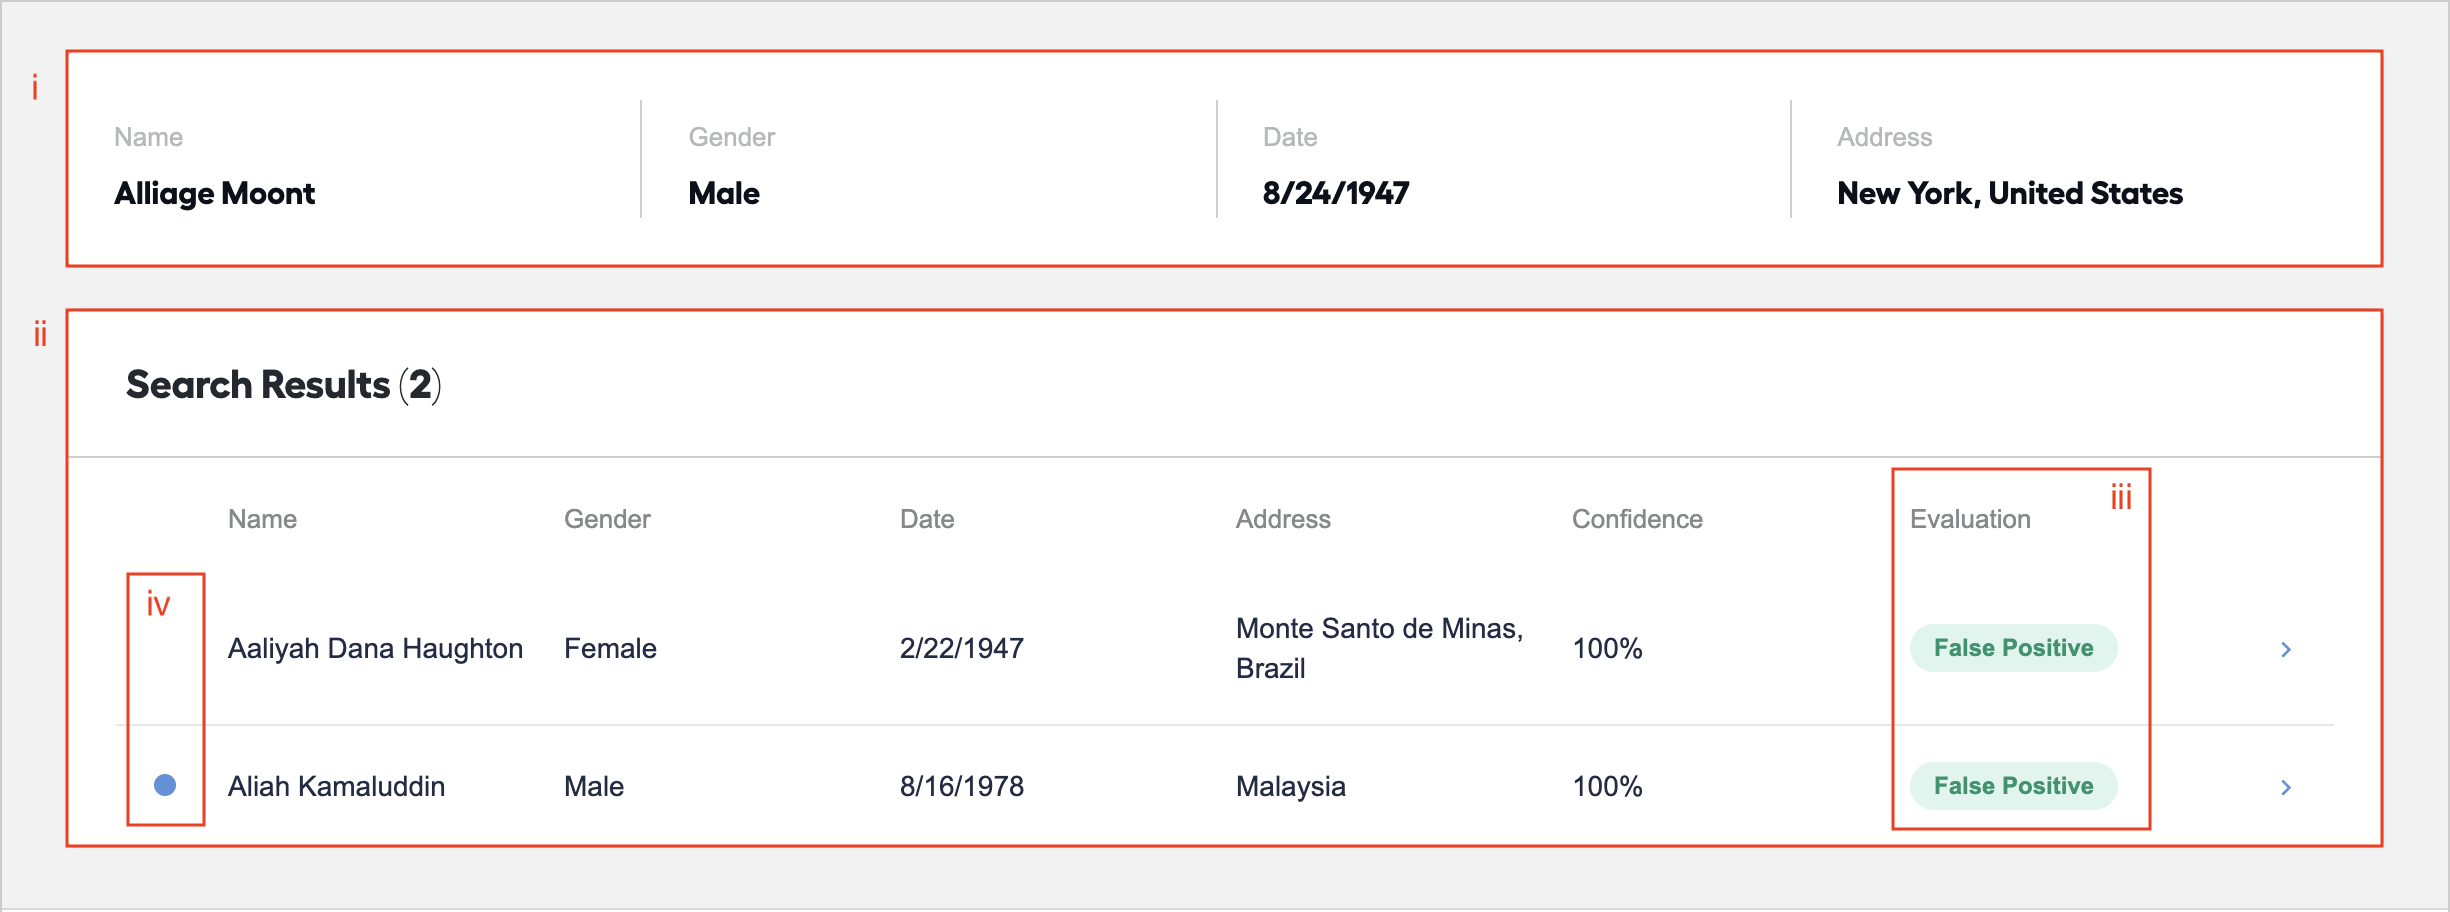
Click the first result.
In the Review matches section you can see the comparison between the data from the input file and the hit, and the reasons behind the bot's decision.
The Evaluate hit section contains the proposed resulution:
- False Positive: The search results indicate that no match with the screened name is found.
- Need More Information: The system asseses the search results as ambiguous, and requires them to be reviewed by a screening specialist.
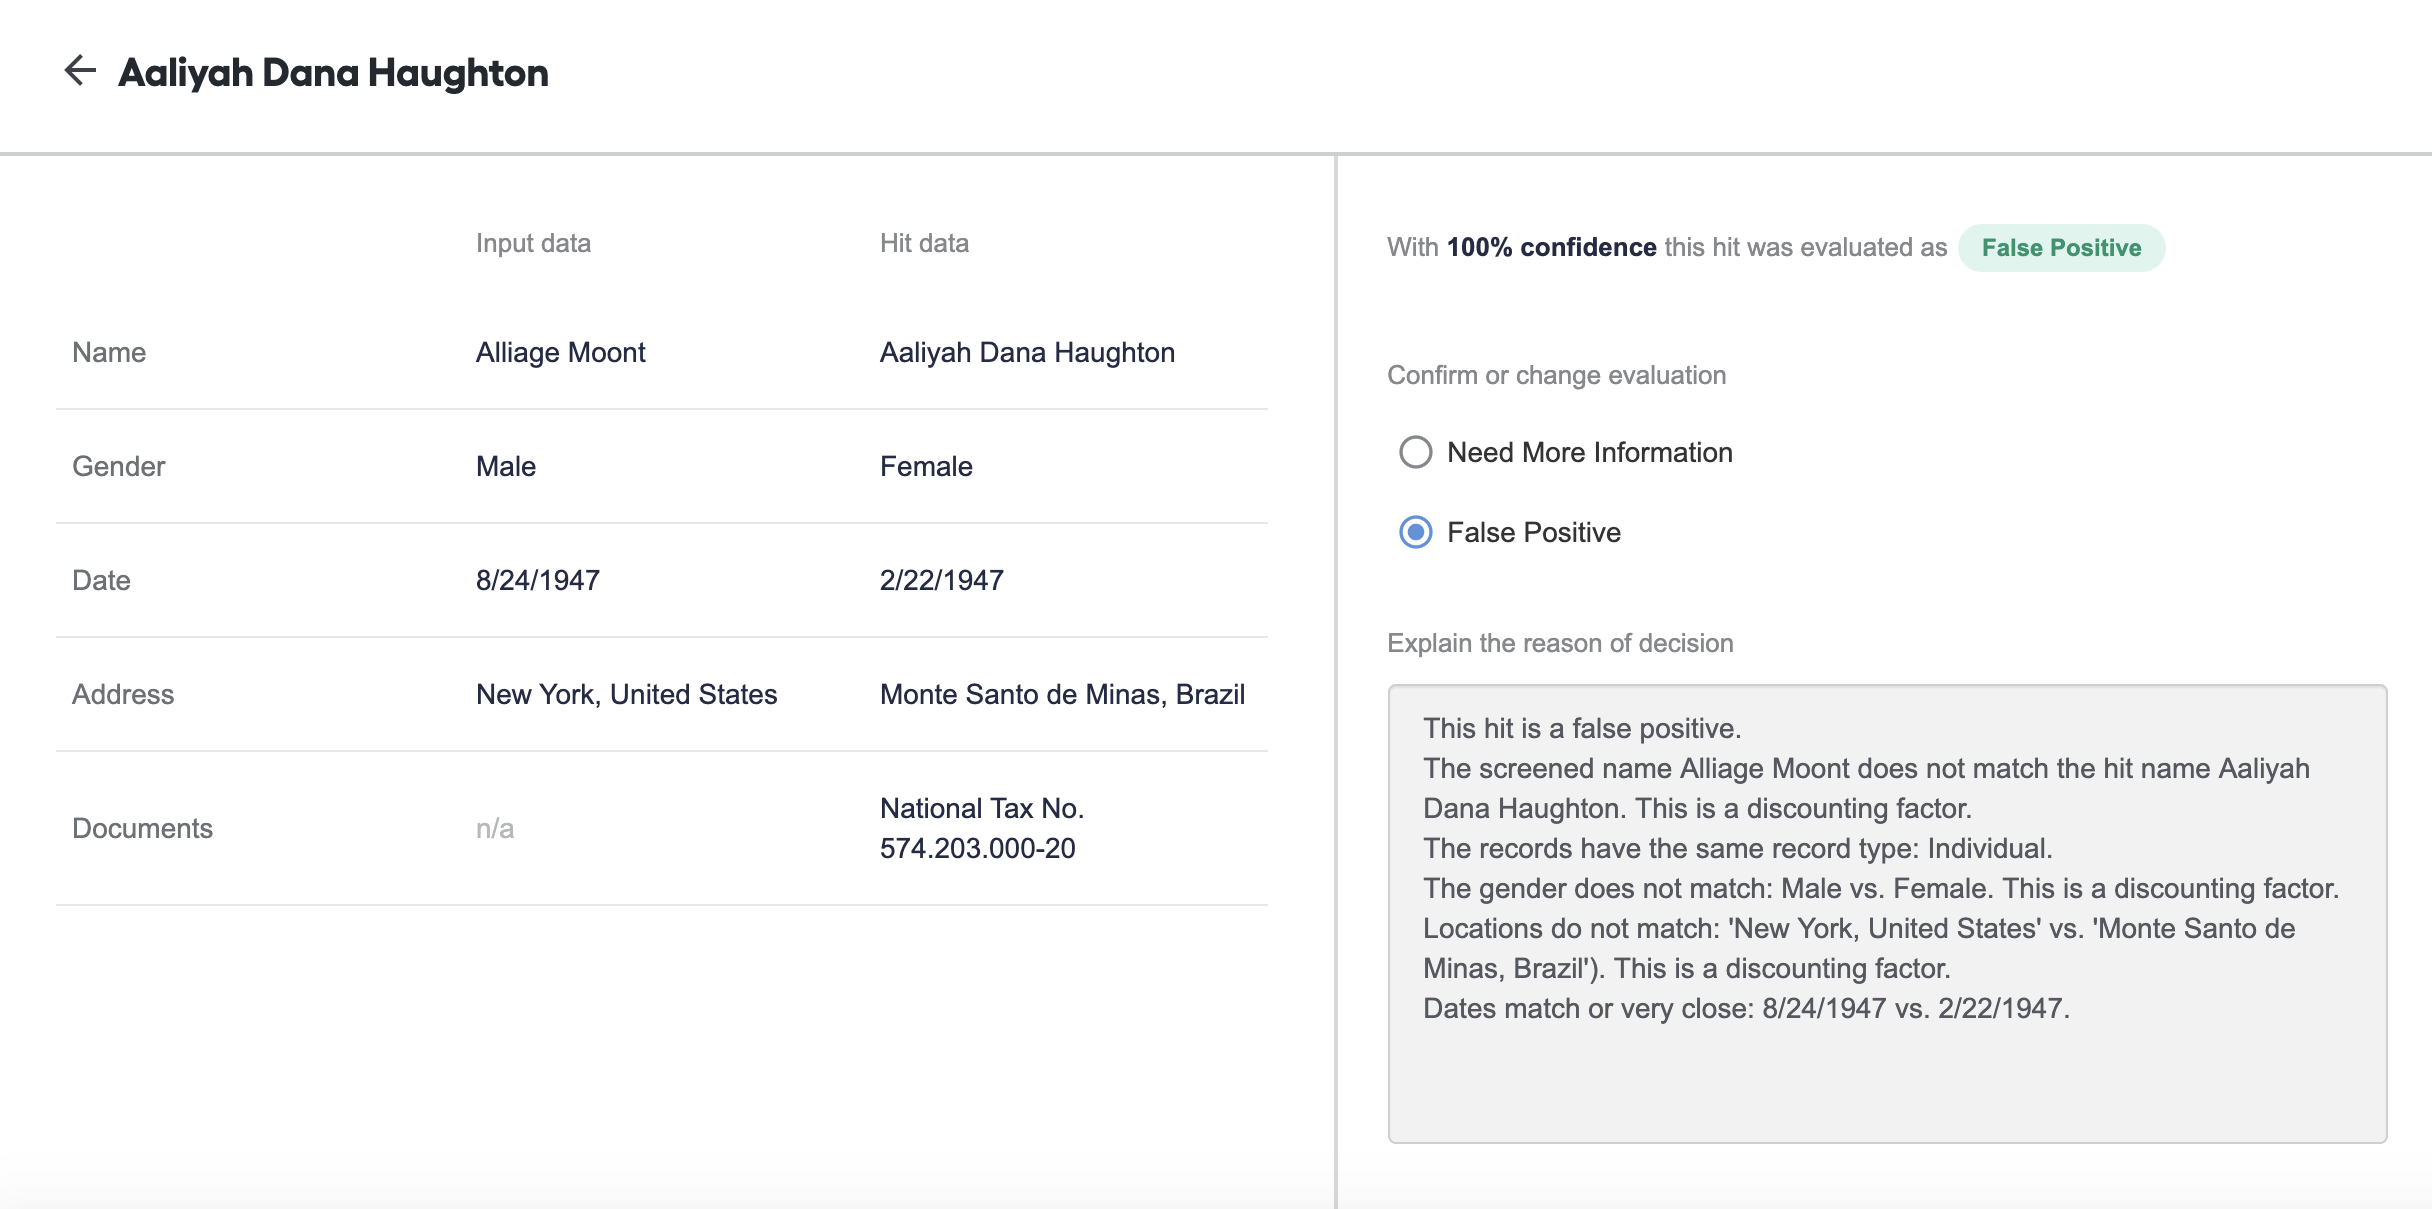
Depending on your assessment of the result, do the following:
- If you think that the bot is correct, go to step 5.
- If you don't agree with the bot's resolution, in the Evaluate hit section, in the Confirm or change evaluation group, select your own resolution.
Click Submit & Review Next Hit.

If you want to correct the previous review, click Back (←).
Repeat steps 1-5 for all hits in the list.
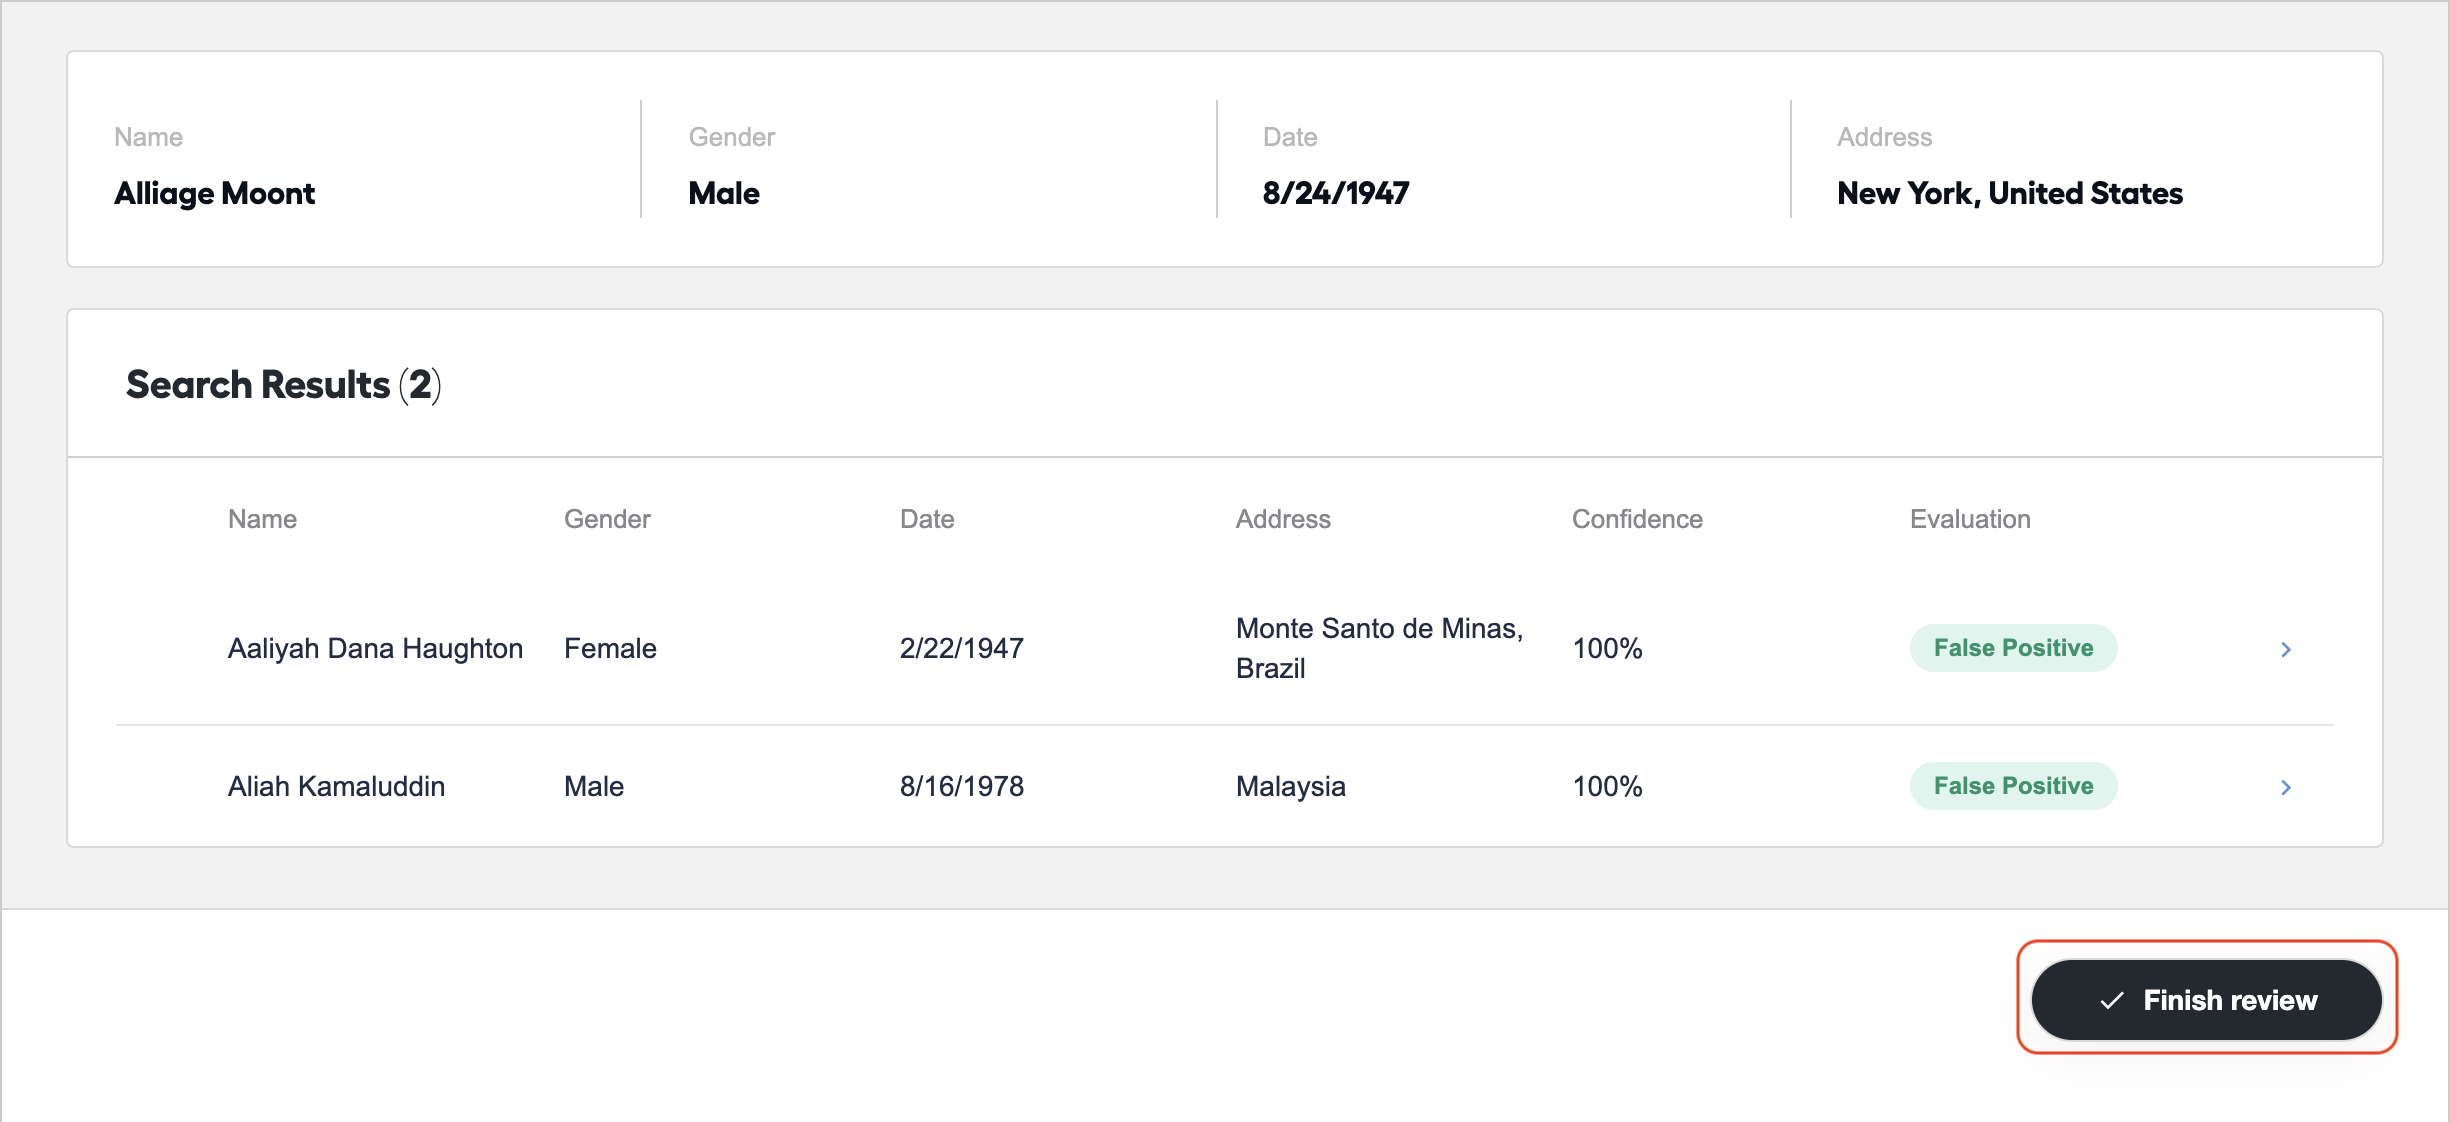
After you review all the results for the name, you are returned to the Search Results table. Here, click Finish review to go to the next task.
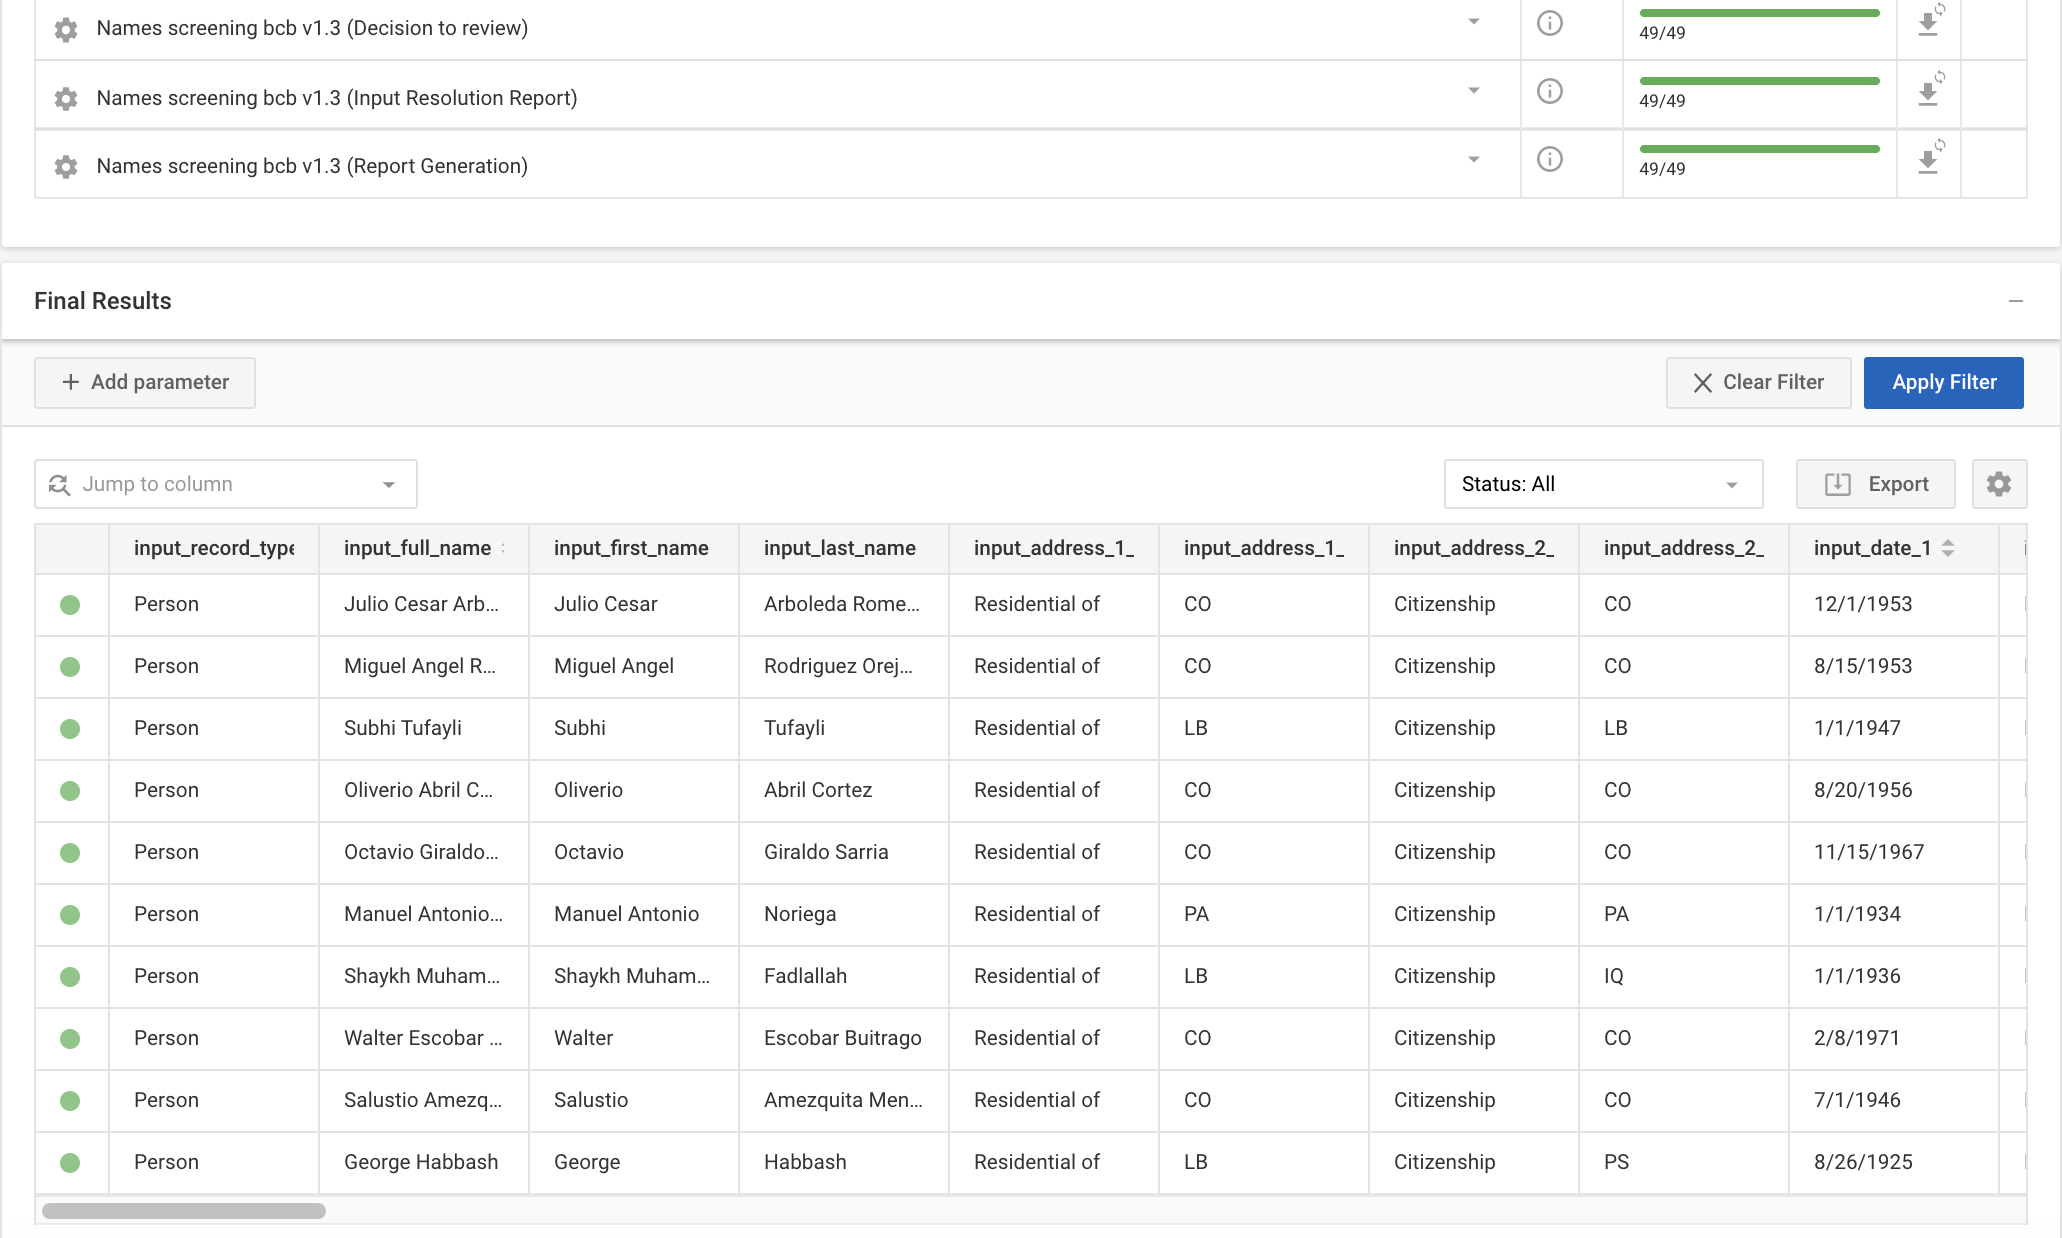
After you review all the tasks, you can return to the Business Process in Control Tower, and see the outcome of the process on the Results tab. Here, note in particular the resolution_metric_decision column that contains resolutions performed by the bot and refined after the manual review. Pay special attention to the True positive decisions.
For deeper analysis of the results, see Analytics.