Sort assignments and create custom queues
To manage your work conveniently, you can group assignments by priority, sort them by date, and create custom queues based on specific business criteria.
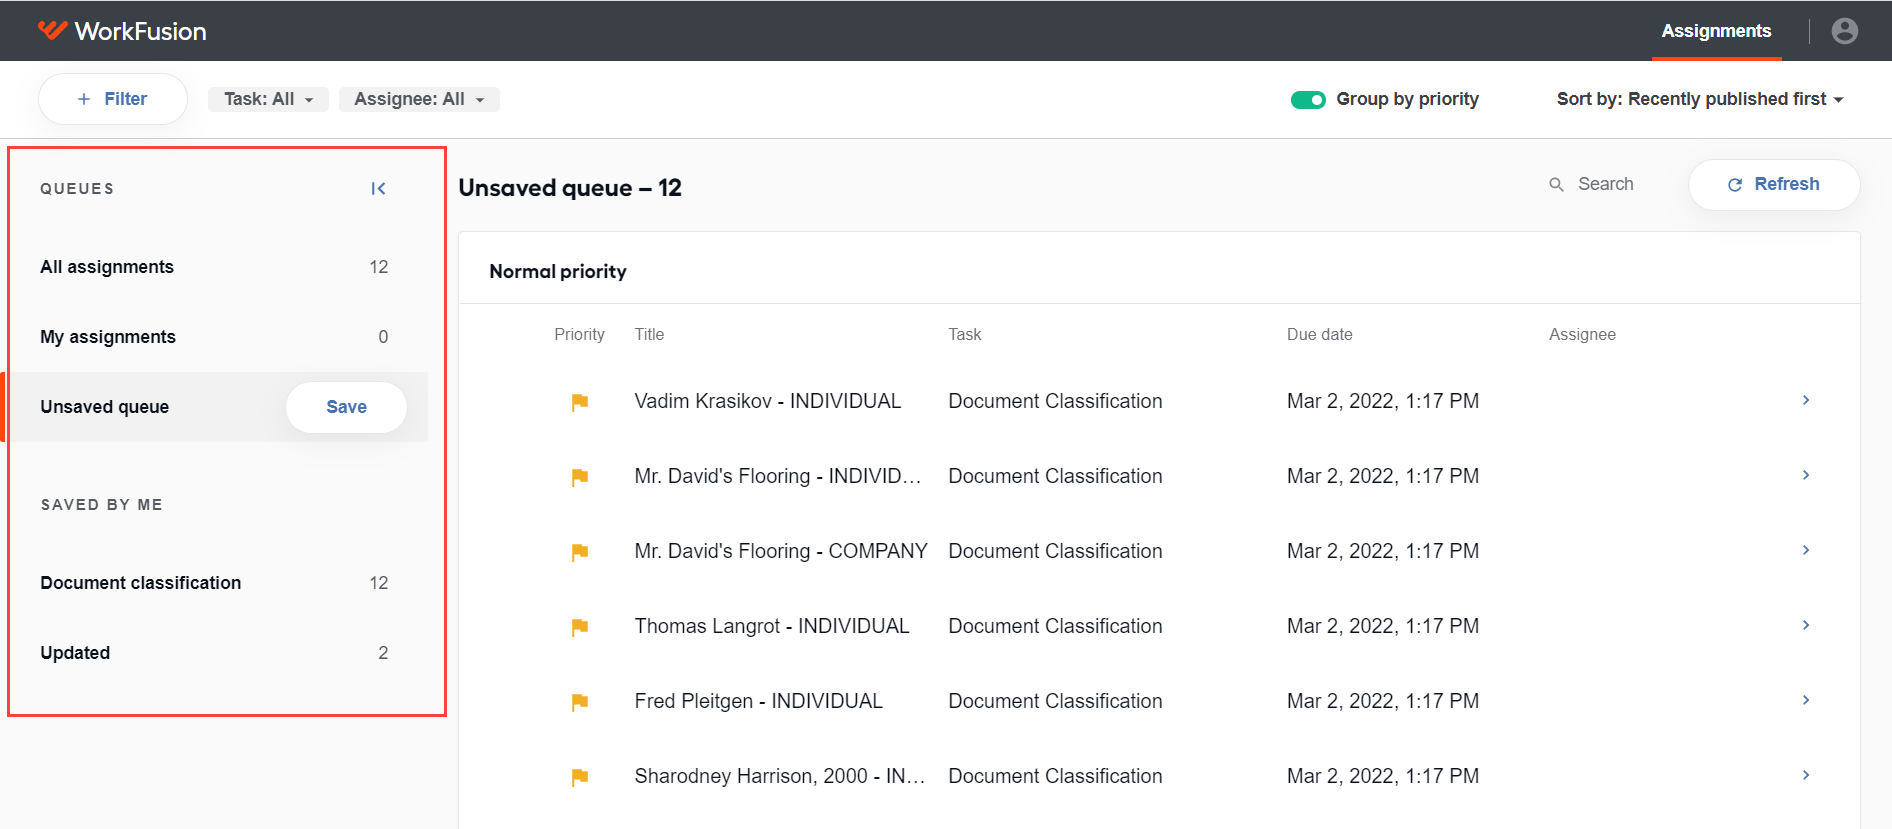
There are two sections of queues you work with:
- The QUEUES section contains:
- All assignments: view all available assignments in the list, with the most recent ones displayed at the top. The queue is shown by default.
- My assignments: view the list of assignments assigned to you. If you have no tasks assigned, 0 assignments are displayed. If you assign assignments to yourself, the number of assignments in the queue is changed accordingly. The queue is shown by default.
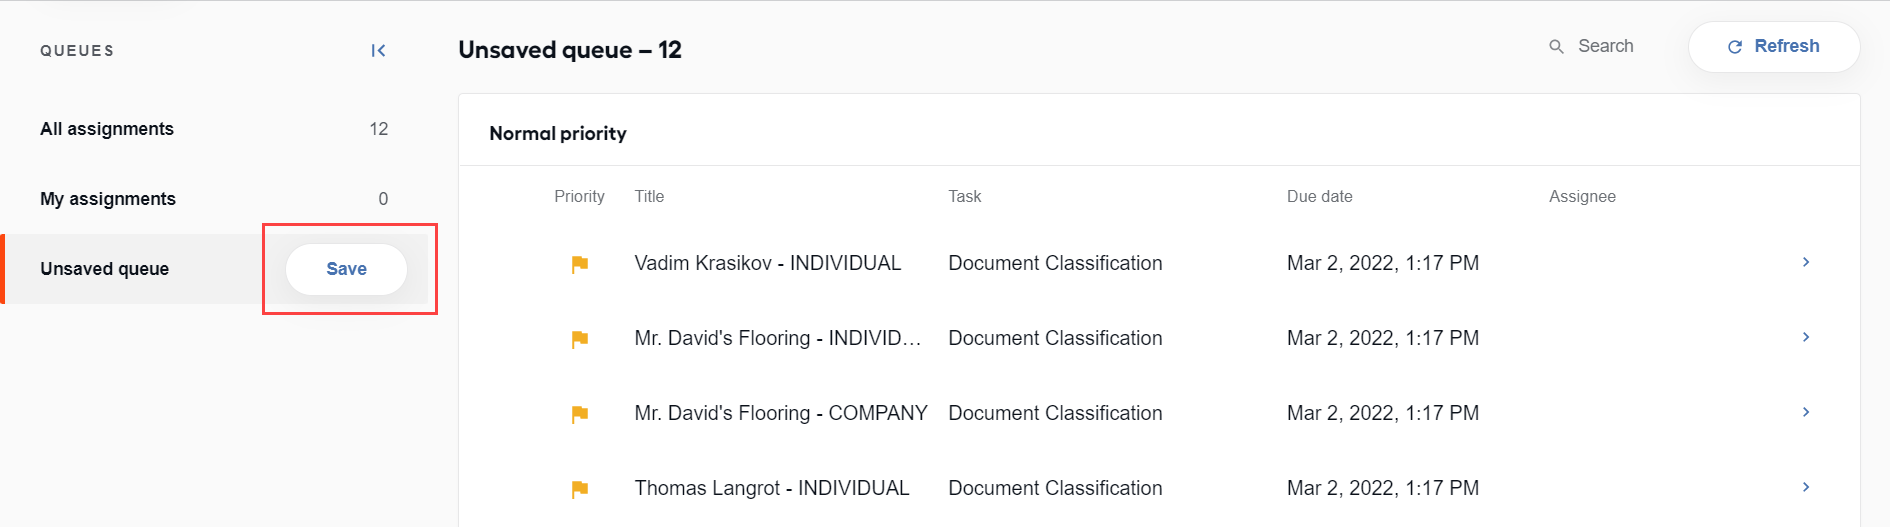
- Unsaved queue: once you start filtering or sorting assignments, you are switched to Unsaved queue where you can create a new queue.
- The SAVED BY ME section contains all your saved custom queues. If you remove all your custom queues, the SAVED BY ME section is not shown.
note
If you cannot see the QUEUES panel or access any of the functionality described in the article, check your WorkSpace permissions.
Sort assignments
You can arrange your assignments in several ways. Sorting options are available in the right-hand corner on the top panel.

Group by priority
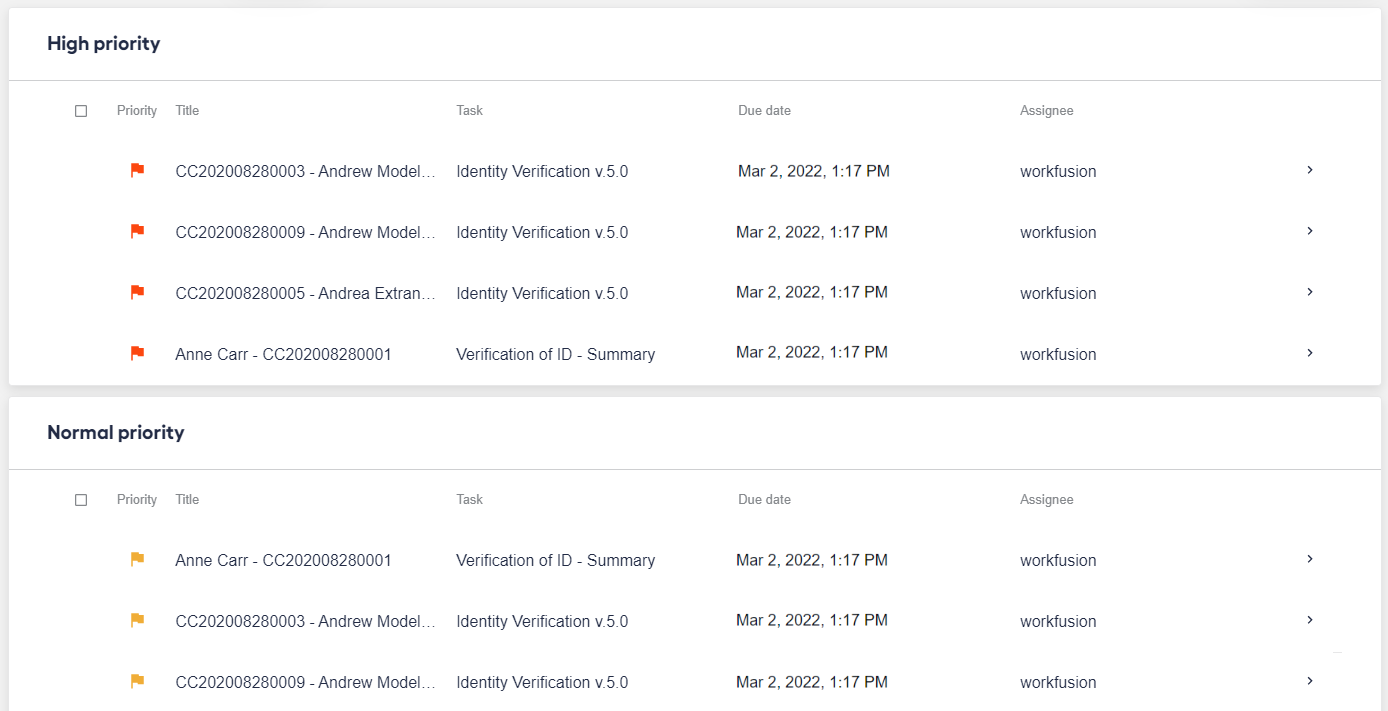
To sort assignments by priority, enable the Group by priority toggle button.

The assignments are arranged in the order of importance—the ones with the highest priority appear at the top of the list. To assign tasks grouped by priority, refer to View assignments | Select assignments.
Sort by date
You can sort assignments by date. Click the Sort by drop-down box and select a sorting option.
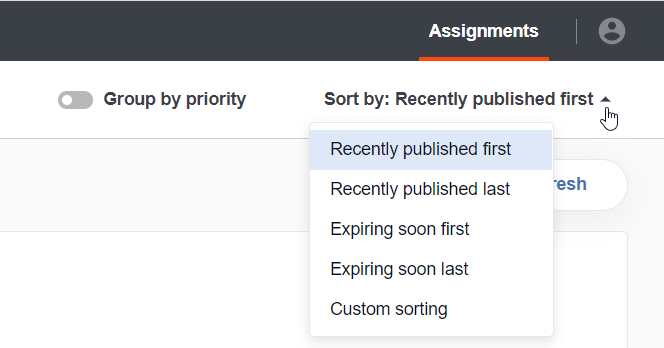
The options are as follows:
- Recently published first (the default sorting order). The assignments are sorted by the date of their creation, with the newest assignments displayed at the top of the list. Mind that some assignments can have a common date.
- Recently published last. The assignments are sorted by the creation date, with the latest ones at the top of the list.
- Expiring soon first. The assignments are sorted by their expiry date, with the closest due date shown at the top of the list.
- Expiring soon last. The assignments are sorted by their expiry date, with the latest due date shown at the top of the list.
- Custom sorting. The assignments are sorted based on the FIFO (First In, First Out) approach, with the oldest (first) ones located above others. The difference from the Recently published first option is that the custom sorting allows you to set the order for each assignment within the task.
caution
The Custom sorting option works only if you have set up FIFO in Control Tower. For more details on custom rendering, refer to FIFO.
Filter assignments
You can filter assignments by the task type, assignee, and assignment business attributes using the panel in the top left-hand corner.

By default, you have two filters—by the task type and assignee. Active filters are highlighted.
To apply the default filters, do as follows:
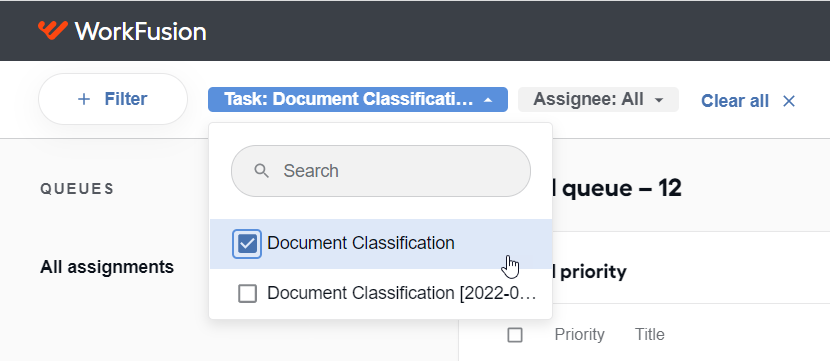
Click the Task drop-down box and select one or more checkboxes.
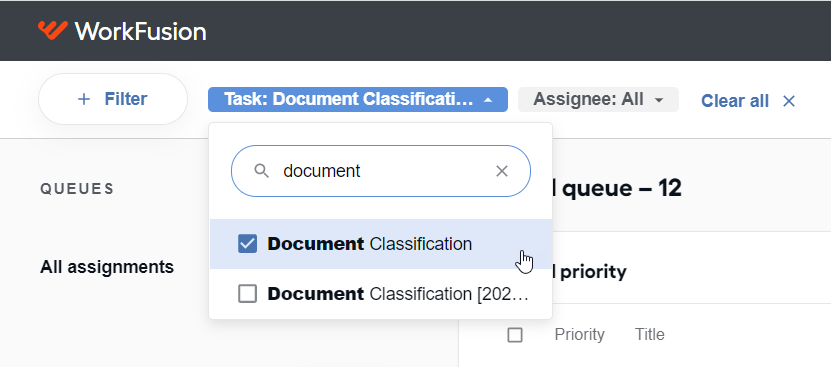
You can search for tasks using the Search field in the Task drop-down box. To find a task, start entering its type.
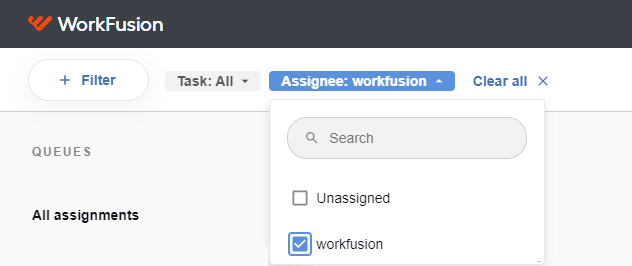
Click the Assignee drop-down box and select one or more checkboxes.
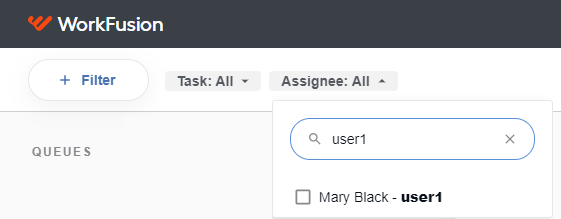
The Assignee search option allows you to search by the first or last name and username. To view available options, start entering the assignee's first or last name or username.
To set up more filters, follow the instruction below:
Click the + Filter button to view the available list of business attributes.
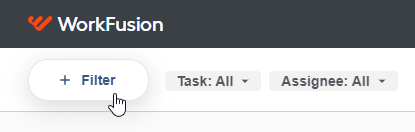
Select any business attributes to set them up as your filtering criteria. Automatically, the added filters appear on the top panel, and corresponding assignments are displayed in the queue.
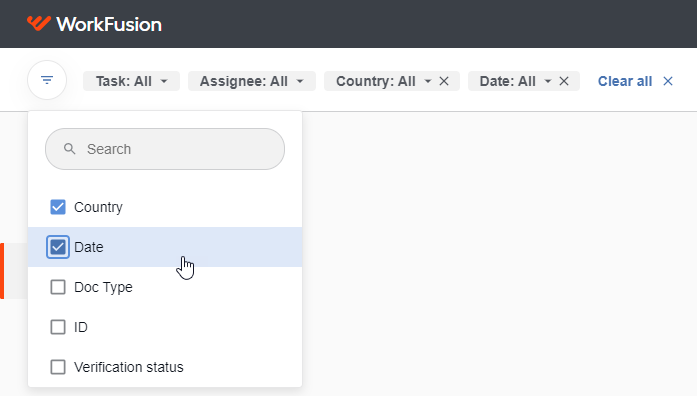
In the Search field under selected filters, you can search for business attributes. To find an attribute, start entering its name.
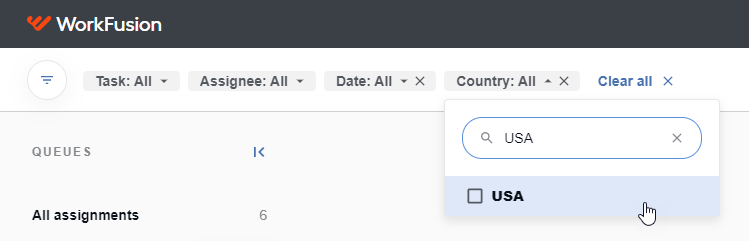
Proceed with further filtering by selecting business attributes from the newly added filters.
To discard filtering criteria, open the related drop-down list and deselect any business attributes you selected previously. The assignment list is changed accordingly.
To set all filters to the default state, click Clear all.

After filtering, you can still group your assignments by priority or sort by date.
Work with custom queue
By default, you view all assignments grouped under the All assignments queue. You cannot edit this queue, but you can create a custom queue based on it.
A custom queue is a dynamic queue with assignments filtered using specific business attributes.
Let's consider different scenarios when working with custom queues:
You work with a queue that does not have new assignments when you work with it.
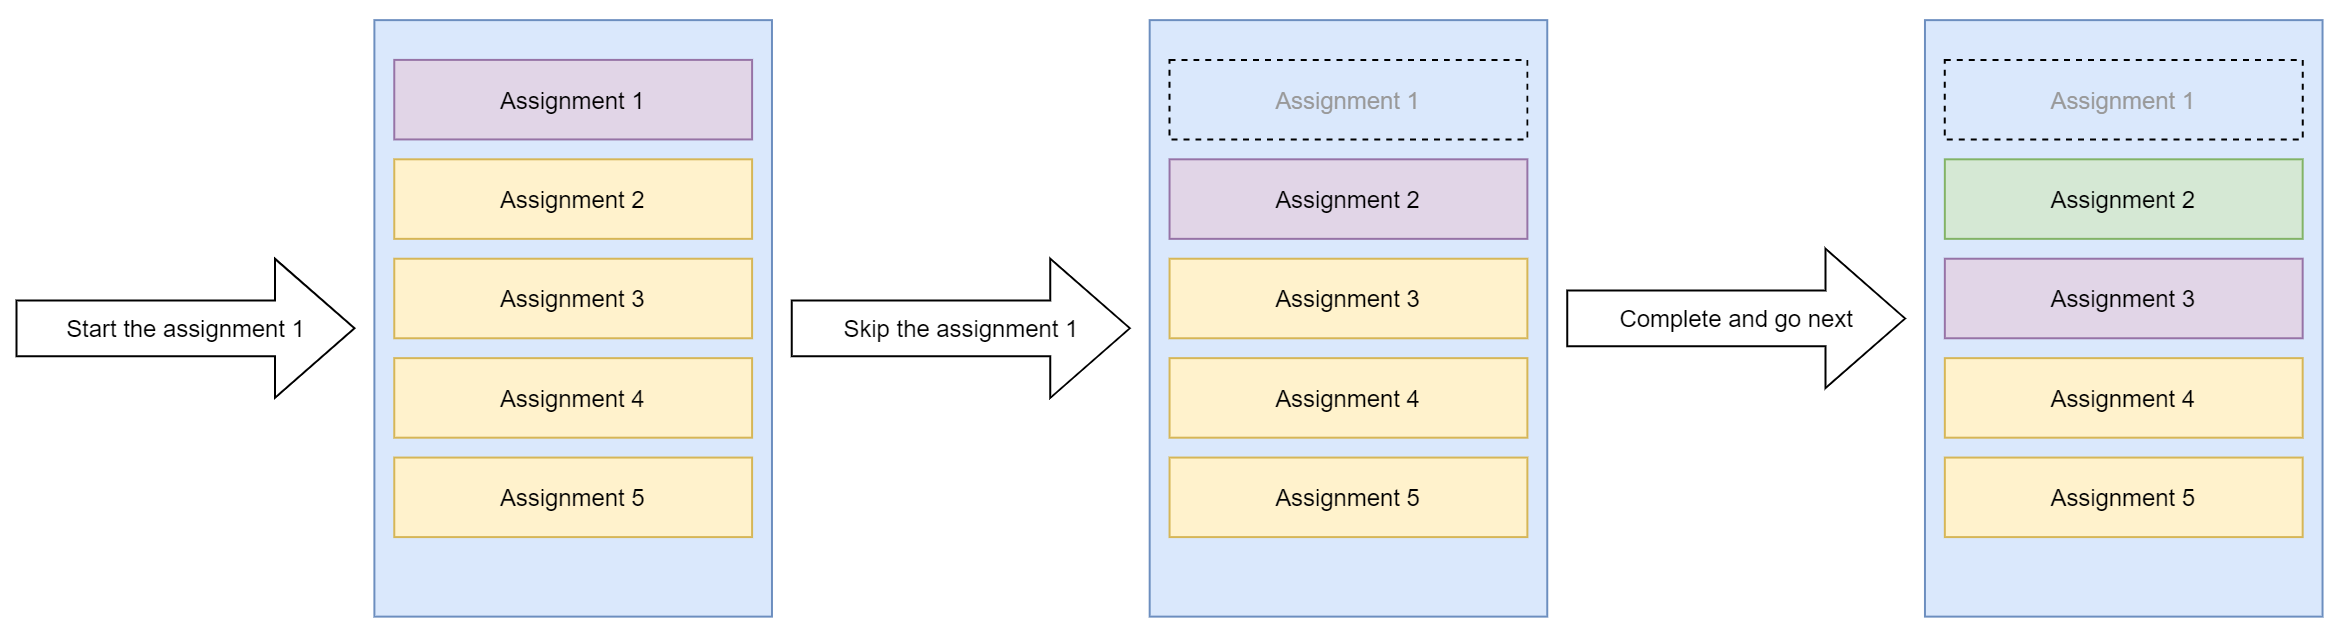
You start to work with a queue ignoring the first one or more assignments.
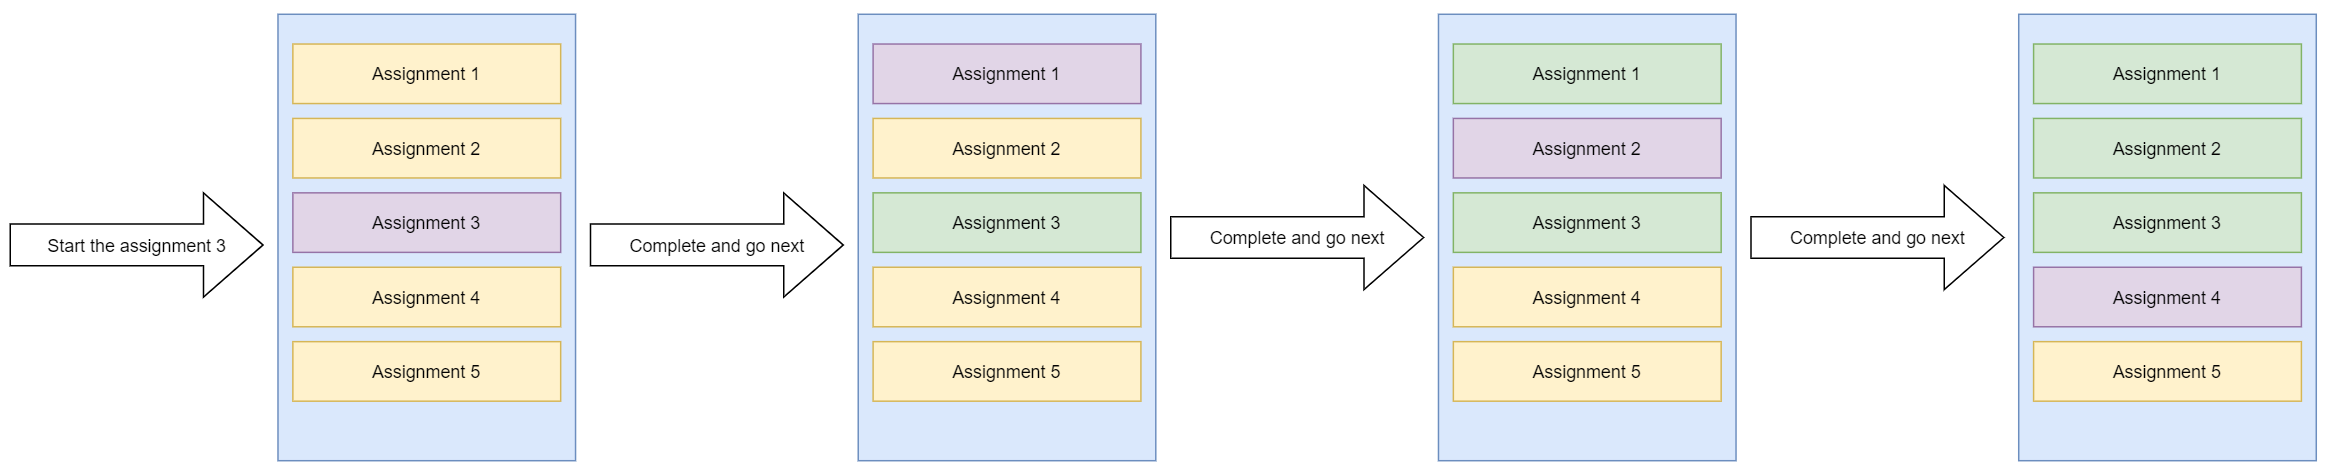
If you select an assignment from the middle of a custom queue, you begin with the first one from the queue after you complete or skip the selected assignment.
You have started to work with a queue, but you get new assignments for the queue.
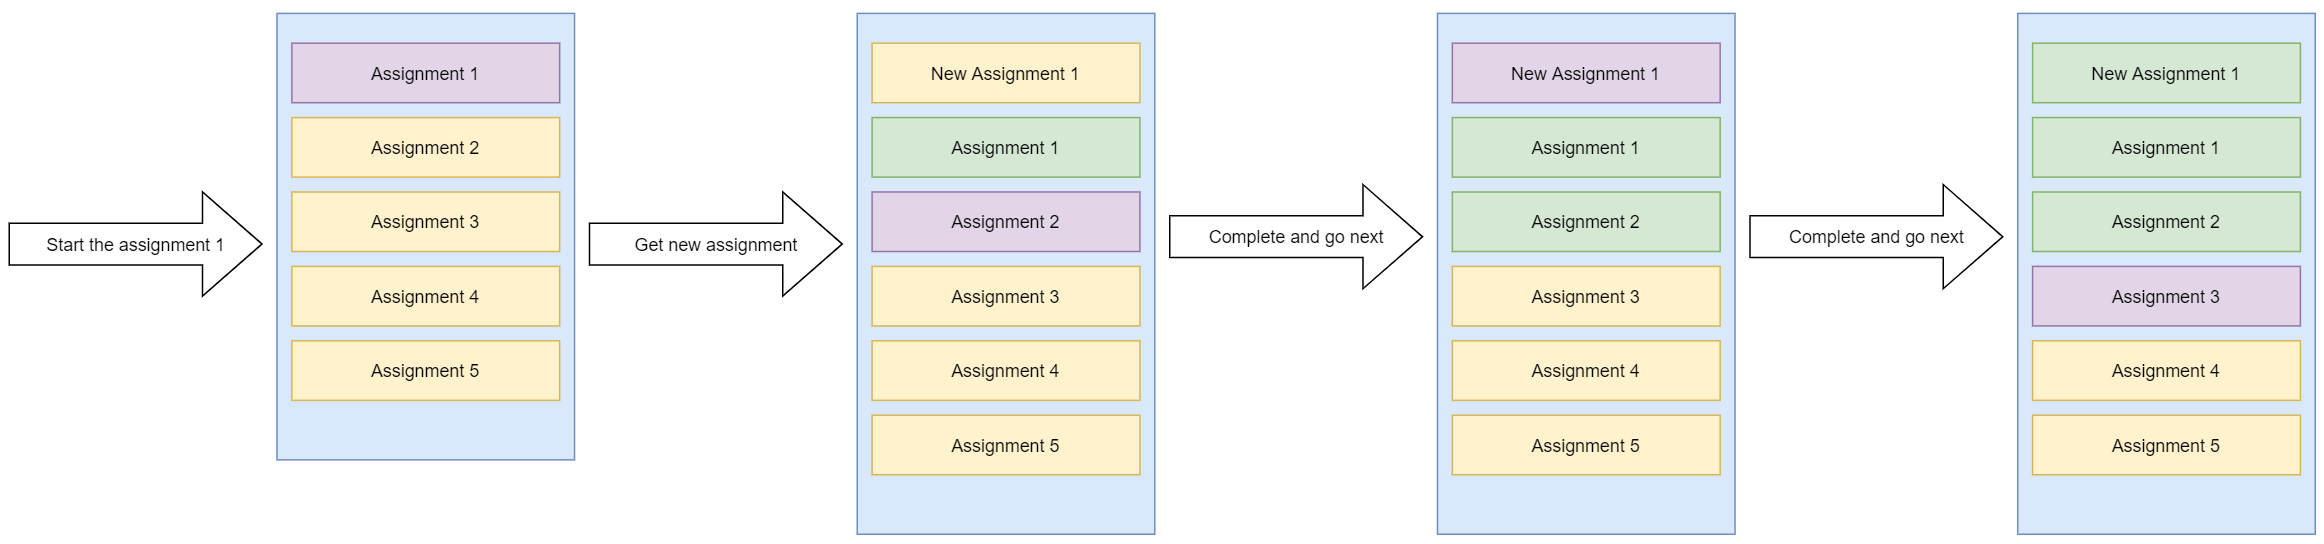
If you get a new assignment when working with a custom queue, you process the newest assignment as soon as you complete or skip the current one.
A custom queue is a dynamic structure. Custom queues of the same user or custom queues of different users can overlap.
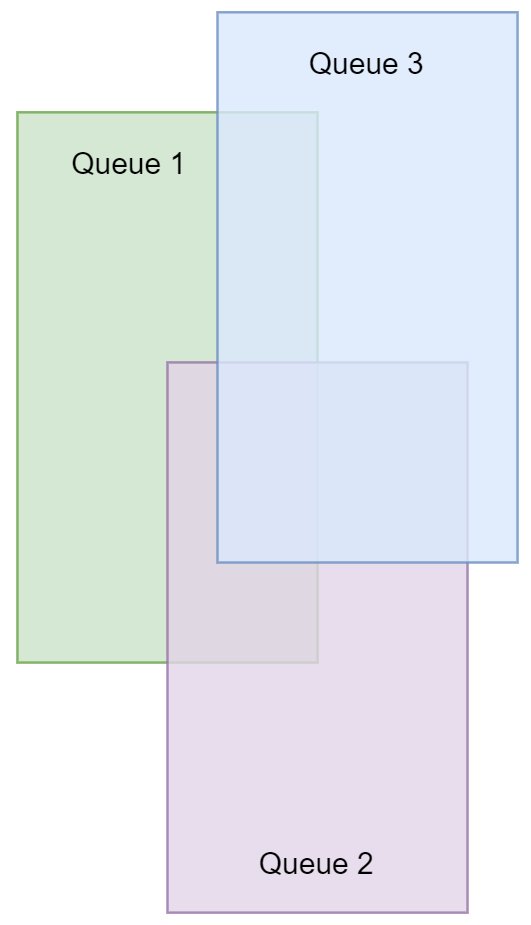
The overlapping implies: if an assignment state is changed in one custom queue, and the assignment exists in other custom queues, all custom queues are updated accordingly.
Add custom queue
As soon as you start filtering assignments, the assignment list changes according to selected criteria and an Unsaved queue is formed. You can start processing assignments right from the draft queue or save it.
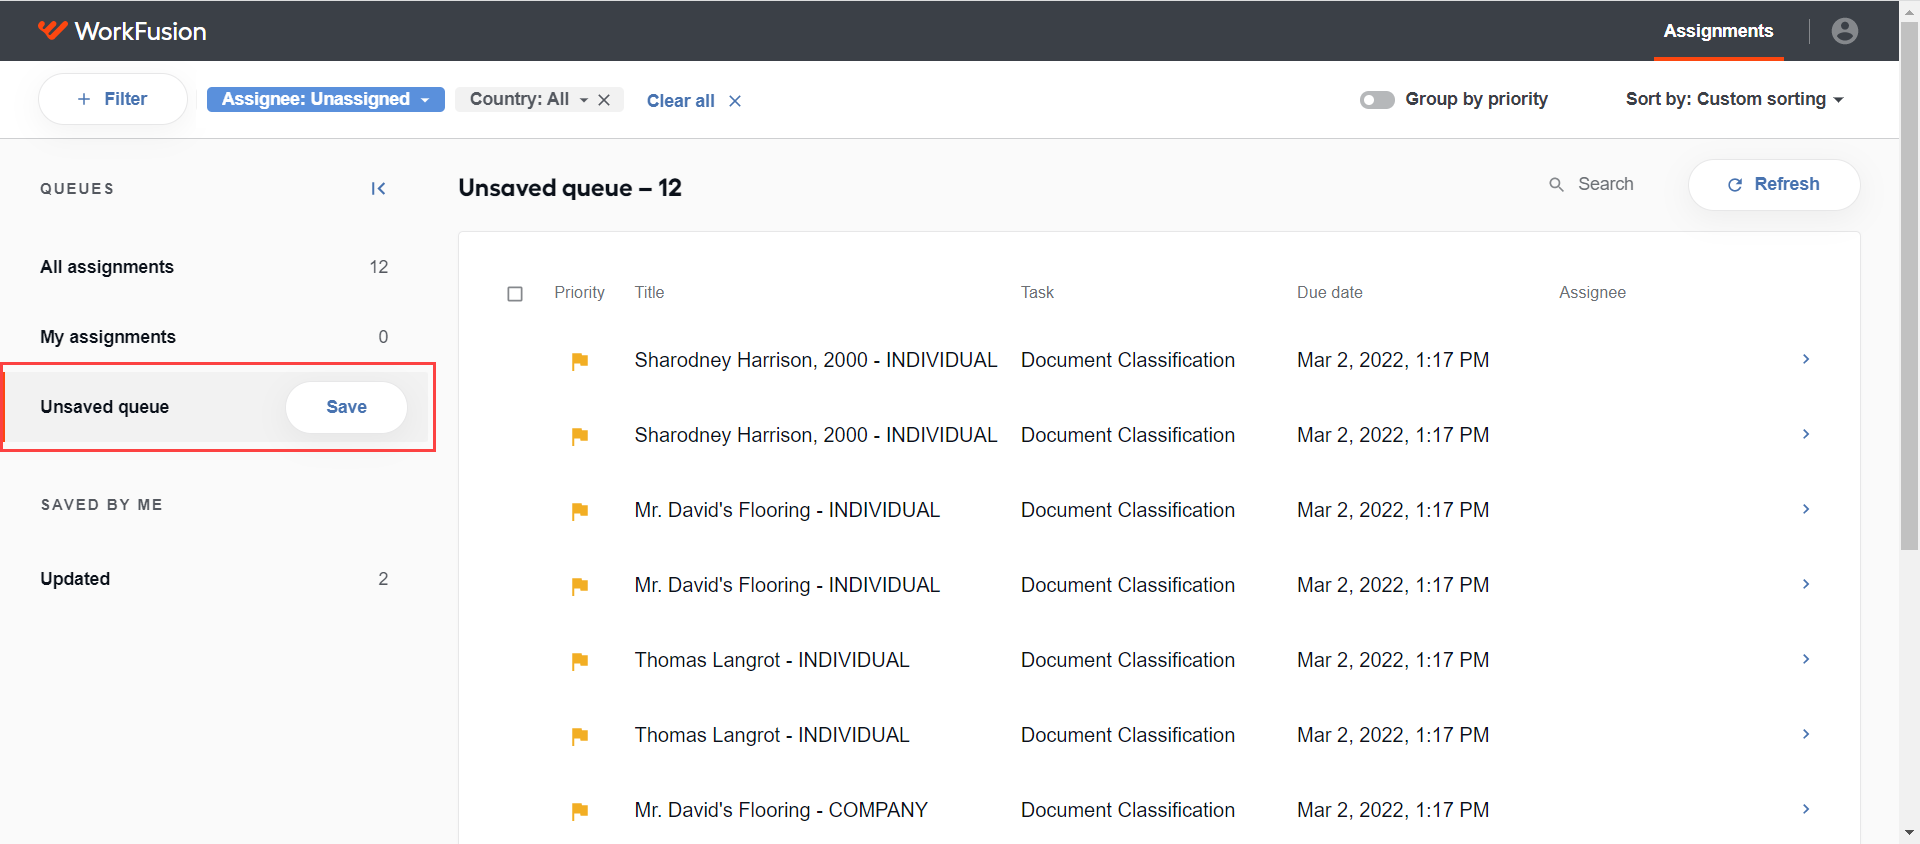
If you switch to another queue, the draft queue is discarded, and your changes are lost. But if you log out and log in again, you can continue working with it. Anyway, the best option is to save the queue to avoid losing the preset filtering order.
To save a custom queue, do as follows:
Specify your filtering criteria.
Click Save.
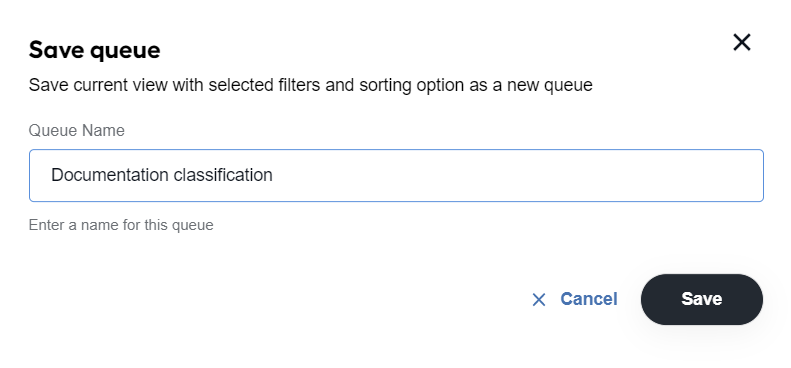
In the window that opens, specify the queue name and click Save.
The saved queue appears in the SAVED BY ME list of queues.
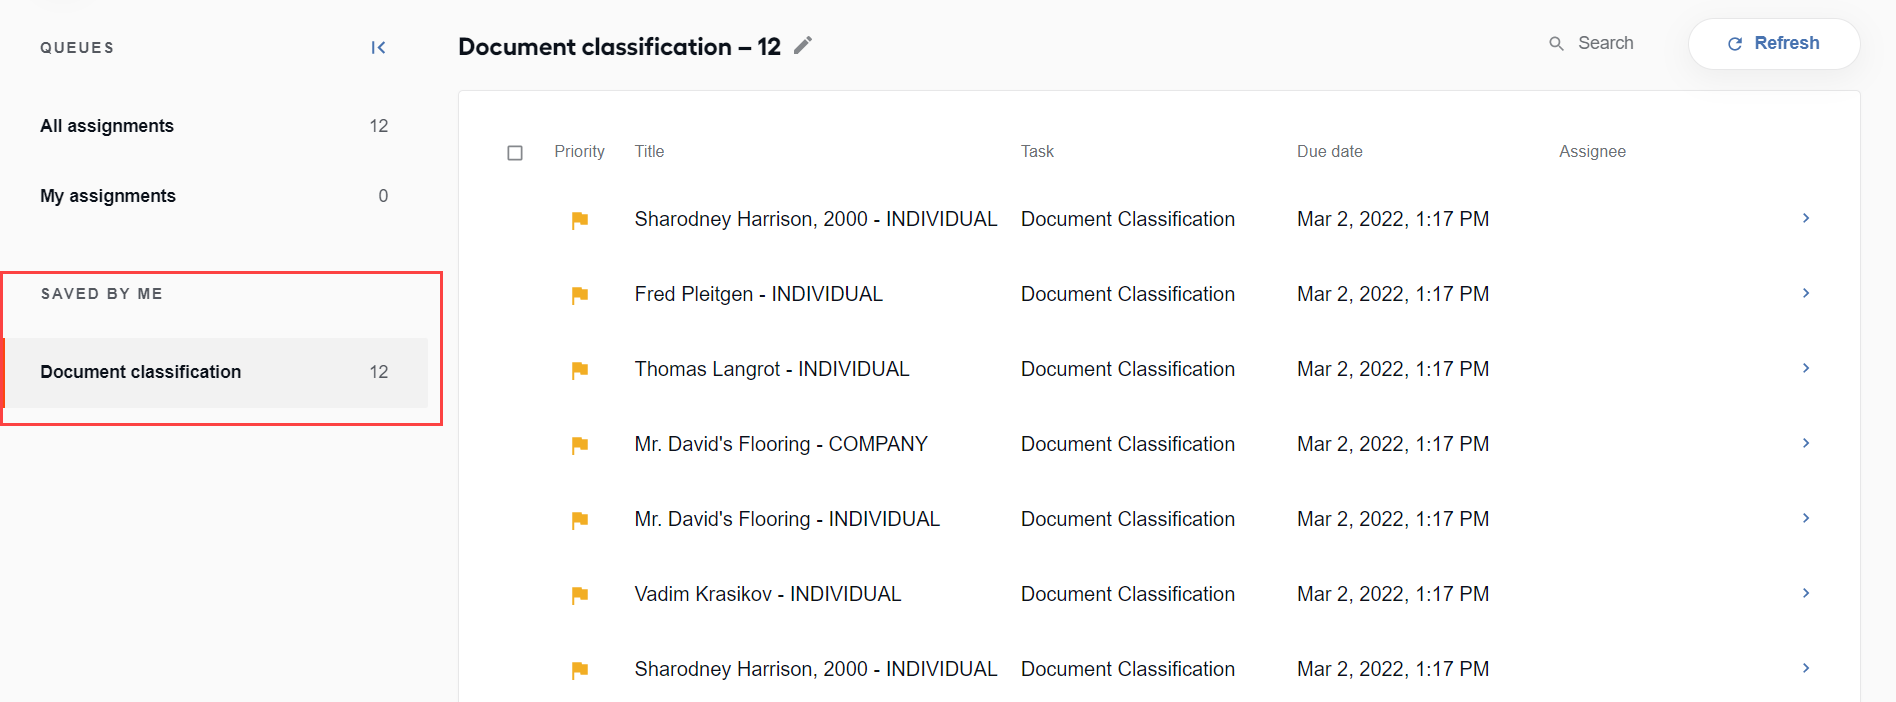
Once the custom queue is saved, you can start working on its assignments. When you initiate execution, the assignments are displayed the way they are arranged within the created queue. Custom queues are updated in real time, including the number of assignments in the list and statuses.
Also, mind the following important considerations:
If you start an assignment from the middle of a queue and complete or skip it, you resume processing the rest of the tasks from the first assignment in the queue.
If you skip an assignment from a custom queue, the assignment returns to the common list outside the custom one and is available for other users. You can take this assignment later if you change your mind.
Edit custom queue
To edit a custom queue, follow the instruction below:
Select new business attributes from filtering options. The assignment list is updated according to the selected business attributes.
Click Update next to the queue name.
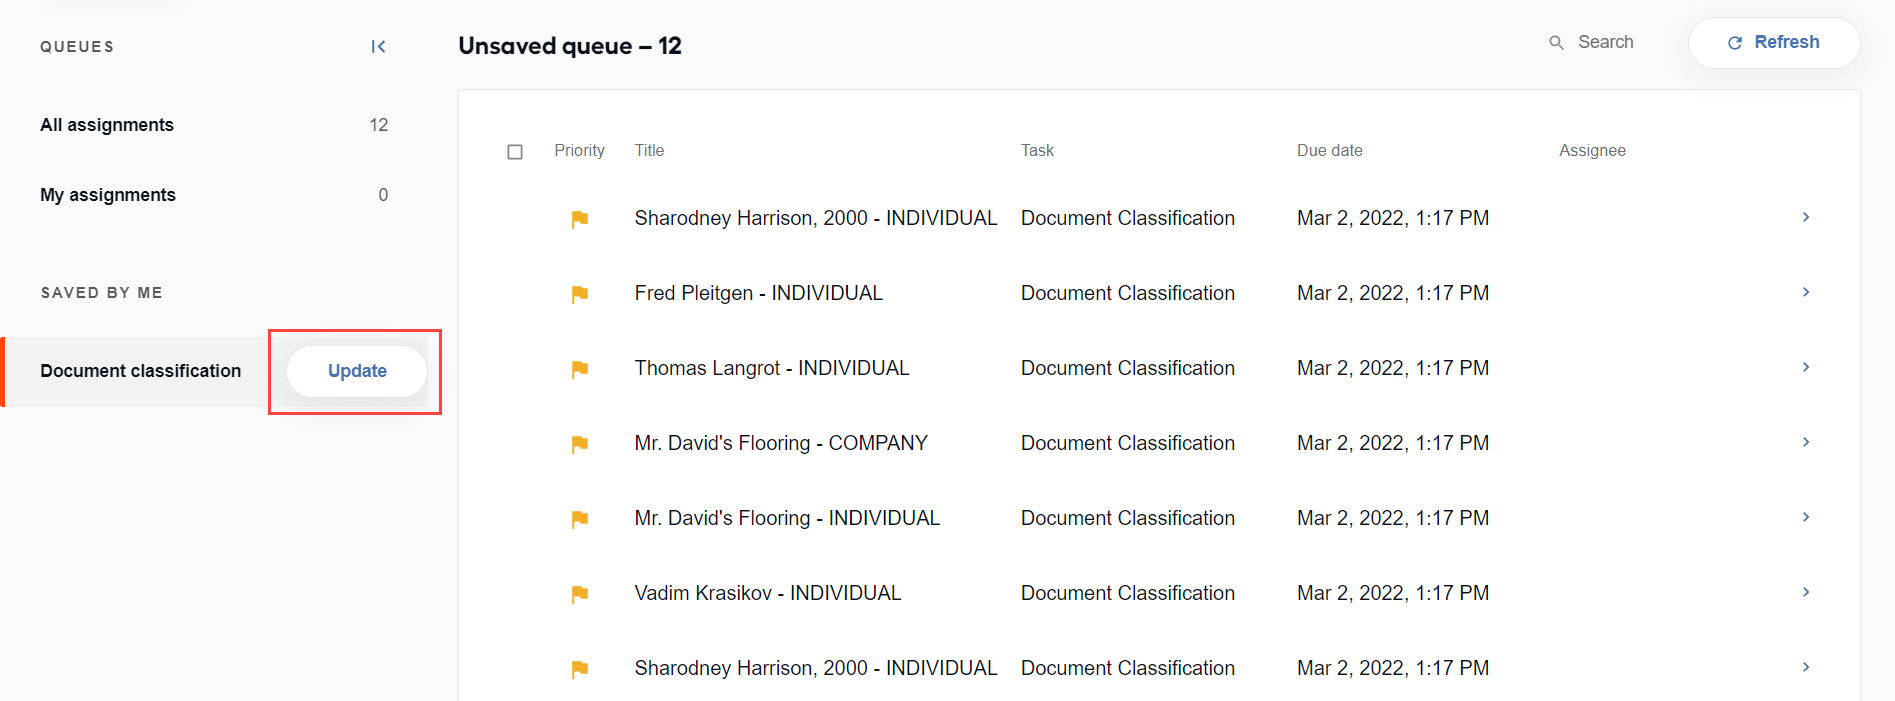
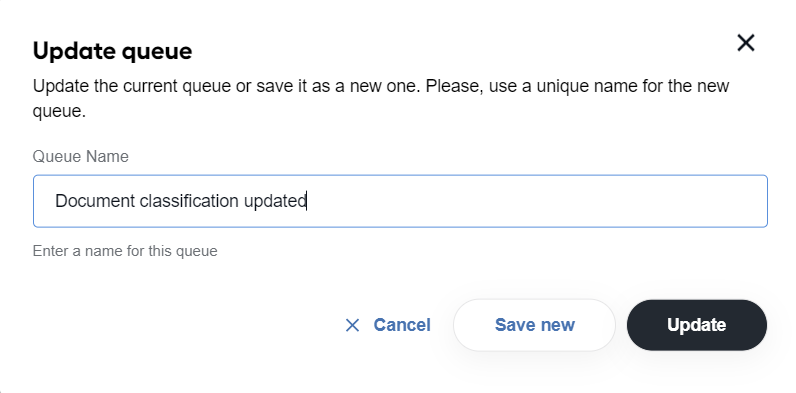
In the popup that follows, save the changes in the queue.
- To update the current queue, click Update.
- To save a new queue, specify a unique name and click Save new. The queue appears in the list of your custom queues.
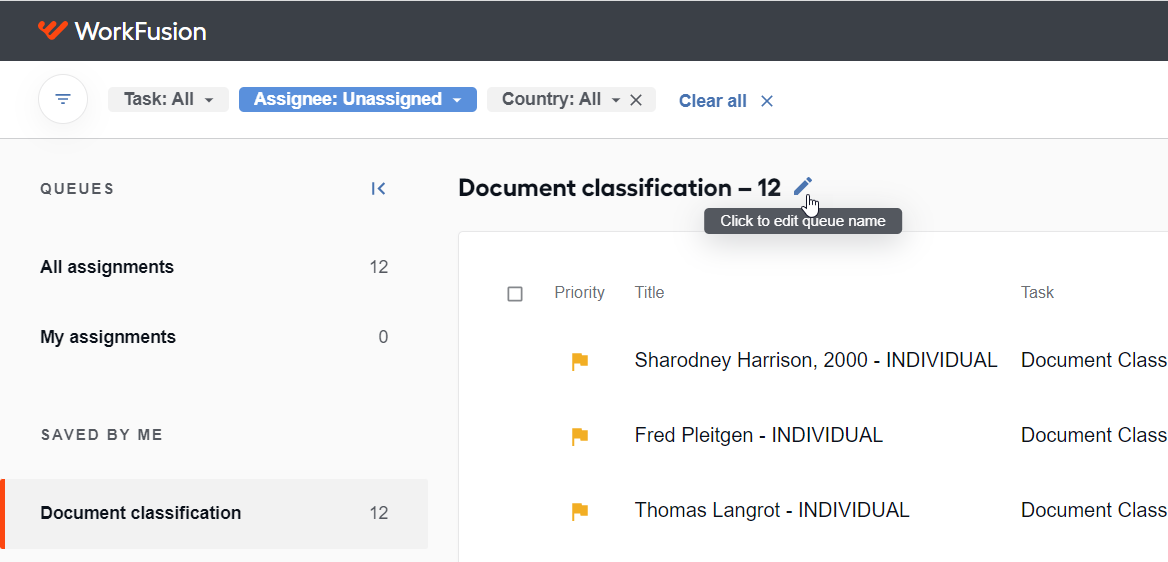
To change the name of your queue, do as follows:
Hover over the queue name and click the pen icon.
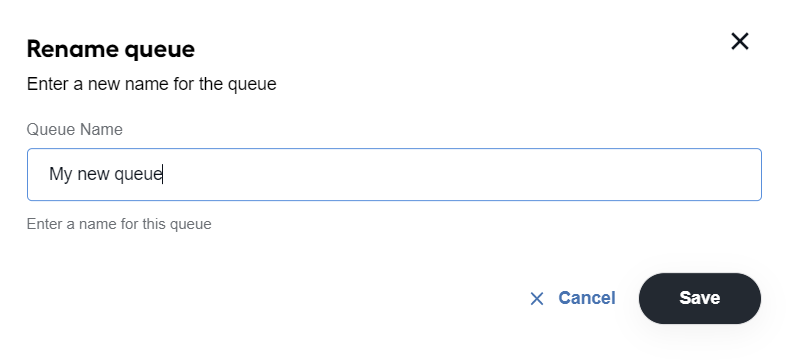
In the popup that follows, enter a new name for the queue and click Save. If you select Cancel, the changes are discarded.
Delete custom queue
You can delete queues from the SAVED BY ME list only. Follow the instruction below:
Hover over the name of the queue you want to delete and click the bucket icon.
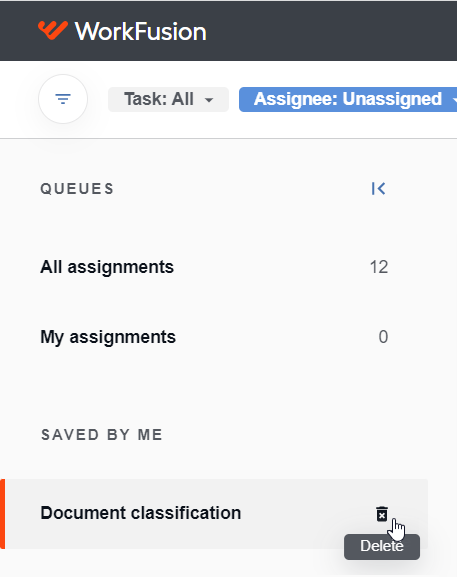
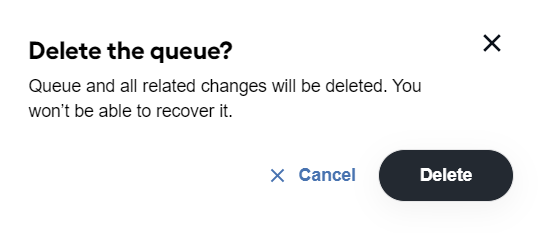
In the window that follows, click Delete to confirm the deletion.