
Manage payments
A Payment is created when a Worker gets approved Assignments with sum of rewards greater than the Threshold. The Threshold is set in Advanced Settings > Financial Accounts.
To start managing Payments, click the Payments item in the top menu. You will see the following grid with a filter:
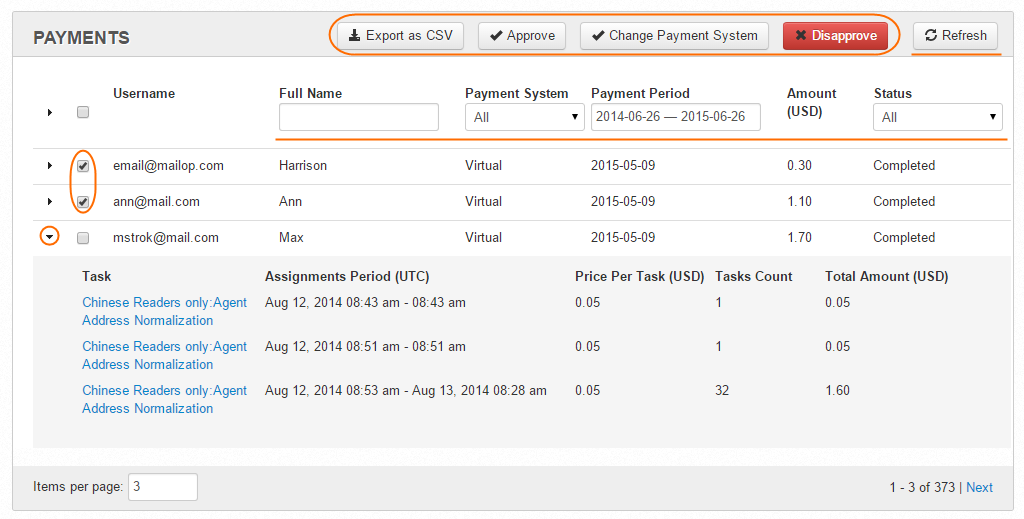
On the Payments page, you can perform the following actions:
Filter Payments. You can filter by Full Name, Payments System, Payment Period, and Status. To apply filters, click the Refresh button.
View Payment parameters. To expand and view the Task, Assignments Period, Price per Task, Task Count, and Total Amount, click the corresponding arrow in the leftmost column.
Preview Tasks. Expand a Payment and click the Task link. The Task preview opens in a new tab.
Return back to work queue. Select Assignment(s) and click this button to return accepted Tasks. Take away the Task from the current Worker and make it available for other Workers.
Approve or disapprove Payments. Select Payment(s) and click the Approve or Disapprove button.
You can skip this required action in Advanced Settings > Application Settings > Payments Approval Required.
Change Payment System. For example, you can change Virtual Payments to PayPal.
Export as CSV. This report displays all the Worker Payments according to the applied filters.