Configure ETL bot (legacy)
The article describes the legacy bot step configuration flow. For the recommended approach, refer to Configure bot steps in UI.
Business Process (BP) step configurations might require minor adjustments, which you can perform using the ETL bot configuration in the Control Tower user interface (UI). Once a bot is converted into an ETL bot, users can leverage an editable form featuring HTML-like fields instead of Groovy or XML code. This approach offers an easy and error-proof way to configure bot steps.
An ETL bot can include transformations of variables and additional calculations. It means you provide required data, and it gets converted into required variables for <export>. So, an ETL bot comprises:
A UI form with easy-to-configure parameters
Additional Groovy or XML code required to prepare variables for subsequent steps
Set ETL bot
You can start with an existing bot or create a new one. Let's go for a simple example and set an ETL bot with three editable fields:
If a bot already exists, copy the bot source code to the clipboard.
Create a template:
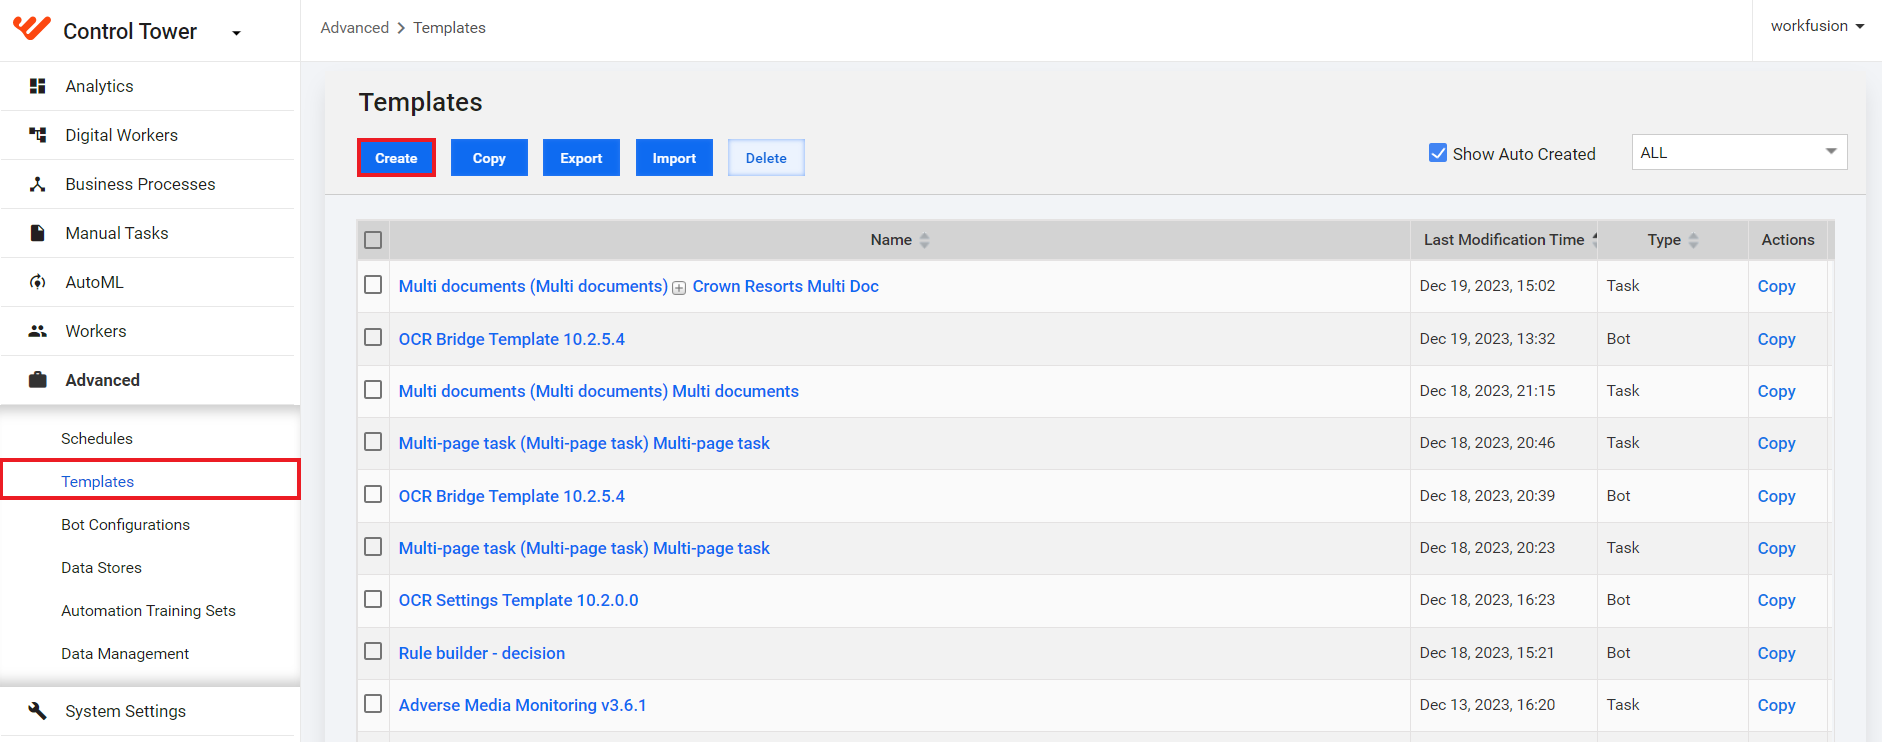
Go to Advanced > Templates and click Create.
Specify Template Name. For Template Type, select Bot Base.
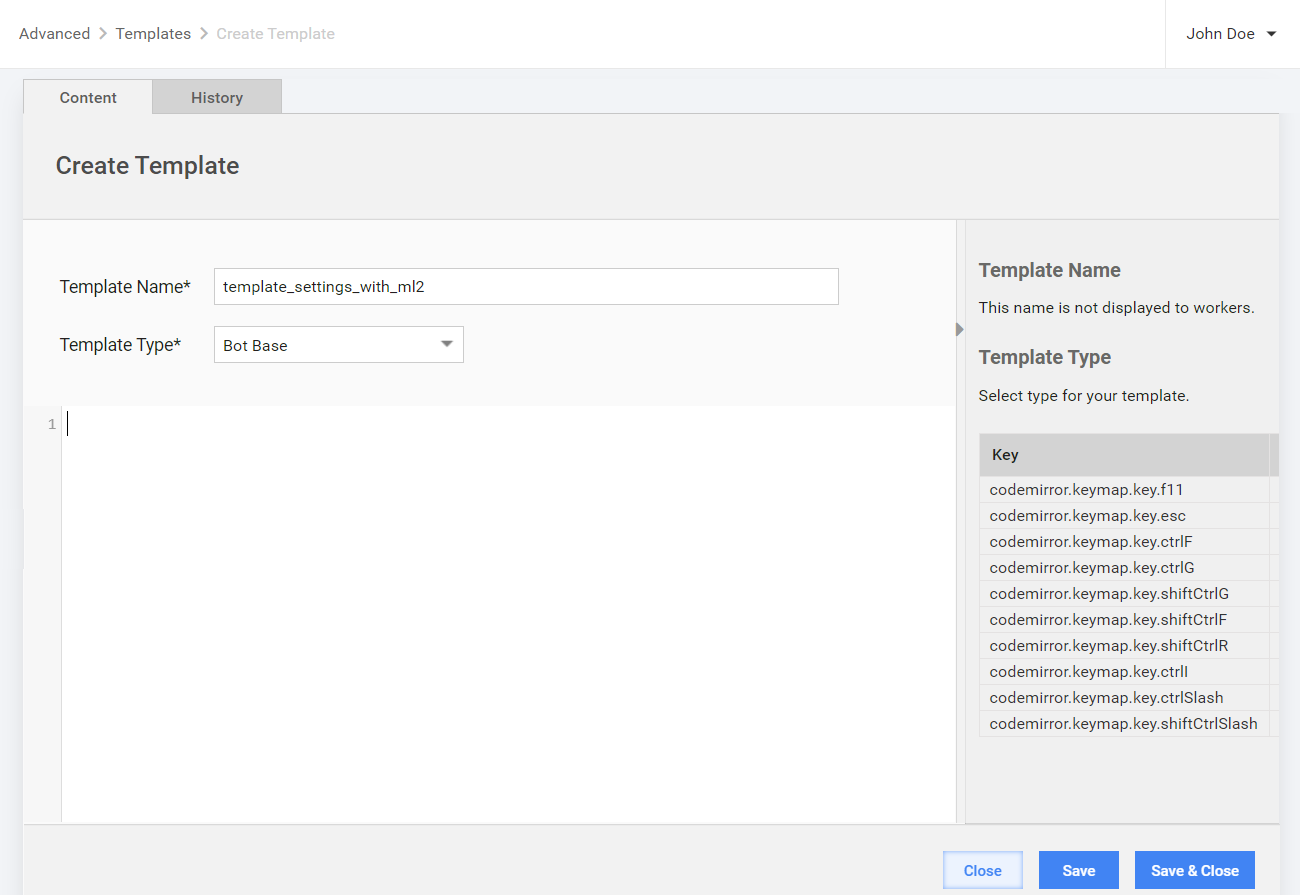
Paste your existing bot code from the clipboard. If the template is new as in the example below, use the following code:
 <?xml version="1.0" encoding="UTF-8"?>
     <config xmlns="http://web-harvest.sourceforge.net/schema/1.0/config" scriptlang="groovy">

         <var-def name="var1">
         {{etl_column_name_var1}}
         </var-def>

         <var-def name="var2">
         {{etl_column_name_var2}}
         </var-def>

         <var-def name="var3">
         {{etl_column_name_var3}}
         </var-def>

         <script><![CDATA[
             // Your custom conversion code goes here
         ]]></script>

         <insert-datastore datastore-name="${datastoreName}" create="true">
             <script return="filteredBotVars"/>
         </insert-datastore>

         <export include-original-data="true">
             <single-column name="var1" value="{{etl_column_name_var1}}"></single-column>
             <single-column name="var2" value="{{etl_column_name_var2}}"></single-column>
             <single-column name="var3" value="{{etl_column_name_var3}}"></single-column>
         </export>
     </config>
Click Save.
warningMake sure that, in the
<export>section, you have each UI field defined, for example,{{etl_column_name_var3}}. Non-defined fields do not appear on the UI form of the ETL bot.
Create an Operation:
Go to System Settings > Operations.
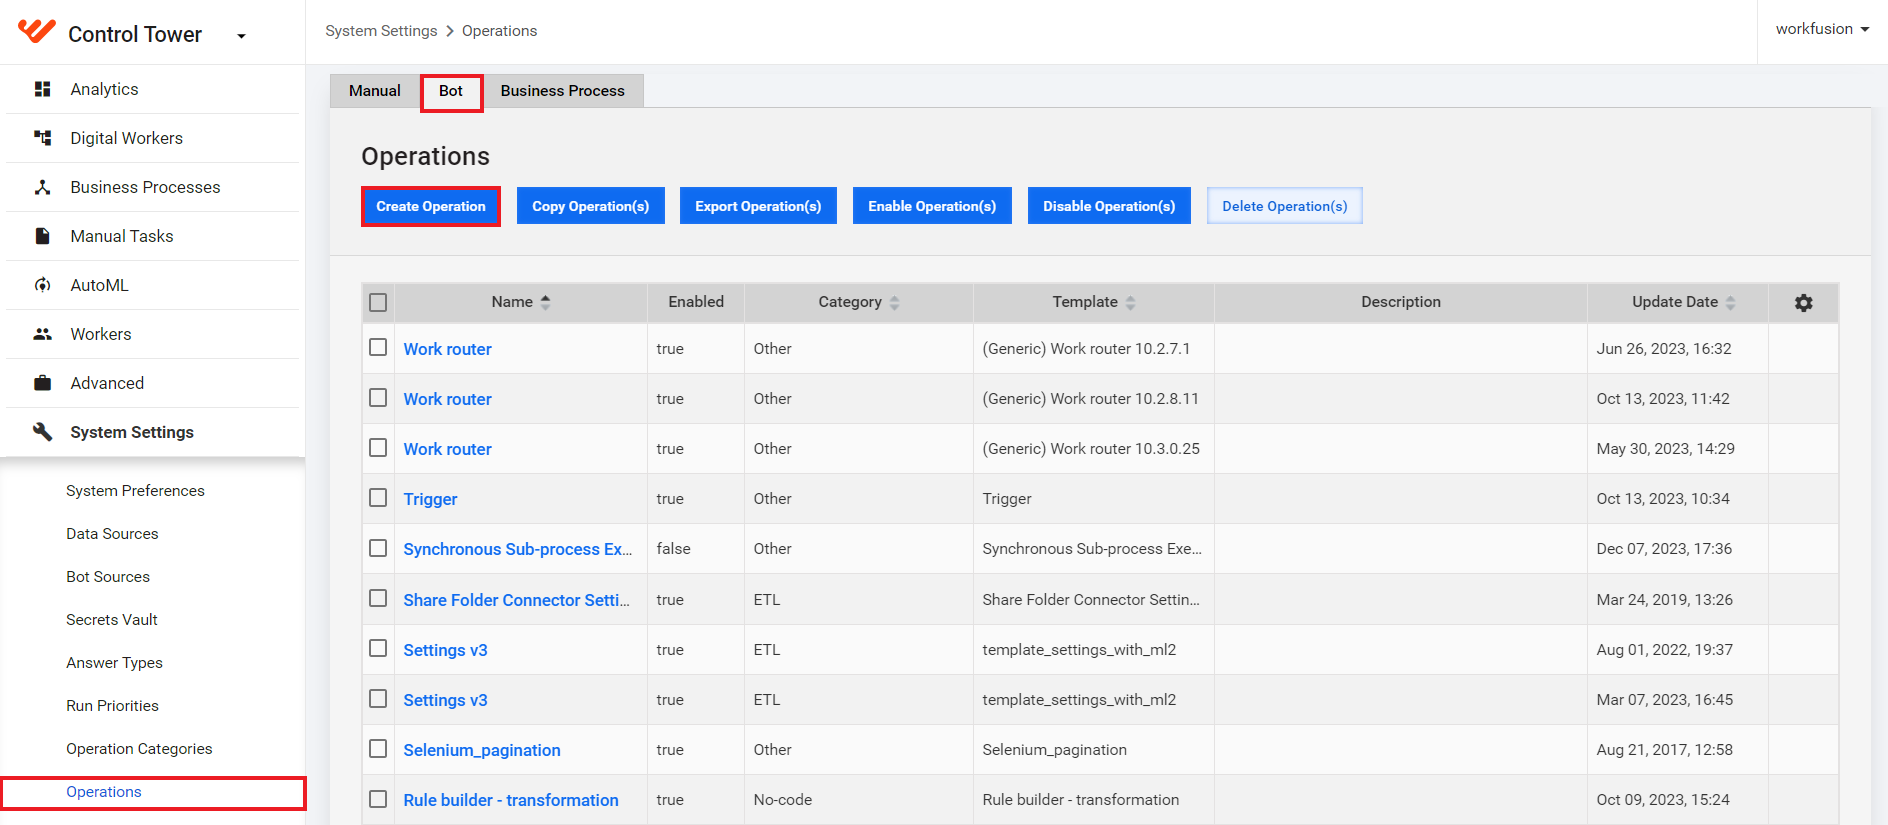
Navigate to the Bot tab and click Create Operation.
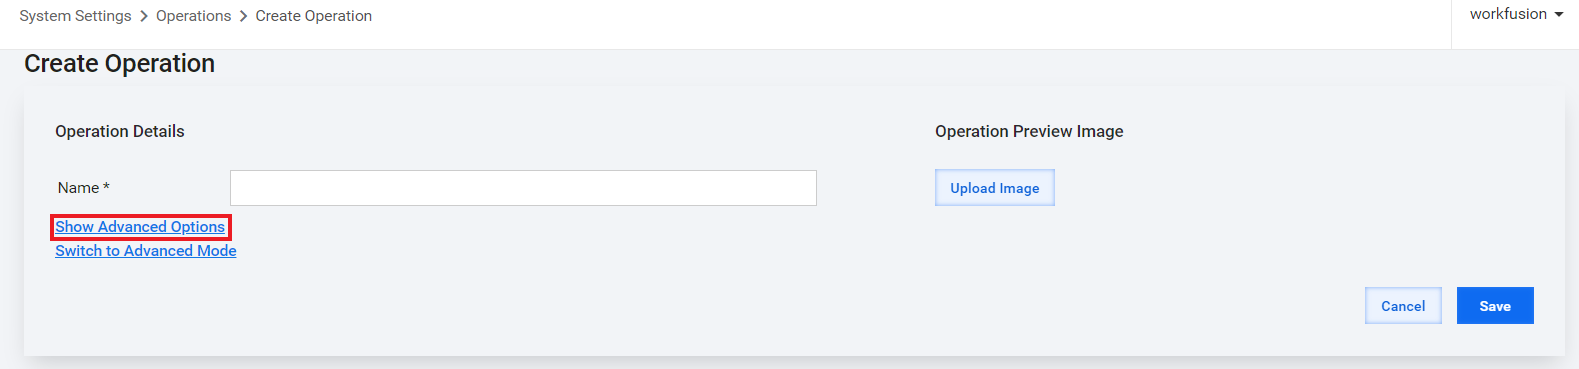
In the Create Operation window, specify the name for the created Operation and click Show Advanced Options to continue with the Operation settings.
Specify the settings as described below:
In Category, select the category where your Operation appears for reuse.
In Base template, select the template created in Step 2.
In Type, select ETL.
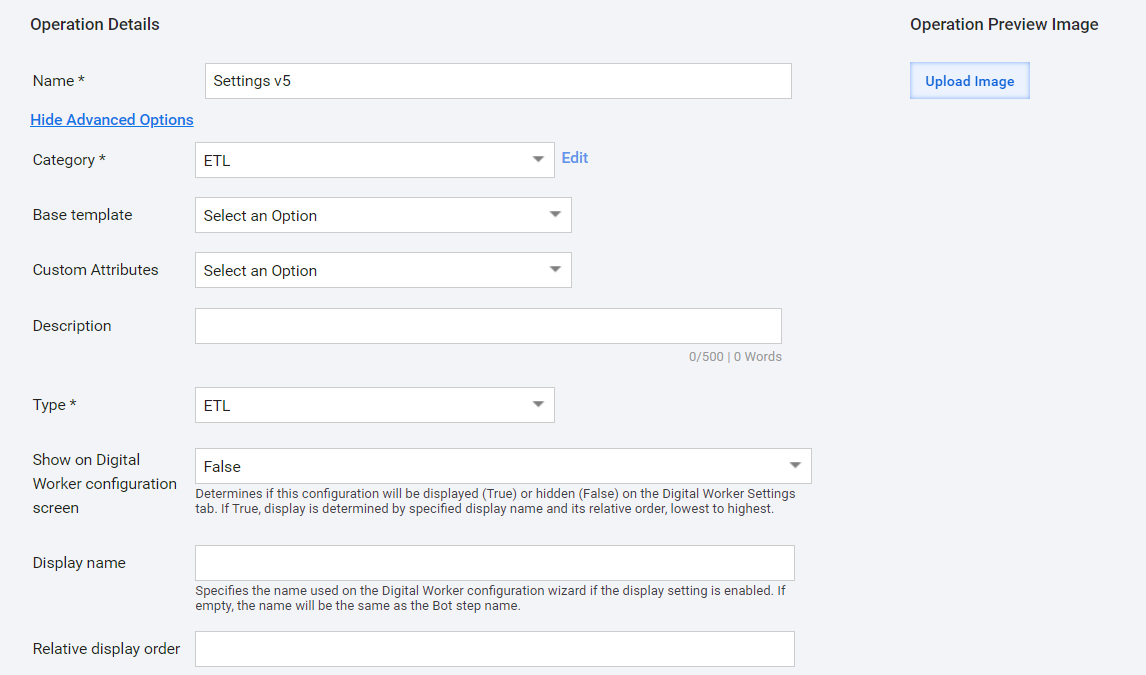
Configure all variables you want to have as fields in the UI form. To do that, click Add Answer and specify input parameters field by field. Click Save Answer when all fields are set as appropriate.
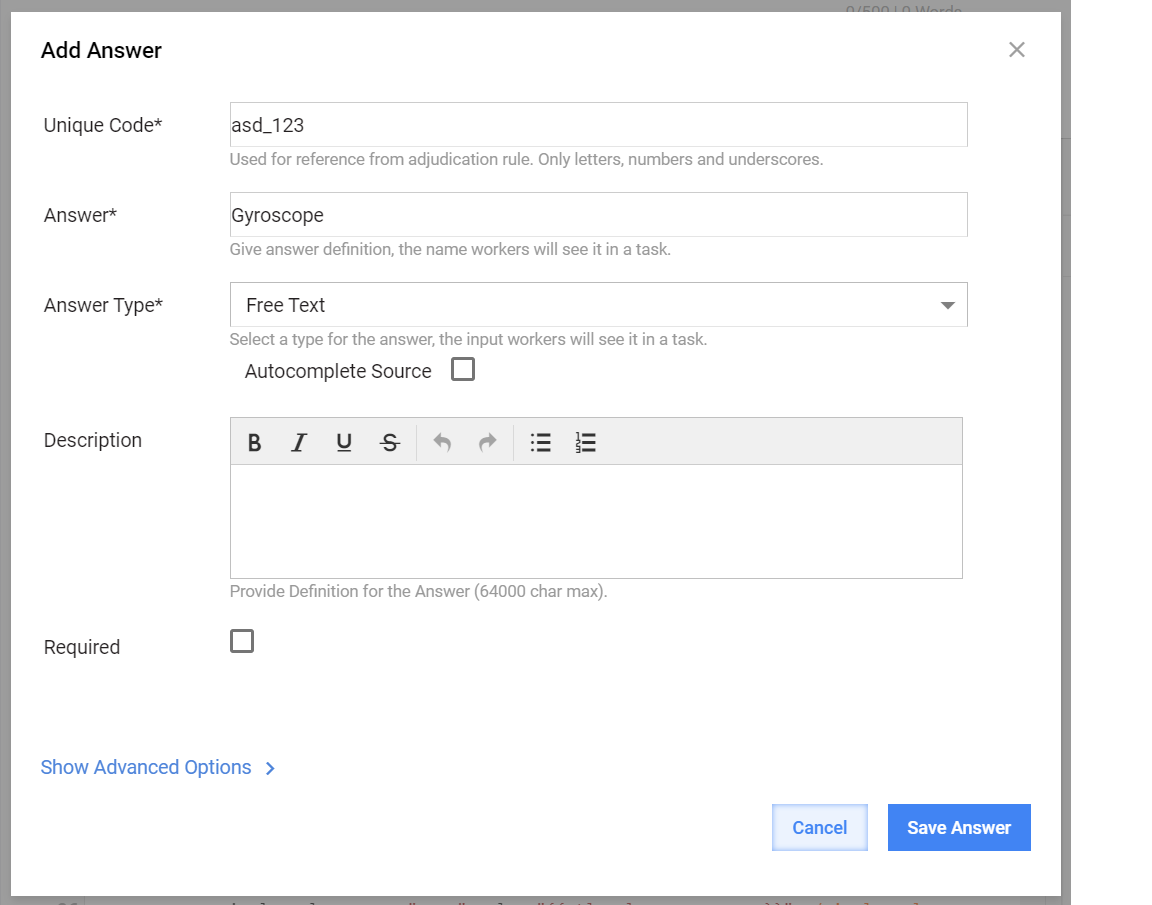
Repeat the same sequence of actions to add as many Answers as you need.
When back on the Create Operation screen, click Save to save the Operation.
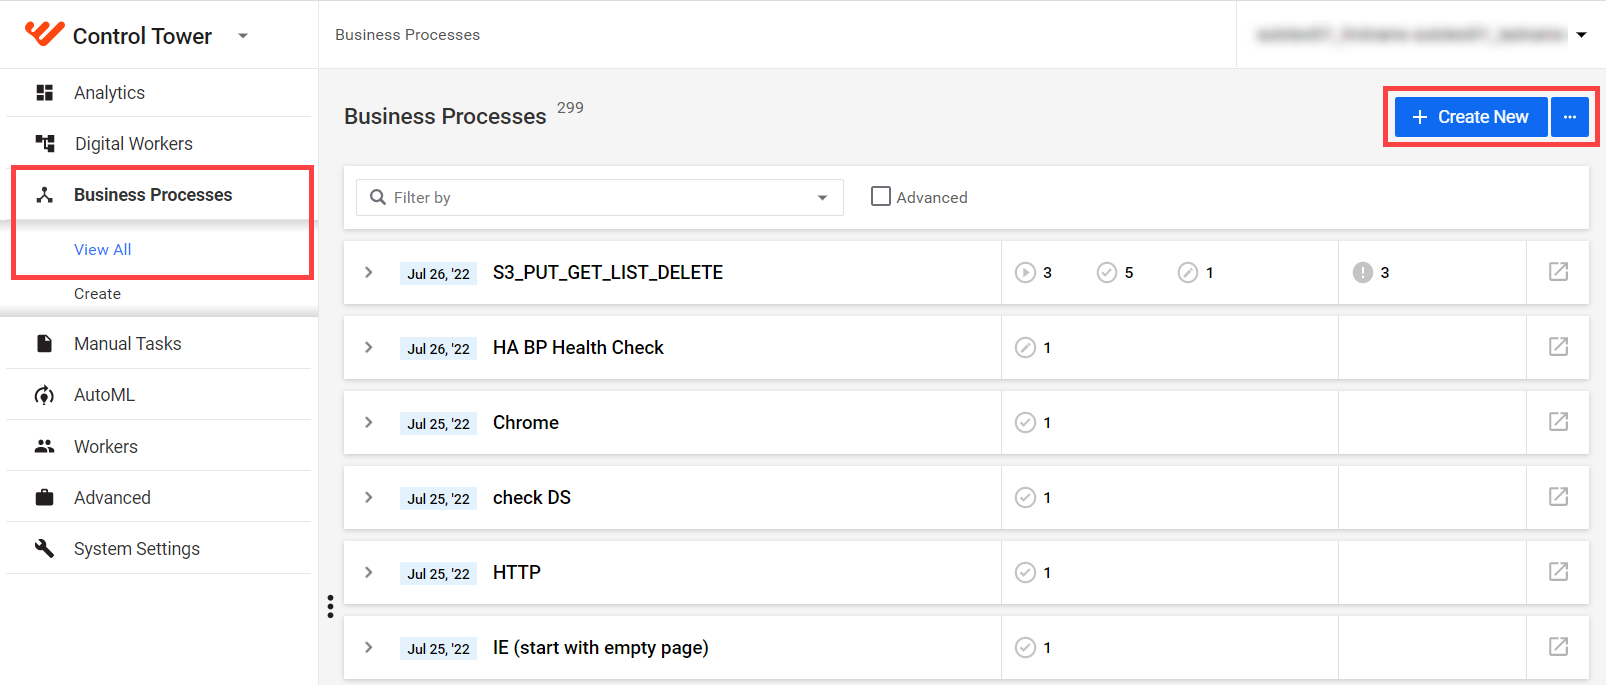
Once the Operation is created, you can use it in any Business Process. On the Business Processes tab, click View All to view the list of existing BPs. To create a BP, click Create.
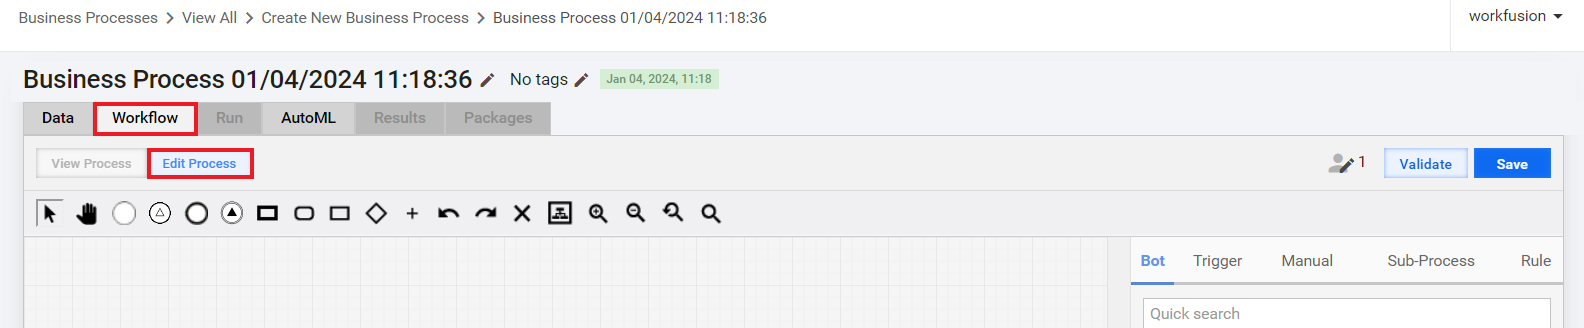
Inside the BP, go to the Workflow tab and make sure the Edit mode is on (click Edit Process if needed).
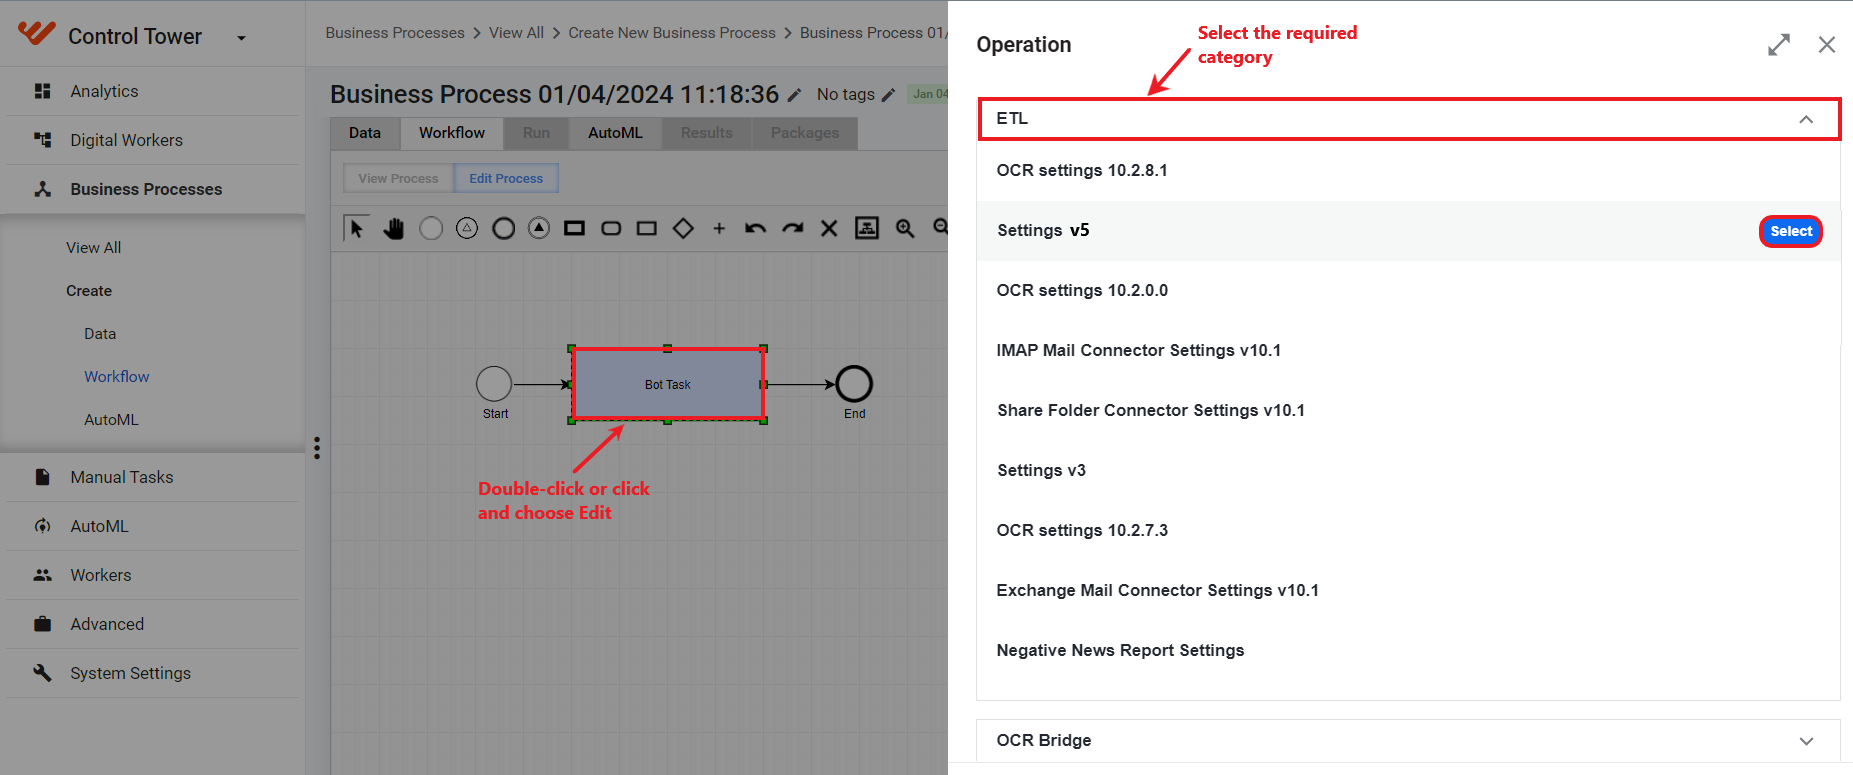
Add the bot to the canvas and then double-click it to start the configuration flow. Alternatively, you can click the element and choose Edit.
On the Operations tab, Control Tower displays Operation categories. Select the category you set for the Operation when creating it. Within the category, select the created Operation.
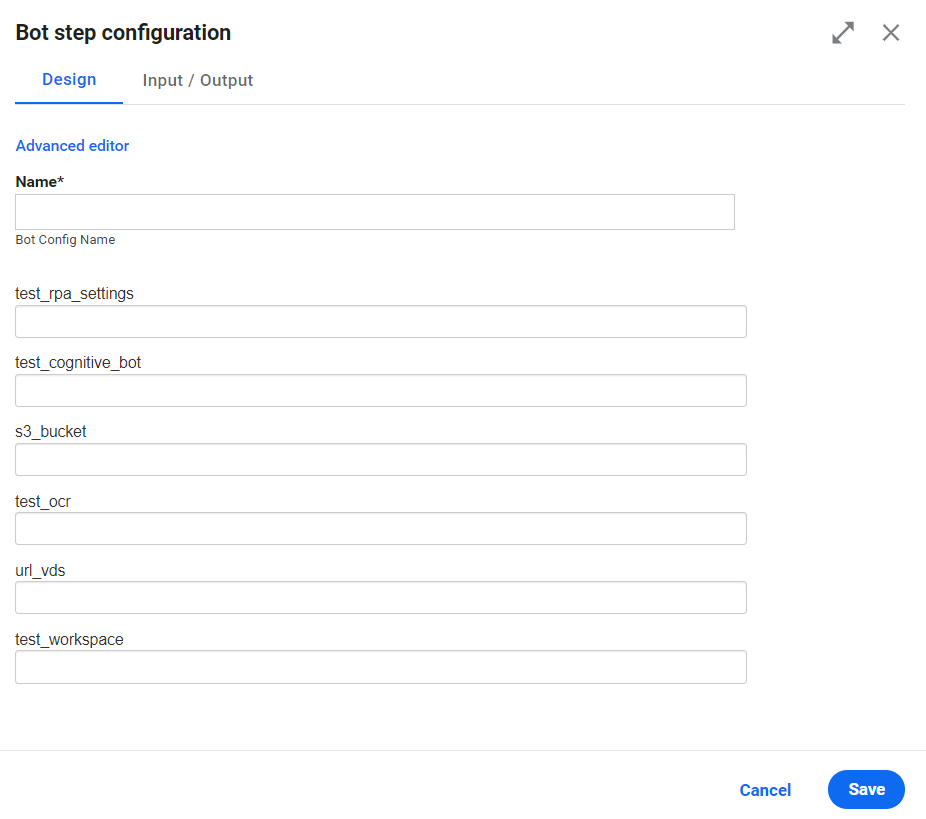
On the Design tab of the bot configuration window, add the name and settings of the new bot. Click Save.
 note
noteMind that the ETL bot has two modes: the default Basic editor and Advanced editor. The UI fields are displayed in the Basic editor mode.
View sample code
You can modify the initial example and add a piece of custom logic to the ETL bot you have created.
Let's assume that your task is to ask a user to provide variable names and save those values to a Data Store in Control Tower. Once done, you need to send the output variables to the subsequent BP step.
View modified ETL bot
<?xml version="1.0" encoding="UTF-8"?>
<config xmlns="http://web-harvest.sourceforge.net/schema/1.0/config" scriptlang="groovy">

    <var-def name="var1">
        {{etl_column_name_var1}}
    </var-def>

    <var-def name="var2">
        {{etl_column_name_var2}}
    </var-def>

    <var-def name="var3">
        {{etl_column_name_var3}}
    </var-def>

    <!-- DO NOT change the code below //-->
    <!-- List of 3 Data Store default column names //-->
    <var-def name="datastoreColumns">var1|var2|var3</var-def>
    <!-- Data Store name where data will land //-->
    <var-def name="datastoreName">CustomDashboardData</var-def>
    <!-- Data Store column name for the BP run's unique ID //-->
    <var-def name="columnUUIDName">uuid</var-def>
    <!-- Data Store column name for the BP's unique name //-->
    <var-def name="columnBPName">bp_name</var-def>

    <script><![CDATA[
        includedVars = [var1.getWrappedObject().get(0).toString(), var2.getWrappedObject().get(0).toString(), var3.getWrappedObject().get(0).toString()];
        dsColumns = datastoreColumns.toString().tokenize('|');
        allBotVars = hit_submission_data_item.getWrappedObject().getItemValueMap();
        filteredBotVars = allBotVars.subMap(includedVars);
        (0..2).each { filteredBotVars.put(dsColumns[it], filteredBotVars.remove(includedVars[it])); }
        filteredBotVars.put(columnBPName.toString(), item.getWrappedObject().getRun().getCampaignName());
        filteredBotVars.put(columnUUIDName.toString(), item.getWrappedObject().getRun().getRootRunUuid());
    ]]></script>

    <insert-datastore datastore-name="${datastoreName}" create="true">
        <script return="filteredBotVars"/>
    </insert-datastore>

   <export include-original-data="true">
       <single-column name="var1" value="{{etl_column_name_var1}}"></single-column>
       <single-column name="var2" value="{{etl_column_name_var2}}"></single-column>
       <single-column name="var3" value="{{etl_column_name_var3}}"></single-column>
   </export>

</config>
As a result, for a BP user, the ETL bot in the Basic mode looks identical to the screenshot from Step 8. In addition, the bot applies the user configuration to the custom code you added in runtime, meaning the variables you type in are saved to the Data Store and the output to export.