Enable read-only access in Kibana
After the installation, you can create custom users and roles in Keycloak to assign specific Kibana permissions to them. The following guide describes the step-by-step creation of a custom user that can only view dashboards, logs, and other items.
Create role and user in Keycloak
To create a custom role and user for the wf-kibana Kibana client, follow the steps below, depending on the Work.AI version you are using.
- For Work.AI versions up to 10.2.9
- For Work.AI v10.3.1+
In the Keycloak main menu, go to Clients > wf-kibana > Roles and click Create New Role.
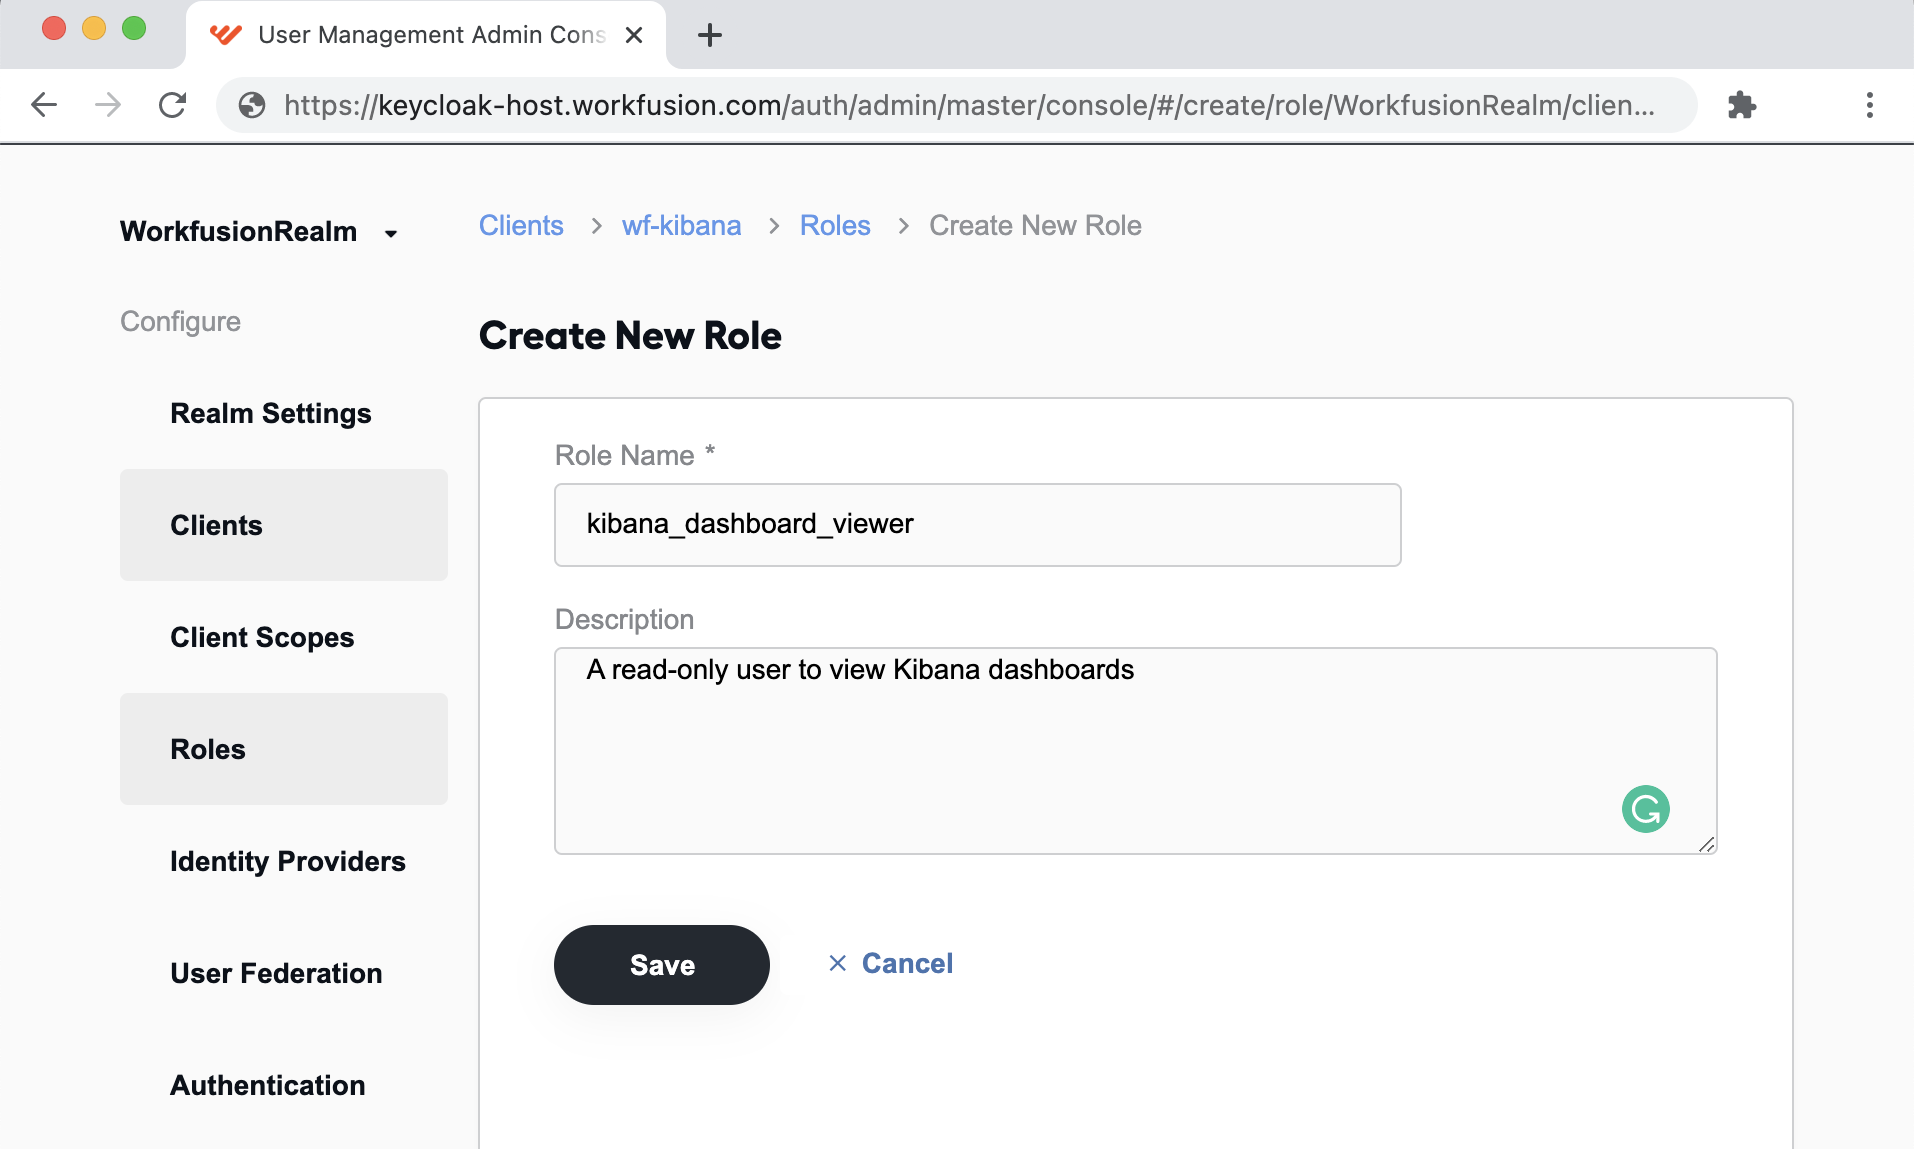
In the Create New Role window, in the Role Name field, specify the new role's name. Optionally, in the Description field, add the additional information on the role.
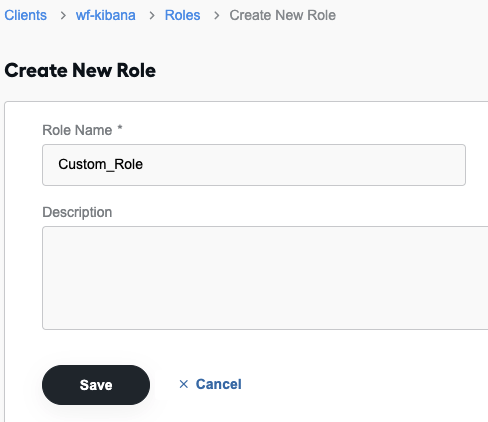
Click Save.
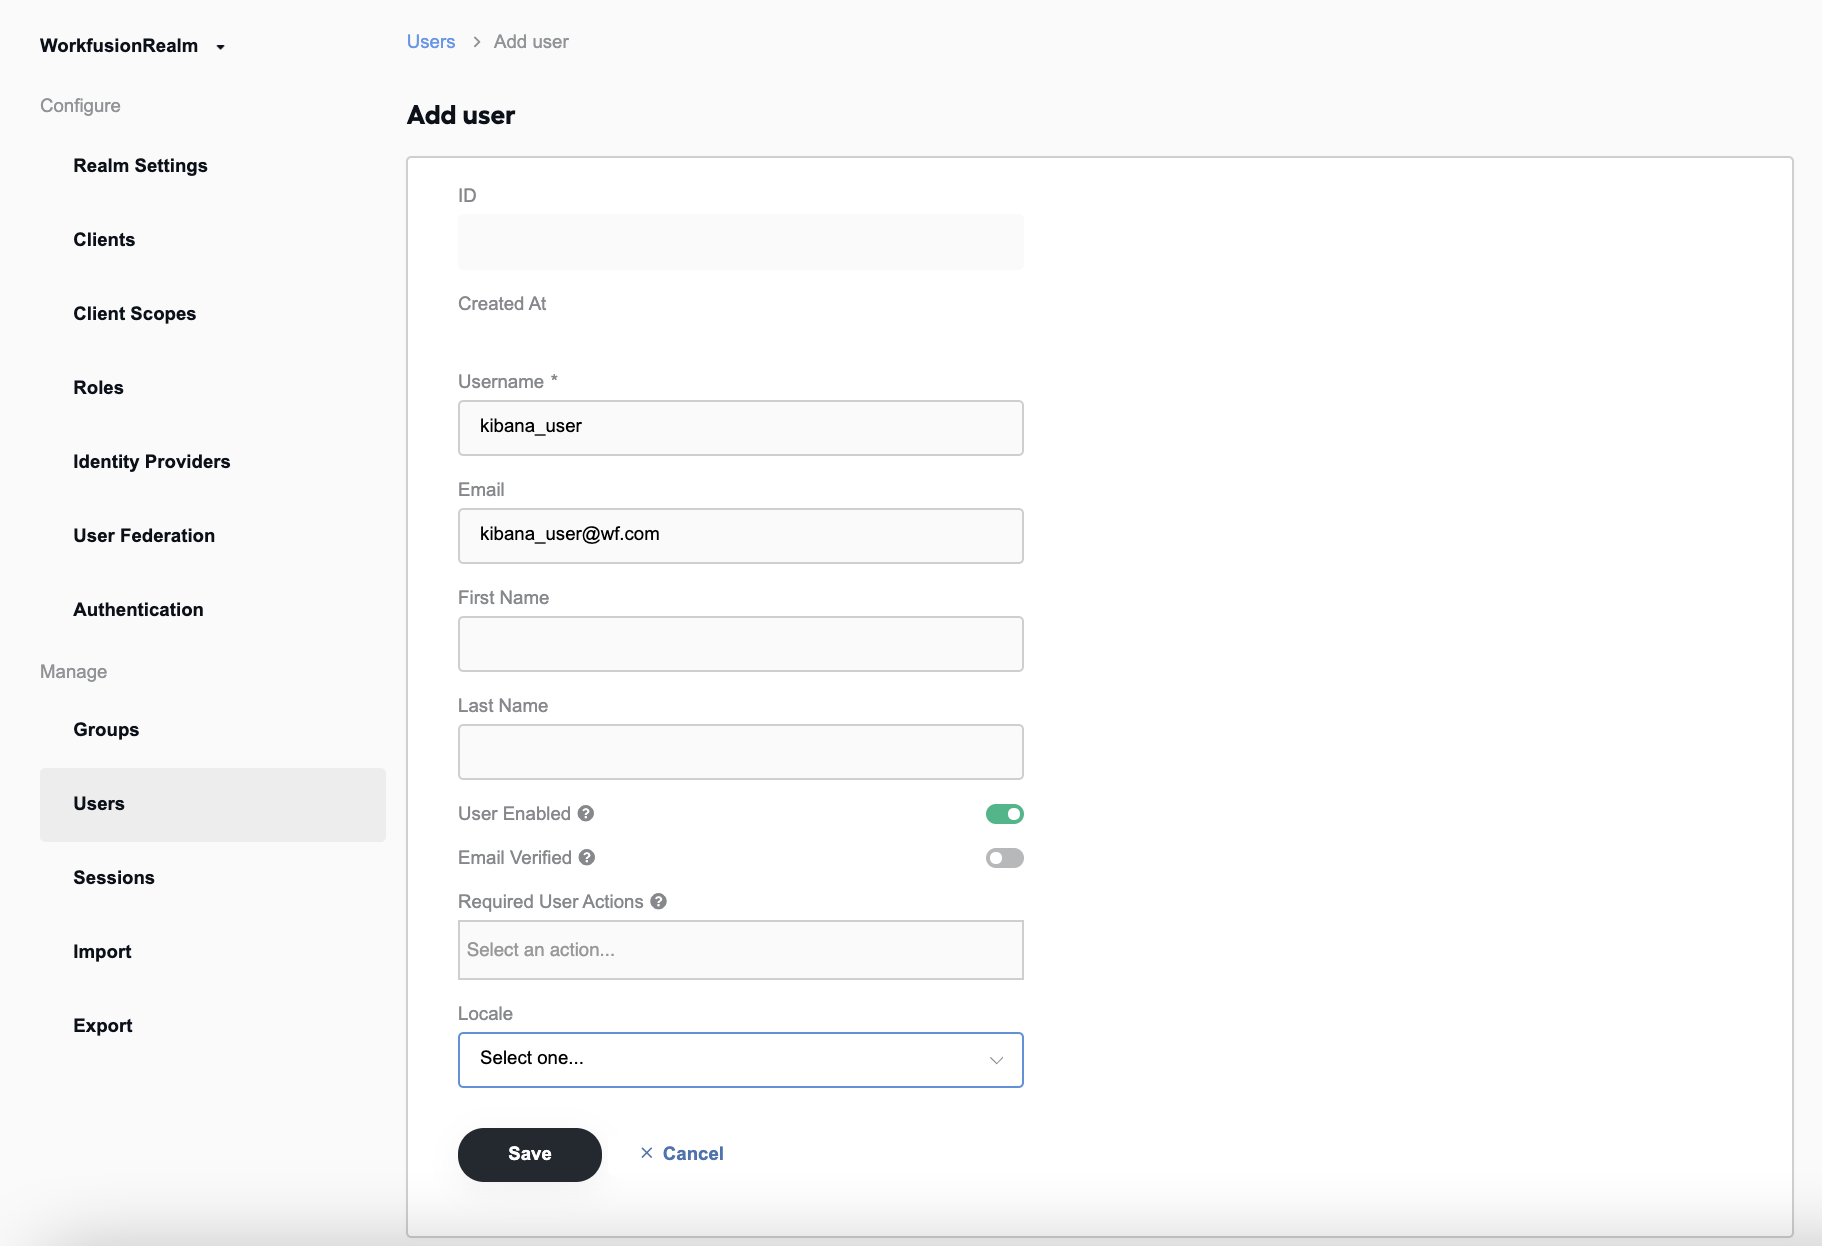
In the main menu, go to Users and click Add user.
Specify Username and make sure the User Enabled toggle is on. Optionally, fill the rest of the fields. Then, click Save.
Go to the Role Mappings tab and set the following parameters:
- In the Client Roles box, select wf-kibana.
- In the Available Roles box, select the role created on step 2. In this example, it is kibana_dashboard_viewer.
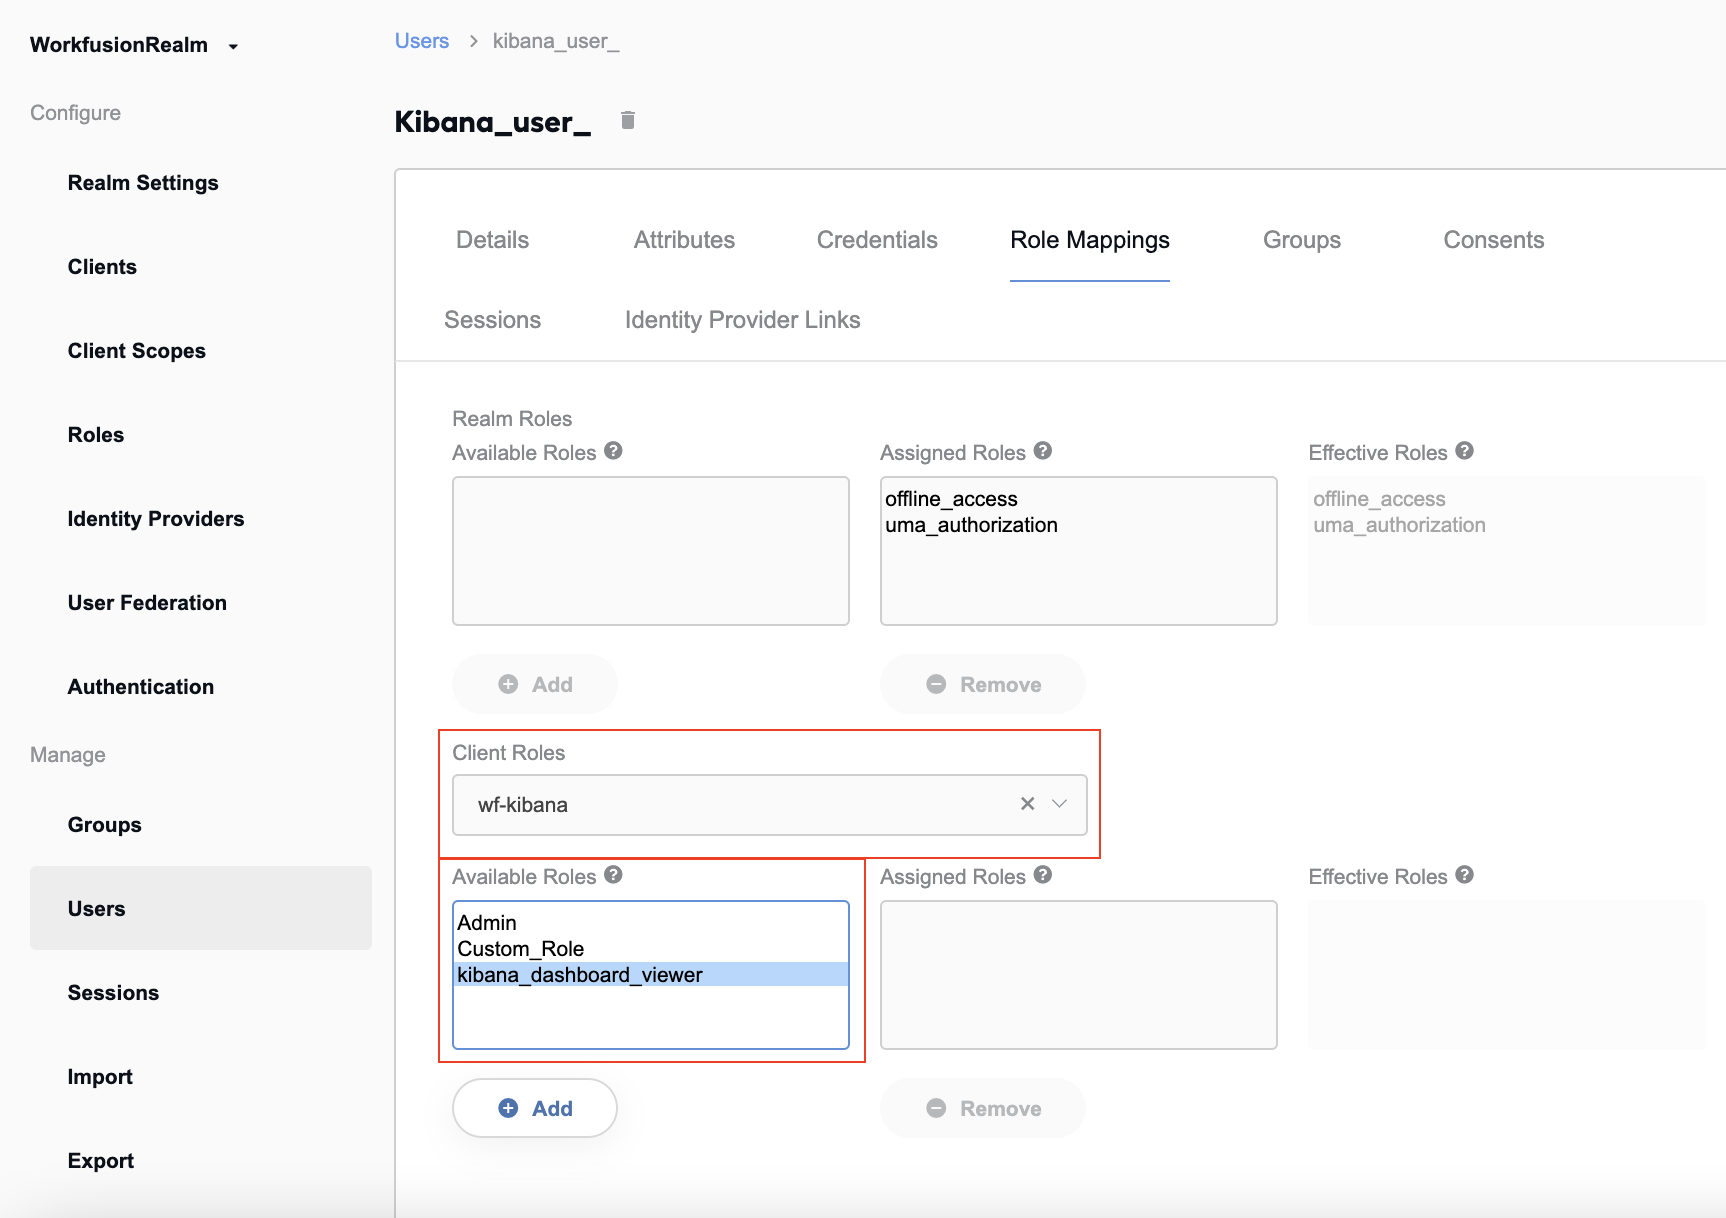
Click Add to assign the role to the user.
In the Keycloak main menu, go to the Clients tab and click the wf-kibana client in the list.
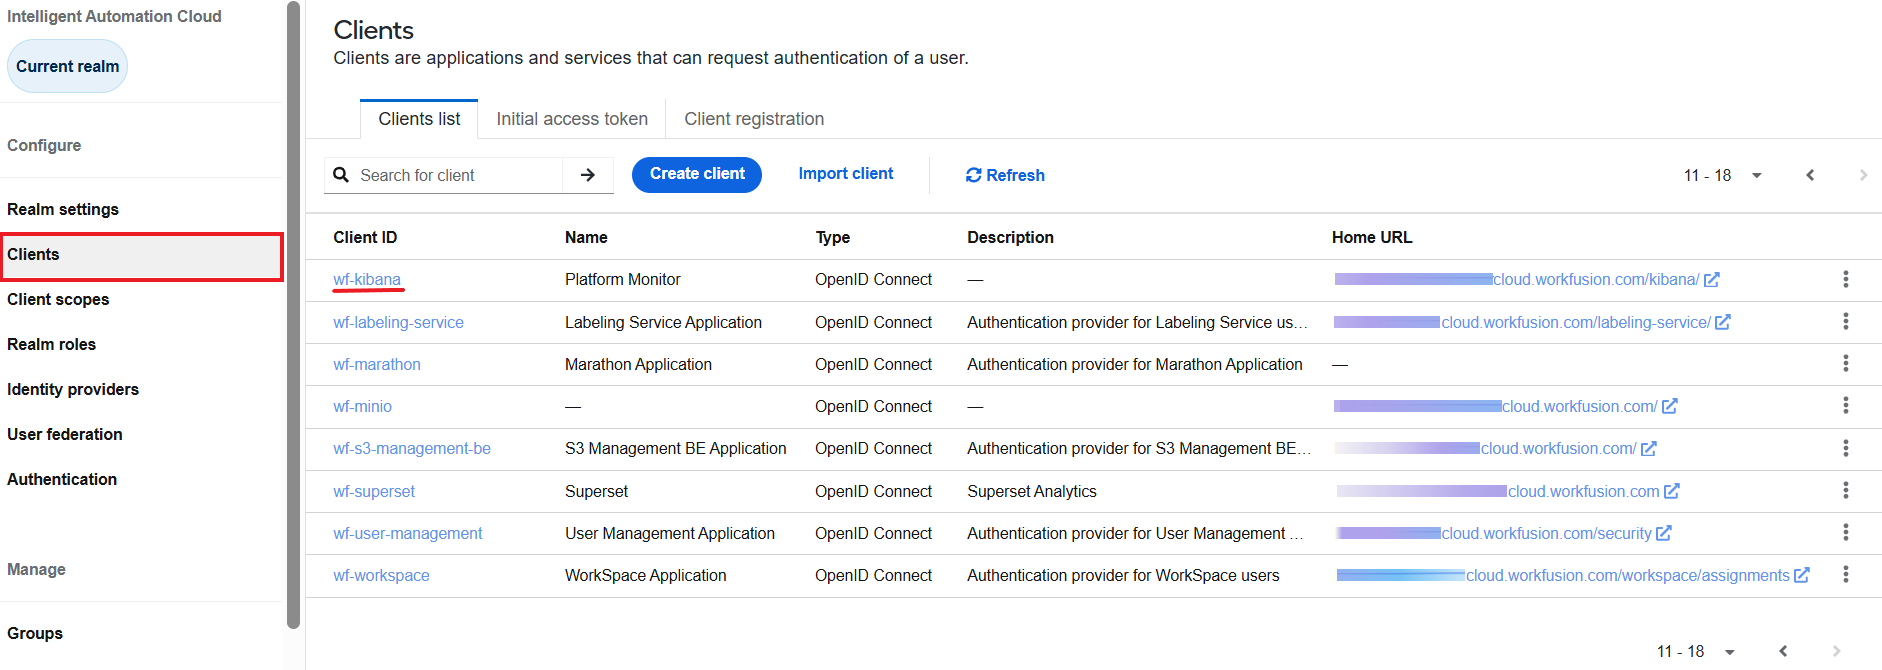
Navigate to the Roles tab and click Create role.
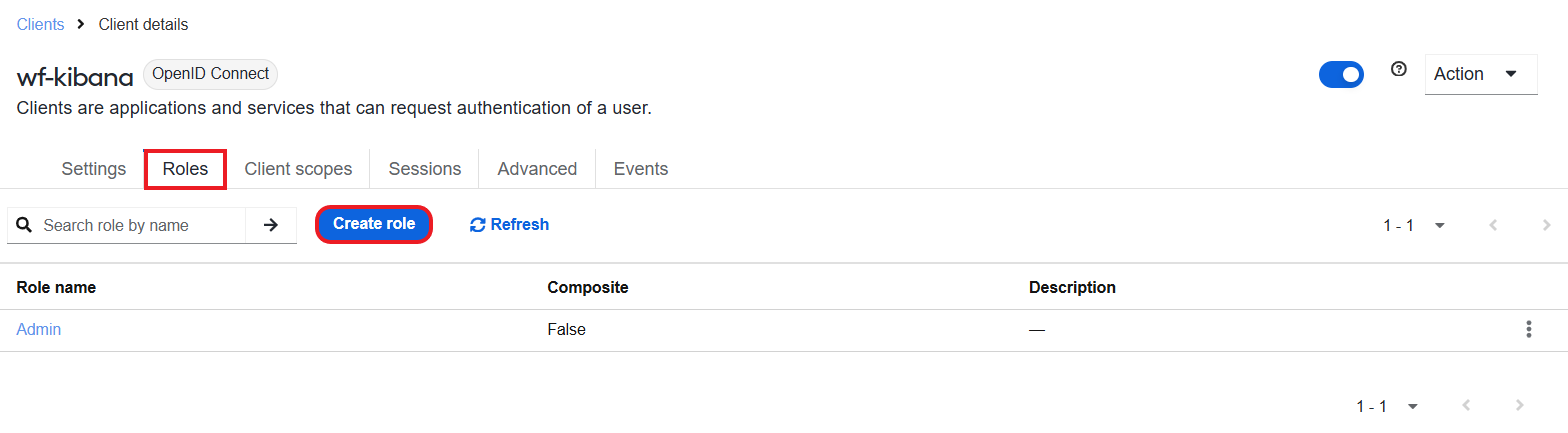
On the Create role screen, fill in the Role name field with a new name for the created role (in this example, kibana_dashboard_viewer). Optionally, in the Description field, add the additional information on the role.
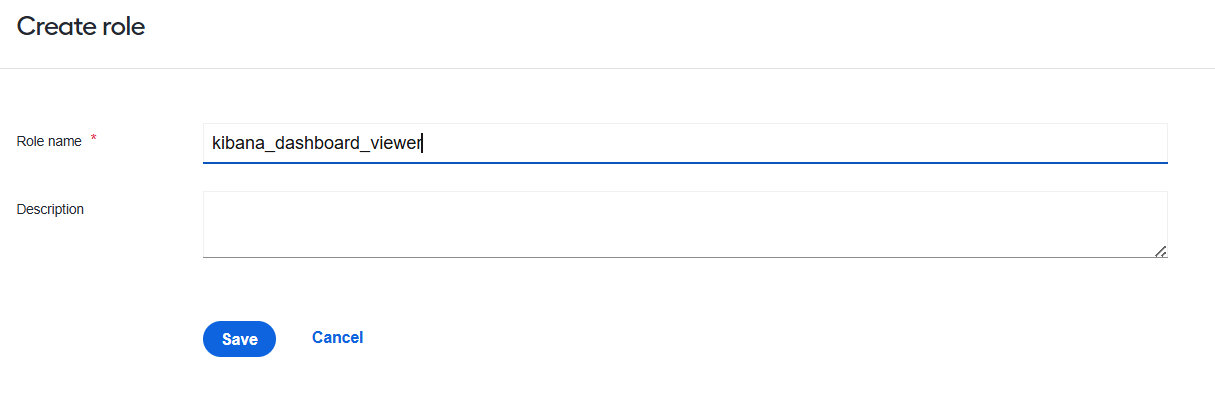
Click Save.
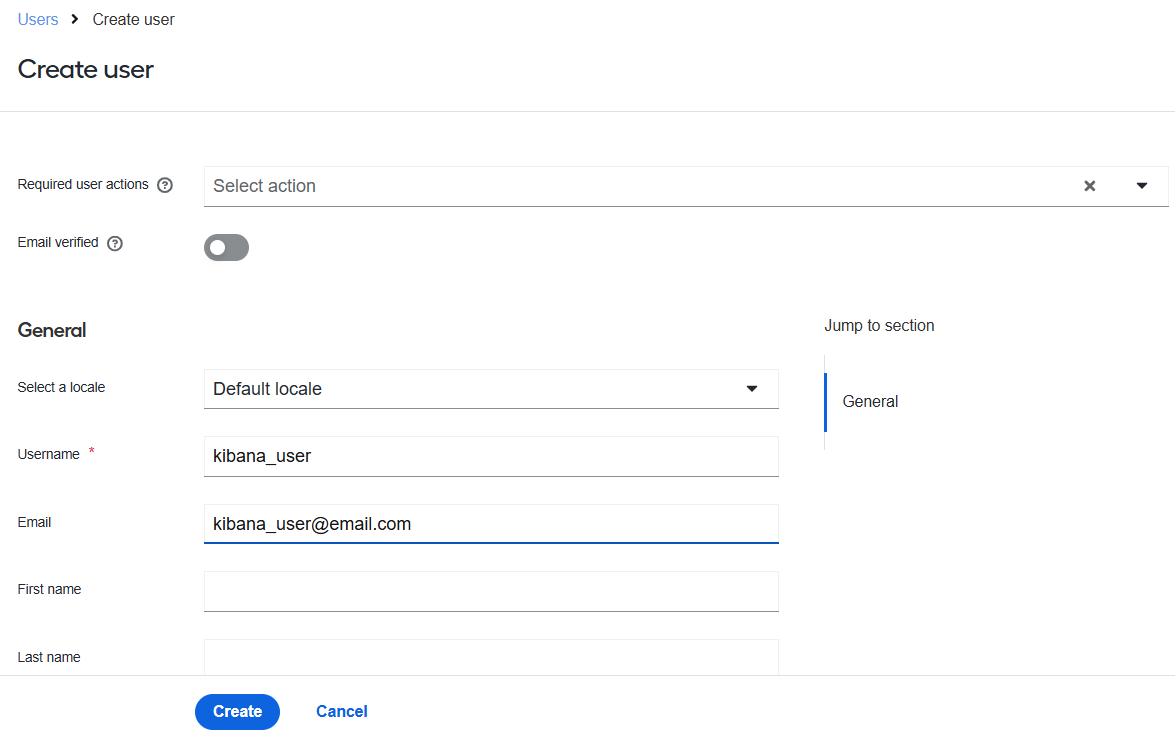
In the main menu, go to Users and click Add user.
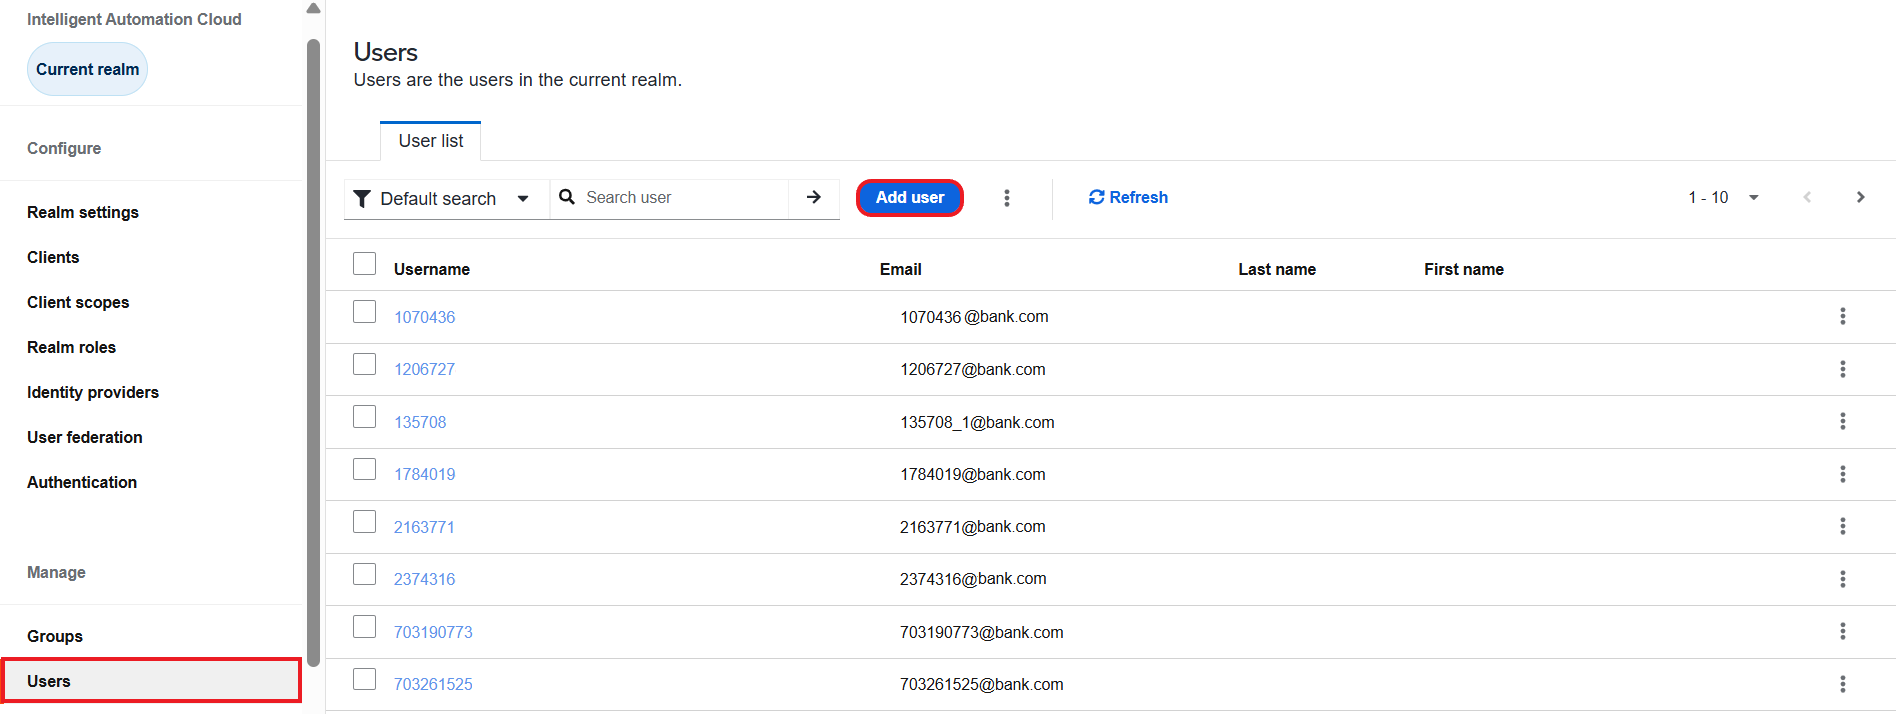
On the Create user screen, specify Username and fill in the rest of the fields if needed. Then, click Create.
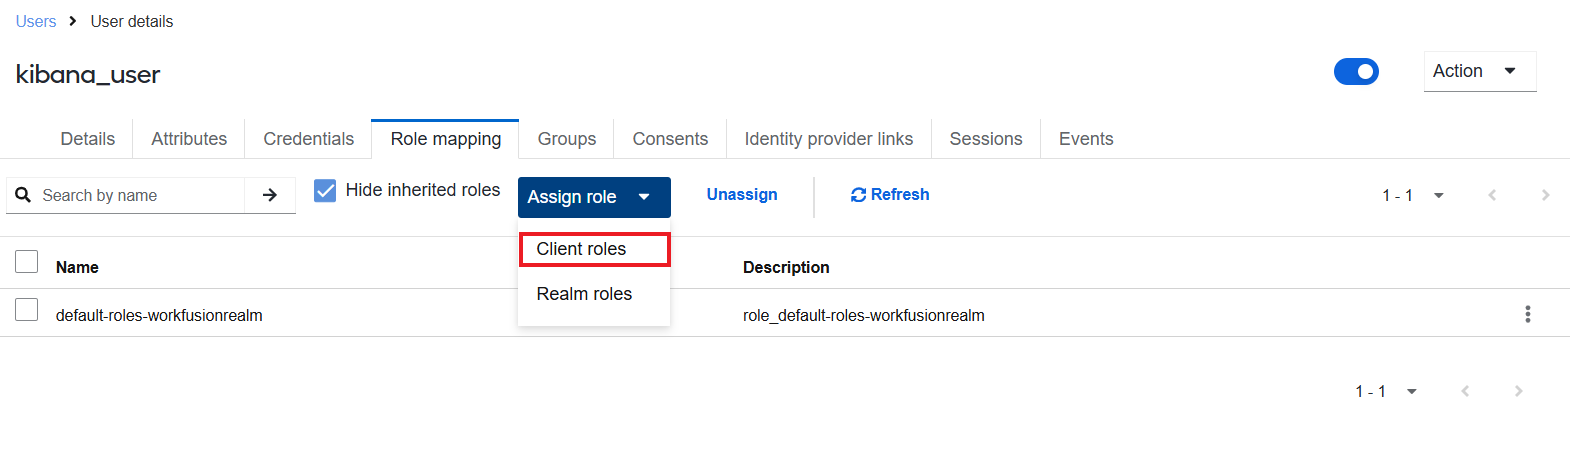
On the user's details page, go to the Role mapping tab, click Assign role, and select Client roles.
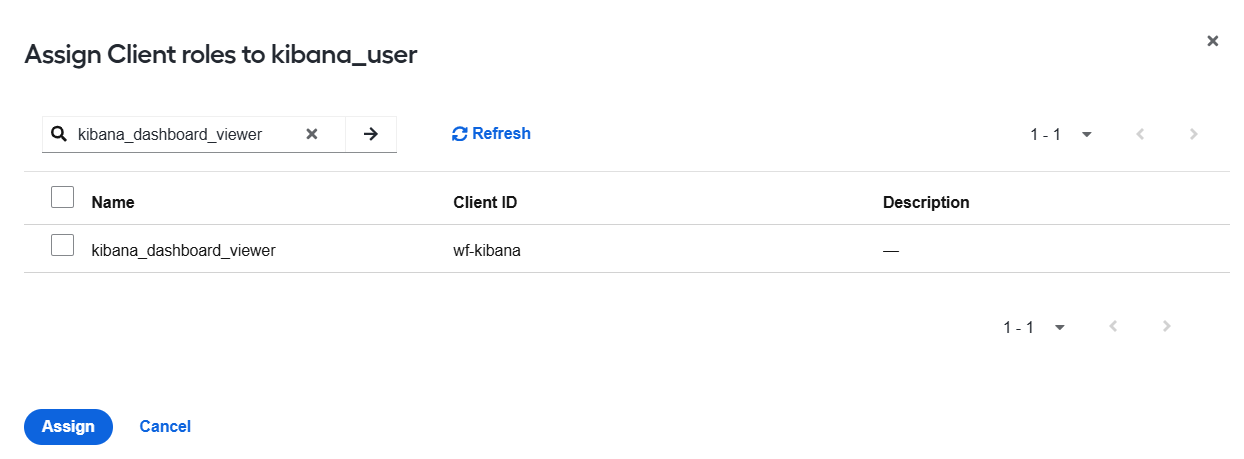
In the search box, type in the name of the role you created on step 3 (kibana_dashboard_viewer), select the checkbox next to the role in the search results, and click Assign.
Set users and roles in Kibana
To set the corresponding users and roles in Kibana, follow the steps below:
In the Kibana main menu, go to Stack Management > Security > Roles and click Create role.
Specify the new role's name, for example, dashboard_viewer and, in the Elasticsearch section, set the following parameters:
- Cluster privileges: monitor
- Index privileges > Indices: "*"
- Index privileges > Privileges: read
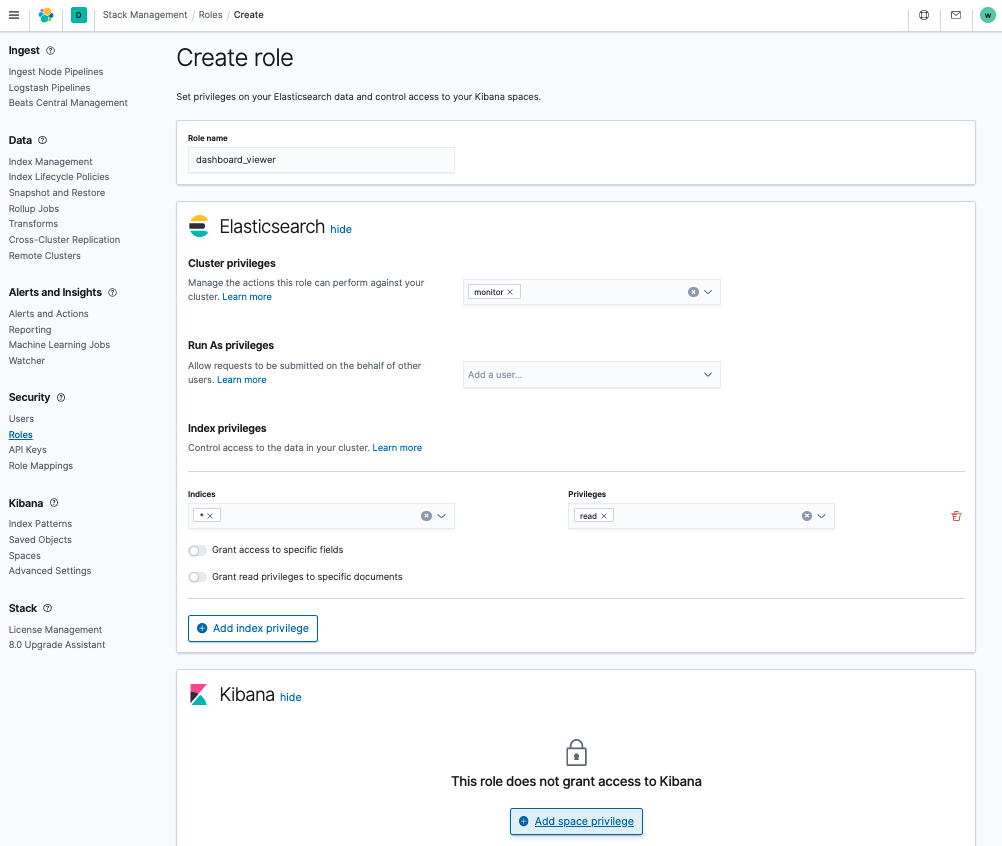
In the Kibana section, click Add space privilege. In the Space privileges window, specify the following settings:
- Spaces: select Global to set permissions for all spaces
- Privilege: select Custom
- Customize by feature: for all features, except Security, set the Read privilege
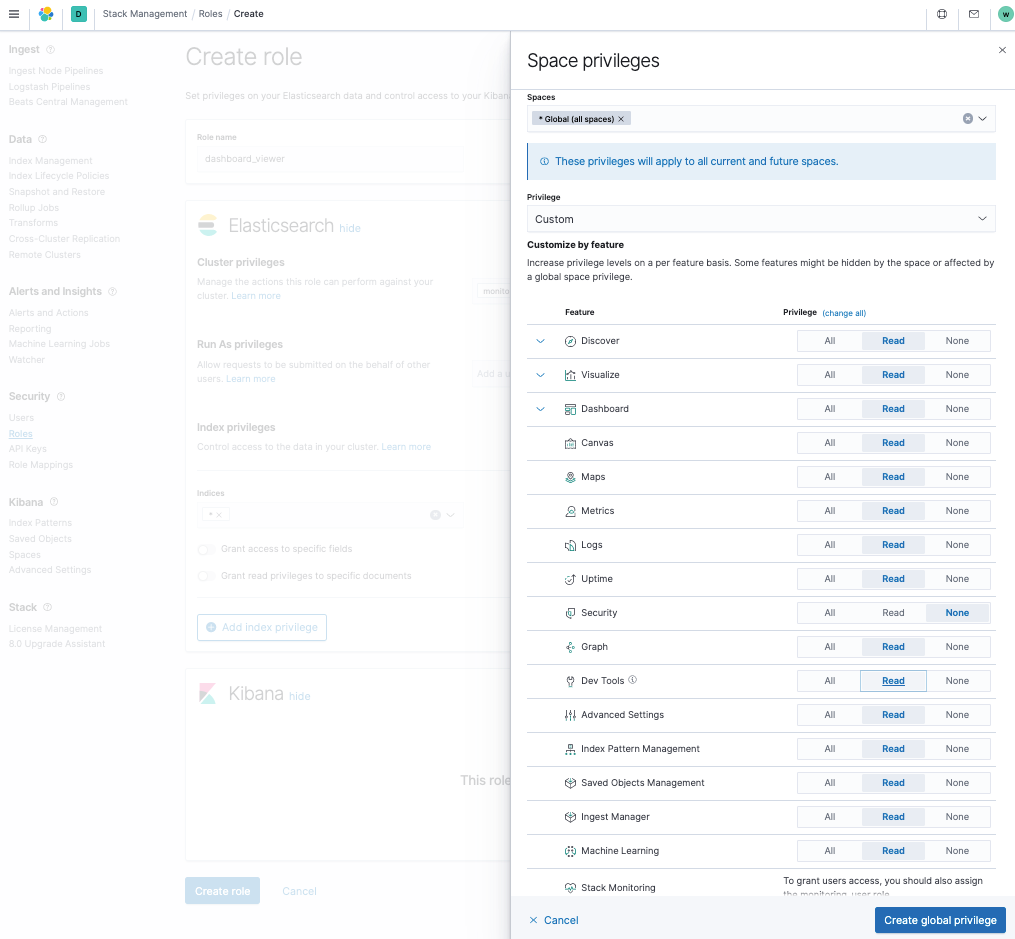
Click Create global privilege and then click Create role.
Associate Keycloak and Kibana roles
To link roles in Keycloak and Kibana, follow the steps below:
In Kibana main menu, go to Stack Management > Security > Role Mappings and click Create role mapping.
In the Role Mapping section, set the following parameters:
- Mapping name: specify a name for the mapping
- Enable mapping: make sure to toggle on the parameter
- Roles: dashboard_viewer
In the Mapping Rules section, click Add and specify the following parameters and values:
- realm.name: wf_keycloak_oidc
- groups: kibana_dashboard_viewer (the role created in Keycloak)
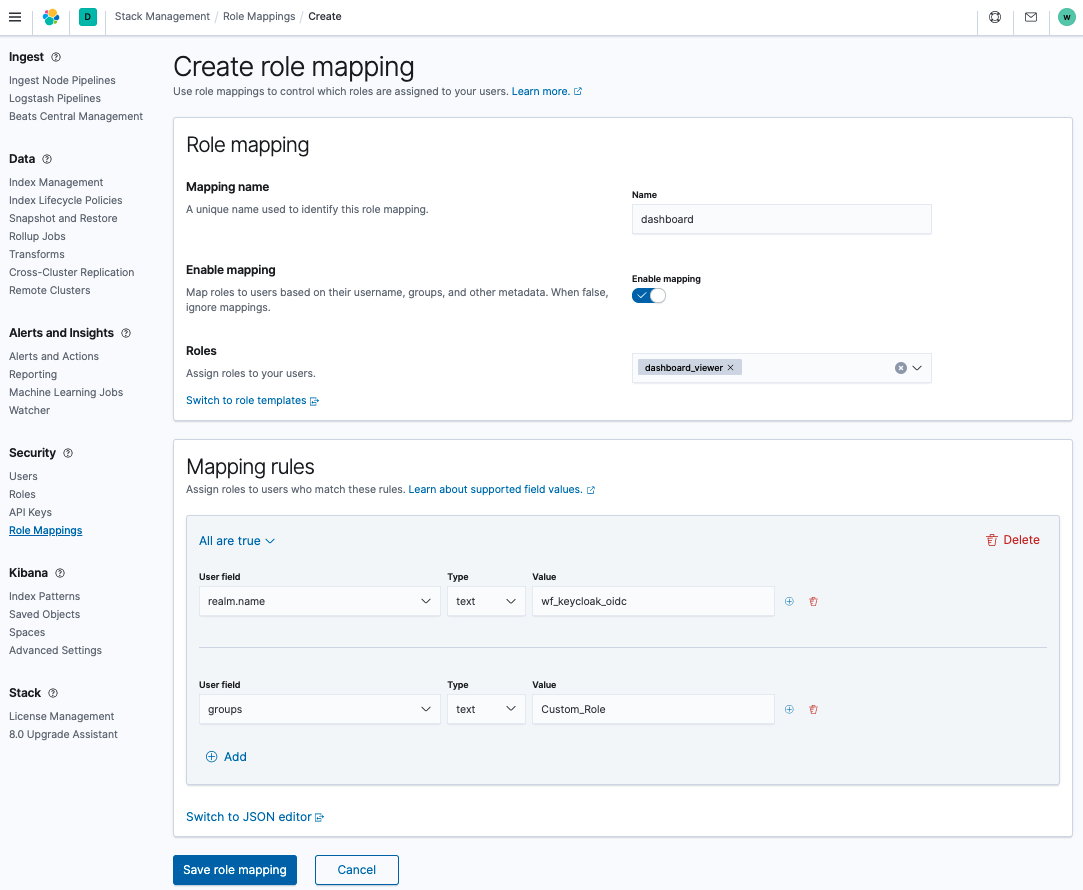
Click Save role mapping.
For additional information, refer to the Kibana role management guide.