Bridger XG connector
The Bridger XG connector enables integration between the LexisNexis Bridger system and the Tara or Evelyn AI Agents.
Installation
To obtain an Asset Bundle (zip archive) containing the required Bridger XG connector version, contact your account manager or the Support team. Once you have the Asset Bundle, upload it to Control Tower following the installation instructions.
You must have your own LexisNexis Bridger Insight XG license to communicate with the system.
Configuration
To configure the Bridger XG connector, complete the following steps:
In Control Tower, do the following based on the Work.AI version you are using:
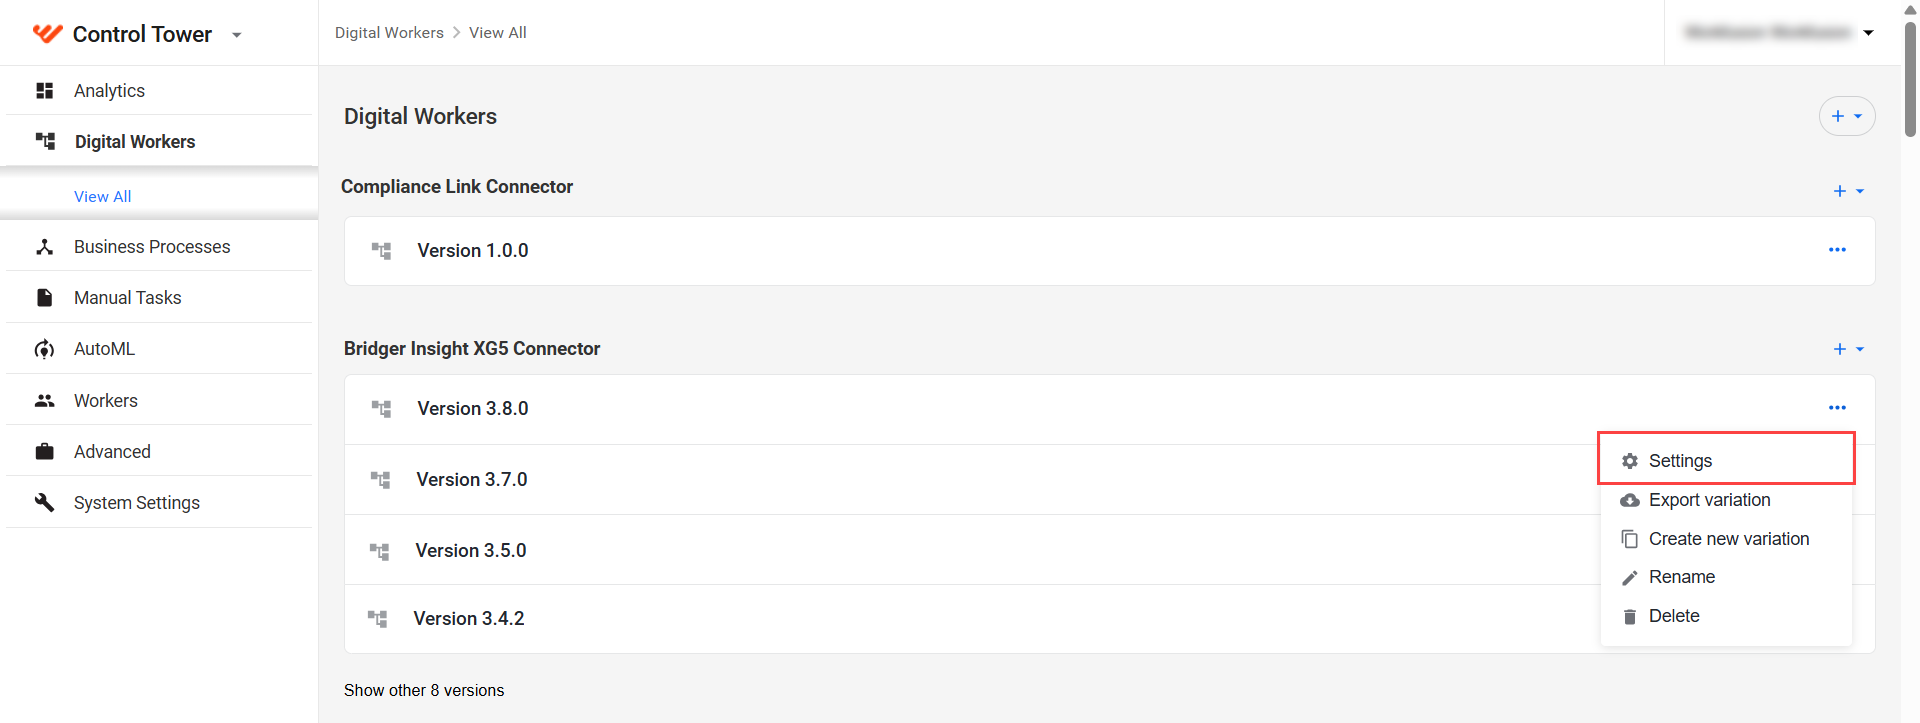
For Work.AI versions up to v10.2.9: go to the Digital Workers page, find Bridger Insight XG5 Connector, open the Actions menu next to the connector variation, and click Settings.
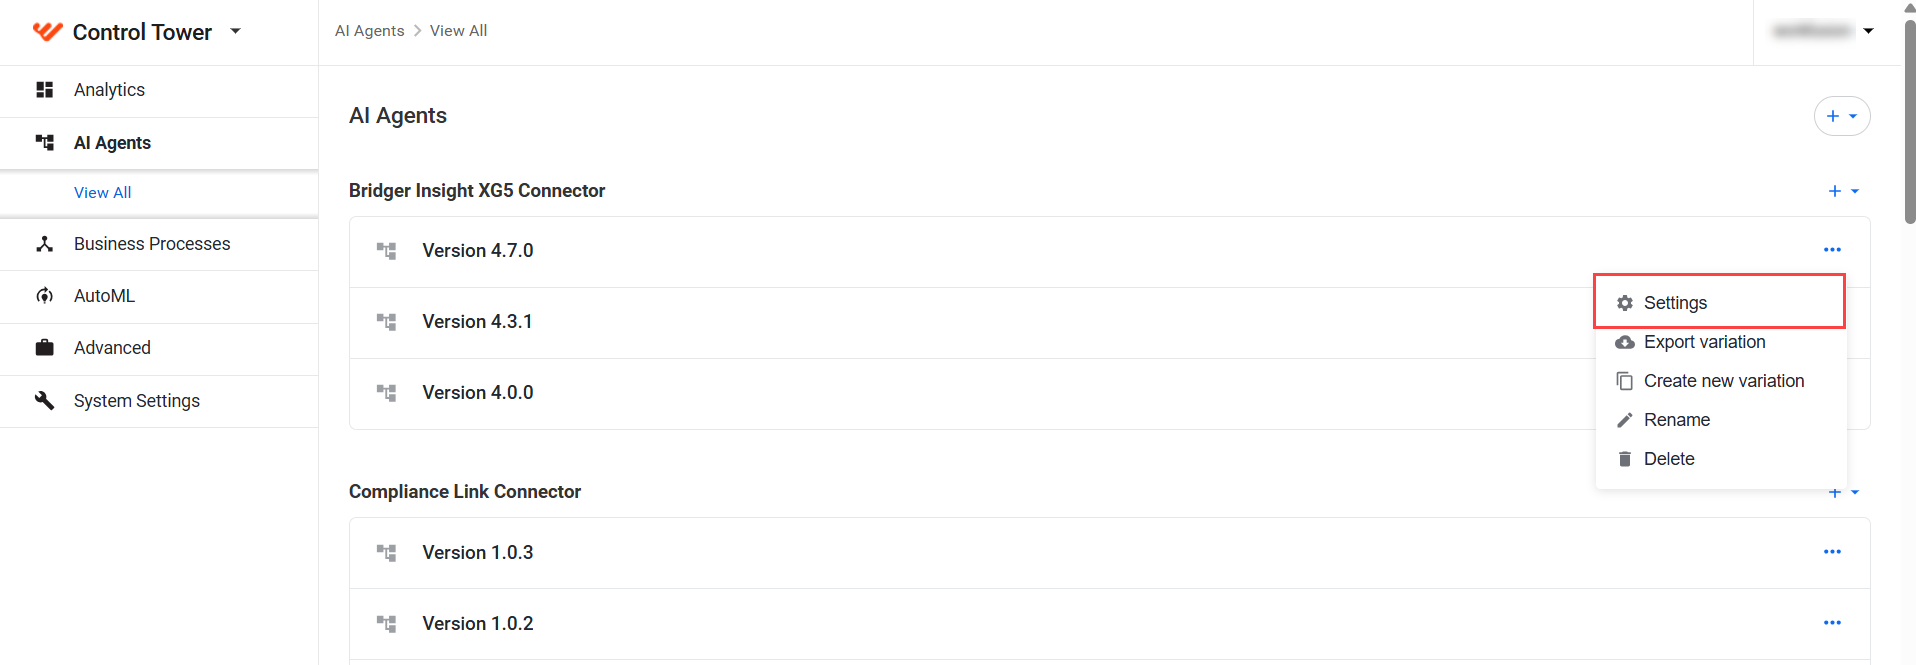
For Work.AI v10.3+: go to the AI Agents page, find Bridger Insight XG5 Connector, open the Actions menu next to the connector variation, and click Settings.
On the General tab, configure the following settings as needed:
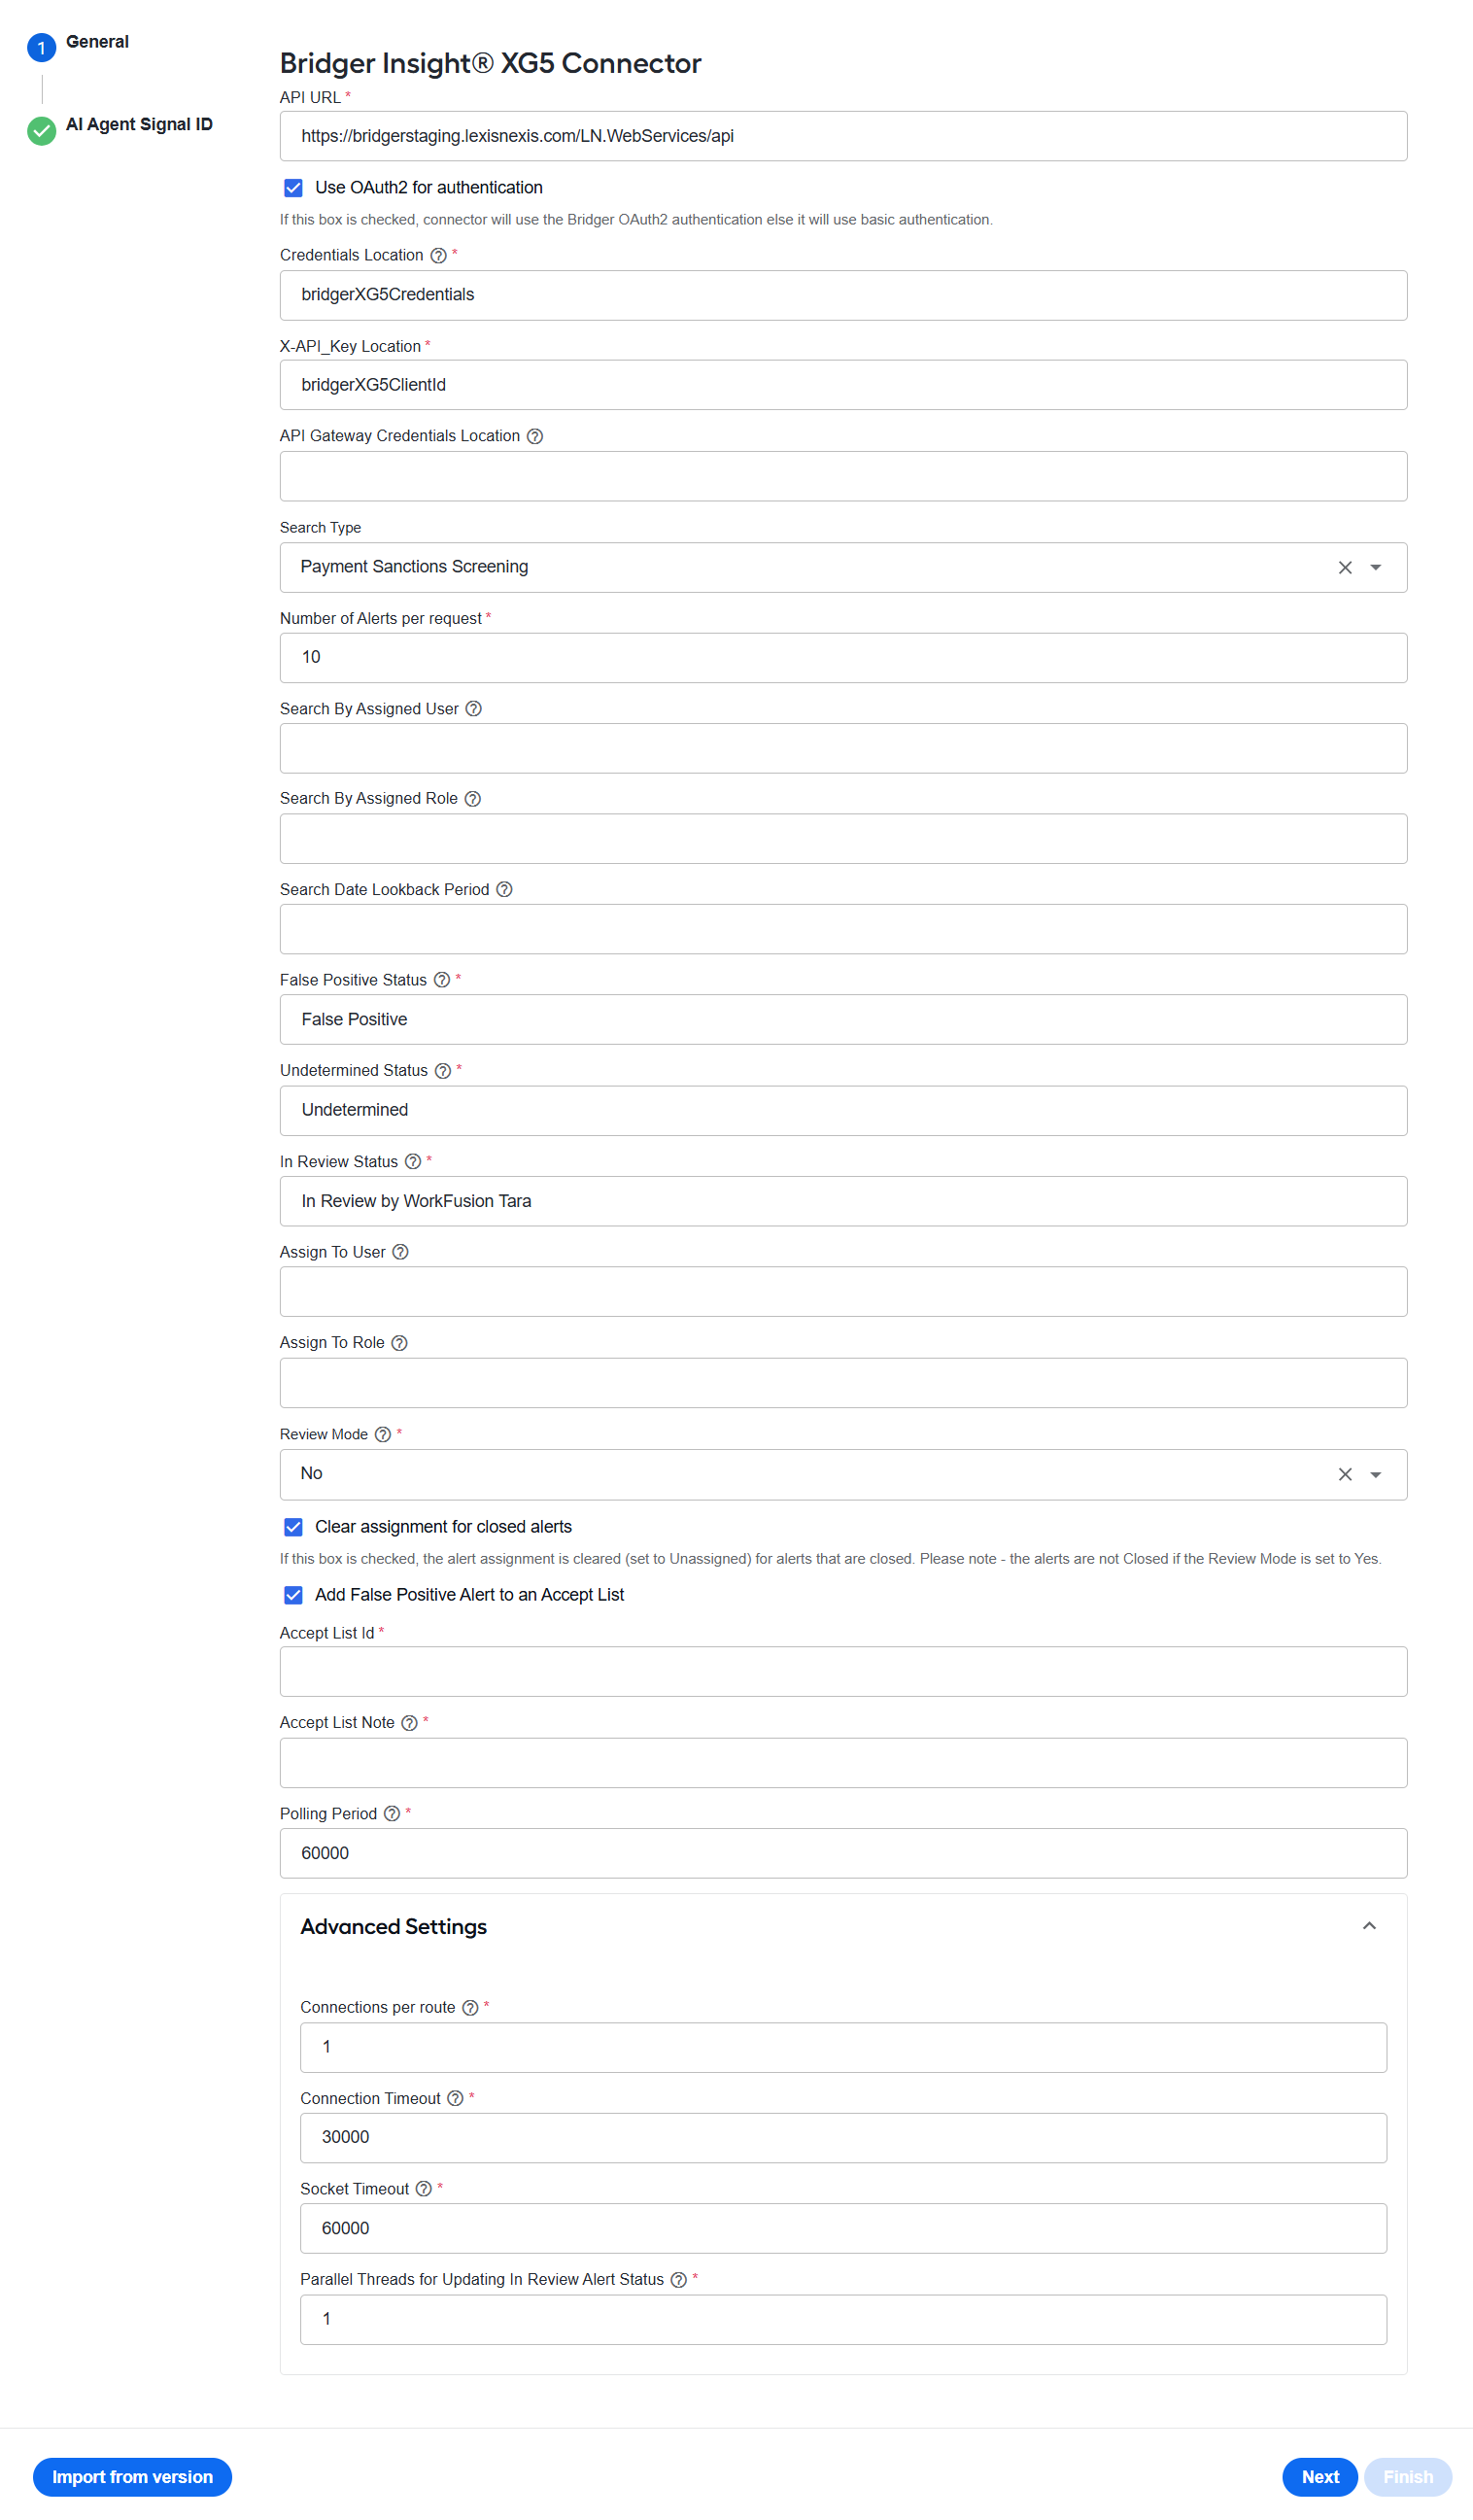
API URL. Enter the common endpoint for all REST services.
Use OAuth2 for authentication. Select the option to use OAuth 2.0 for obtaining the access token.
Credential Location. Define a secret entry for the credentials used to access Bridger.
Key: Bridger XG username
Value: Bridger XG password
X-API-Key Location. Define a secret entry that stores the LexisNexis secret key required to access a specific client via the REST API.
If Use OAuth2 for authentication is selected:
Key: Bridger XG X-API-Key
Value: Bridger Client Secret
If Use OAuth2 for authentication is not selected:
Key: Bridger XG Client ID
Value: Bridger XG X-API-Key
API Gateway Credentials Location. Enter a secret entry that stores the API Gateway credentials. If provided, the credentials are used to generate a base64-encoded basic authentication token, which is then appended to the Bridger token, separated by a comma.
Search Type. Select Payment Sanction Screening for Tara or Names Sanction Screening for Evelyn, depending on which AI Agent will use the connector.
Number of Alerts per request. Define how many alerts are retrieved in each Retrieve Open Alerts request. For instance, if there are 100 alerts and the setting is
10, the system makes 10 calls with 10 alerts per request. The maximum value is100.Search By Assigned User. If left blank, alerts are retrieved across all users. If set, only alerts assigned to that user are retrieved during the Retrieve Open Alerts call.
Search By Assigned Role. If left blank, alerts are retrieved across all roles. If set, only alerts assigned to that role are retrieved during the Retrieve Open Alert call. The setting cannot be used if Search By Assigned User is configured.
Search Date Lookback Period. If left blank, the search includes alerts regardless of date. If set, the system looks back X days from the current date and uses that as the start date for the Retrieve Open Alerts call. For example, if today is 3/14/2026 and the value is 7 days, the start date is 3/7/2026, and the system retrieves alerts newer than 3/7.
False Positive Status. Enter the value configured in your Bridger client. The status is used in the Update Alert Status call when a false positive decision is applied.
Undetermined Status. Enter the value configured in your Bridger client. The status is used in the Update Alert Status call when no decision is applied.
In Review Status. Enter the value configured in your Bridger client. The status is used for alerts that require further review and is applied in the Update Alert to In Review call.
Assign To User. If left blank, no user is assigned in the Update Alert Status call. If set, the specified user is assigned when the decision is applied.
Assign To Role. If left blank, no role is assigned in the Update Alert Status call. If set, the specified role is assigned when the decision is applied.
Review Mode. If set to Yes, false positives are sent to another user for review. If set to No, false positives are automatically resolved without manual review.
Clear assignment for closed alerts. Select the option to automatically clear alert assignments when alerts are closed in the Bridger system.
Add False Positive Alert to an Accept List. Select the option and set Review Mode to No to automatically add false positive alerts to a predefined accept list.
Accept List Id. Enter the internal identifier of the accept list in the Bridger system. Retrieve this ID using the
/ListMaintenance/SearchListsAPI via Postman.Accept List Note. Provide the note text used when an alert is added to the accept list.
Polling Period. Specify the delay (in milliseconds) between each check for open alerts in Bridger.
Configure the advanced settings if required:
Connections per route. Define the maximum number of connections per request to Bridger.
Connection Timeout. Set the timeout (in milliseconds) for establishing a connection. A value of
0means no timeout (infinite).Socket Timeout. Set the timeout (in milliseconds) for waiting for data or the maximum period of inactivity between consecutive data packets. A value of
0means no timeout (infinite).Parallel Threads for Updating In Review Alert Status. Define the number of parallel threads used to update the intermediate status of alerts in Bridger.
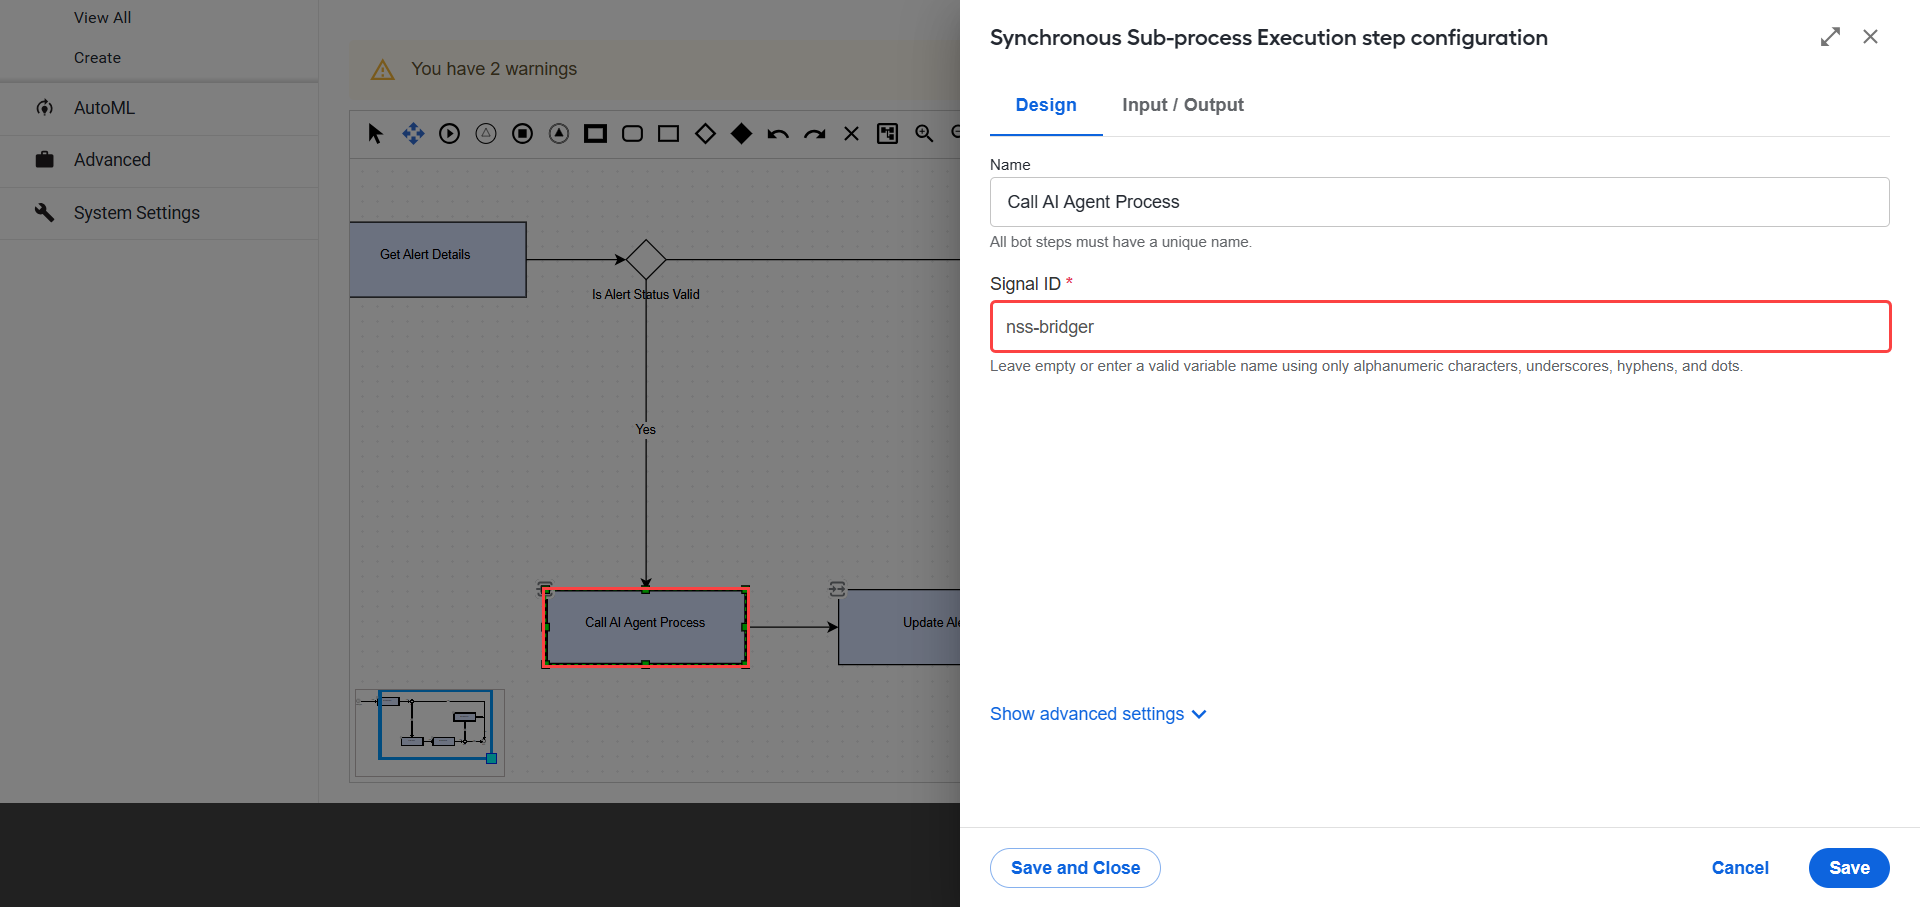
On the AI Agent Signal ID tab, in the Signal ID field, specify the signal ID for the AI Agent that receives the results.
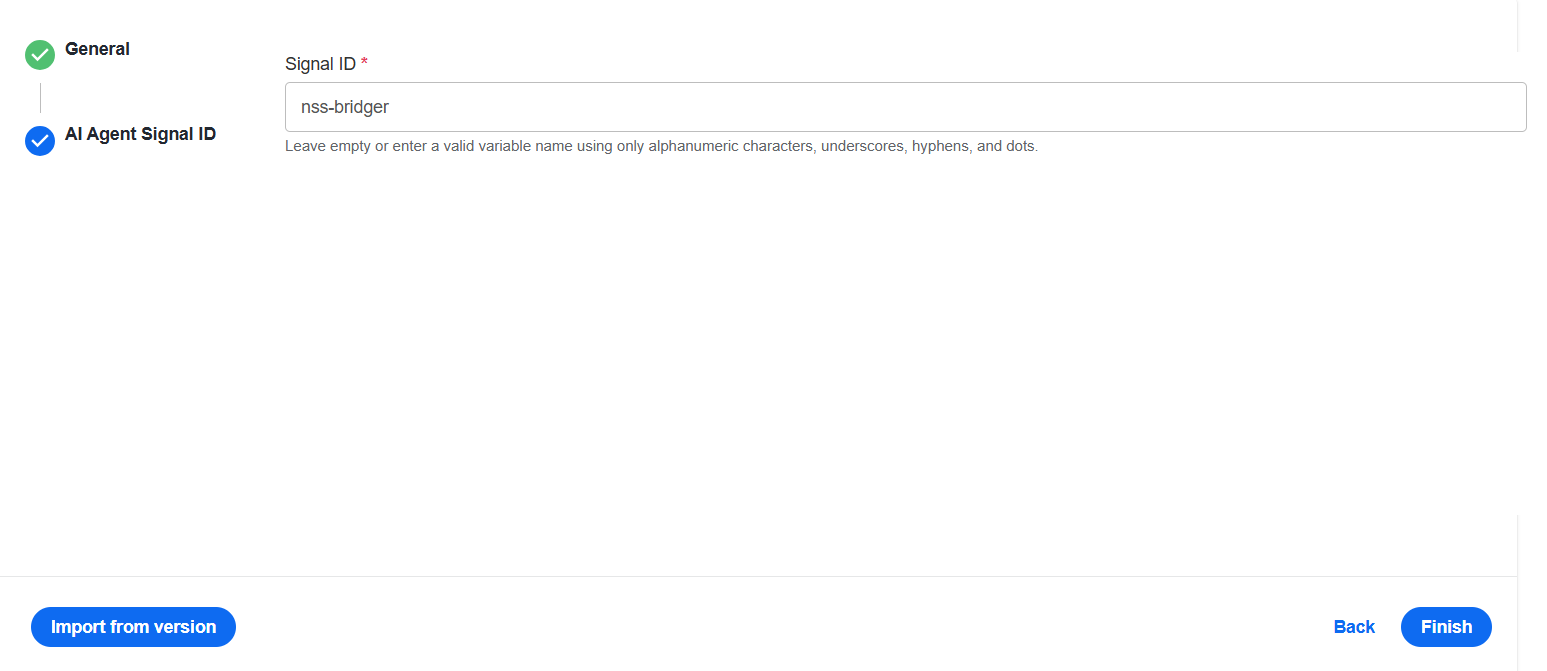
Click Finish to save your changes.
Set rate limit
The Bridger XG connector has a rate limit per account, not per user. For development environments, the limit is two requests per second.
To prevent HTTP 429 errors, adhere to the following requirements:
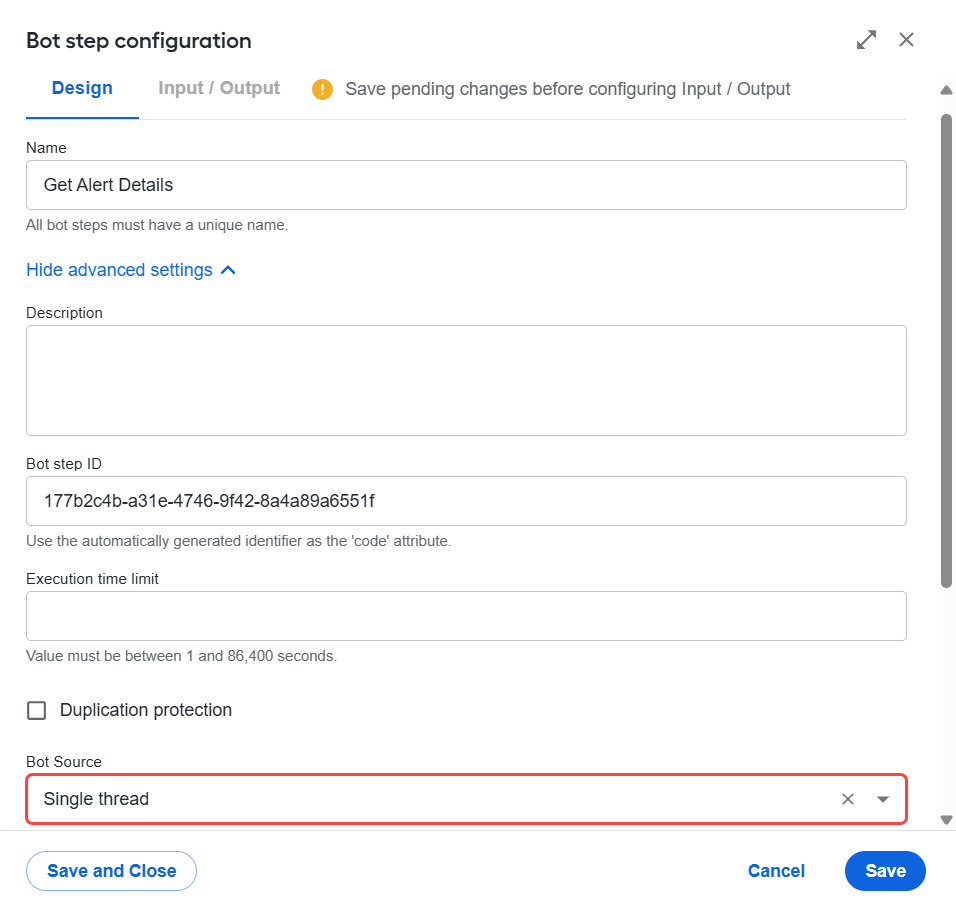
Configure each bot step to run using a single thread.
Ensure the Connections per route value equals the number of concurrent requests per Bridger endpoint.
Workflow
The Bridger Insight XG5 Connector Business Process handles each open alert as follows:
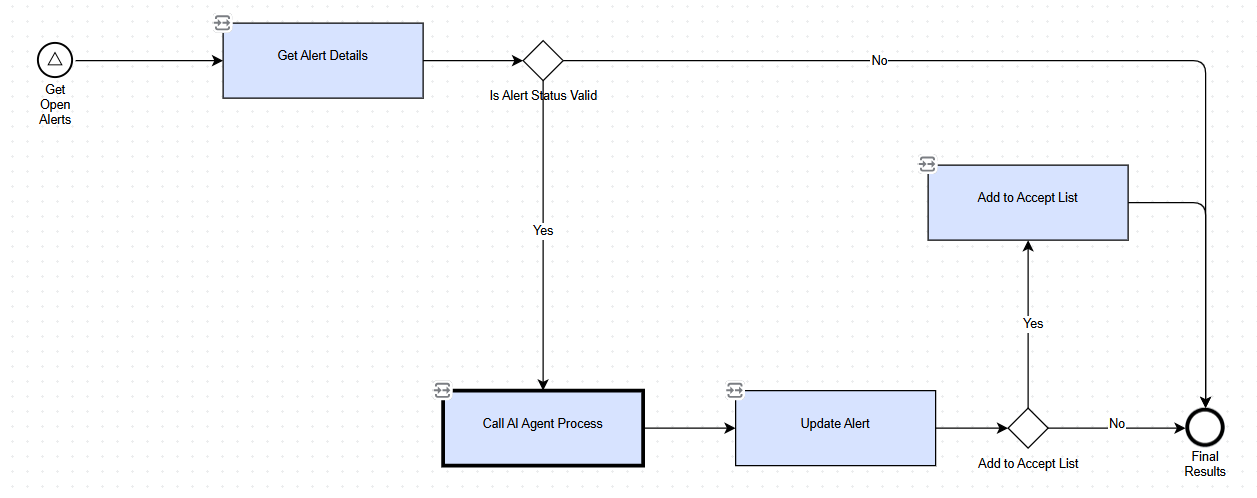
Get Open Alerts starts the workflow for each retrieved open alert.
Get Alert Details retrieves the alert information.
Is Alert Status Valid checks whether the alert can be processed. If the status is not valid, the workflow proceeds directly to Final Results.
Call AI Agent Process sends an alert with a valid status to the configured Tara or Evelyn AI Agent based on the specified signal ID.
Update Alert updates the alert in Bridger based on the AI Agent's response.
Add to Accept List determines whether the updated alert should be added to the configured accept list. If required, the alert is added before the workflow proceeds to Final Results. Otherwise, the workflow proceeds directly to Final Results.