
Design Manual Task
The image below describes the general flow of designing a Manual Task.
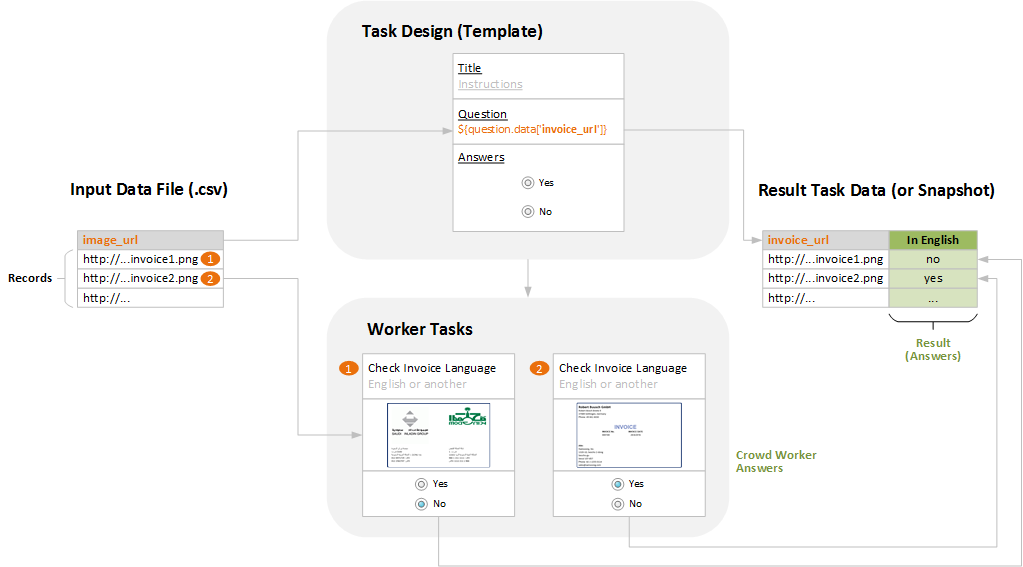
For designing a Manual Task, Control Tower (CT) offers Task Designer providing the means to edit a task structure, description, look and feel, and answers.
Acess Task Designer
To access the Task Designer, go to the CT main menu and select Manual Tasks > View All. In the Manual Task list on the left, click the name of the task where you want to add a specific design and go to the Design tab.
Alternatively, to access the Task Designer, use the Manual Task creation flow: select Manual Tasks > Create or click Create Manual Task > select a Use Case, and go to the Design tab. For details, read the Create Manual Task article.
On the displayed Task Designer page shown below, the main panel on the left side comprises a WYSIWYG editor. The side panel on the right is reserved for adding and configuring a relevant task section.
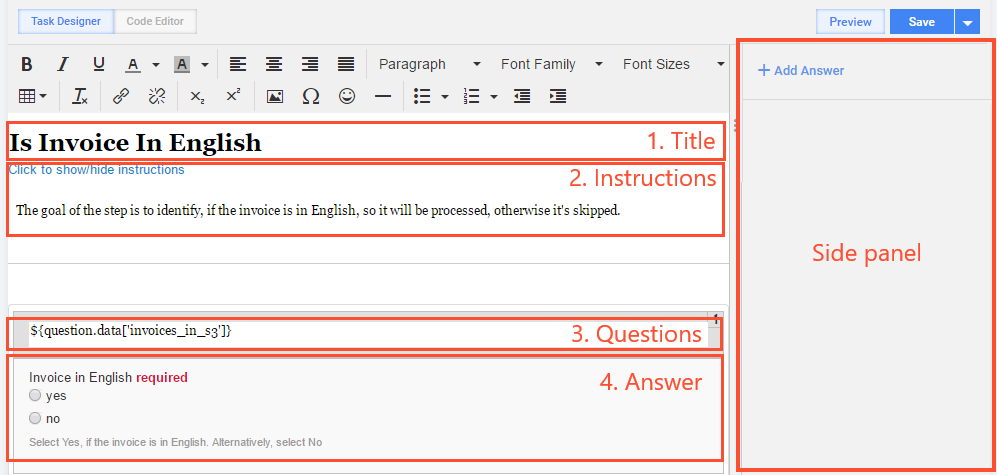
The Task Designer layout above can significantly vary depending on the selected Use Case. Possible variations are as follows:
- section order changed
- sections missing
- new sections created
- styles changed
Edit Manual Task design
To edit a Manual Task design, follow the instructions below:
- Click any space inside a target section—Title, Instructions, Question, or Answer.
- On the main or the side panel, act as described in the table below.
- To check the updated task design, click the Preview button.
- Save the updated design if needed.
The table below lists actions and content types for each Task Designer section.
| Section | Main panel actions | Side panel actions | Common or per Record* |
|---|---|---|---|
| Title | Type Rich Text | Help text, no actions required | Common |
| Instructions | Type Rich Text, show and hide Instructions and Tests | Add or edit, delete, re-order Instructions, Tests, and FAQs | common |
| Question | Type Rich Text, type Data Elements in the following format: ${question.data['element name']} or delete them | Insert Data Elements | Text—common; Data Elements—per Record |
| Answer | No actions required | Add or edit, delete, and re-order Answers and Sub Answers | Answer Types—common; Answers—per Record |
* The last column indicates whether the section content is common for all records in a Manual Task or unique for each Record.
tip
When designing a Manual Task, try not to copy and paste a formatted text directly from MS Word or other advanced text editors because these insertions can significantly increase the task size and slow down its loading. If you want to copy and paste a text, use simple text editors (NotePad++, Sublime Text) and format it in IA Cloud.
To modify styles and sections, see the Manual Tasks guide.
Use WYSIWYG editor
You can use the WYSIWYG editor (TinyMCE) to format texts, insert links, images, tables, and lists into the Instructions or Question sections.

For a detailed description of the WYSIWYG editor, refer to the following aids:
Insert images
To insert an image, follow the steps below:
Set the cursor where you want the image to be displayed.
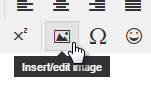
Click the Insert/Edit Image.
In the displayed dialog window, choose an image location.
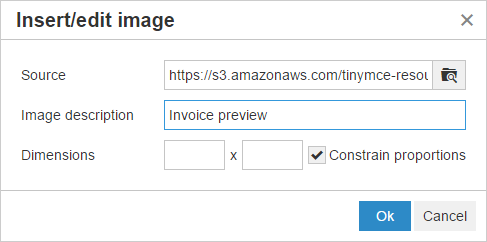
The following options are available:
- Paste a link to your image into the Image URL field, for example, https://yourserver.domain/images/your_image.jpeg.
- If your input file contains a column with image URLs, enter an appropriate Data Element into the Image URL field, for example,
${question.data['img_url']}. - To upload an image file from your local PC, click the icon to the right of the Image URL field. Click the Choose File button and then the Upload button. Finally, select the uploaded image from the gallery.
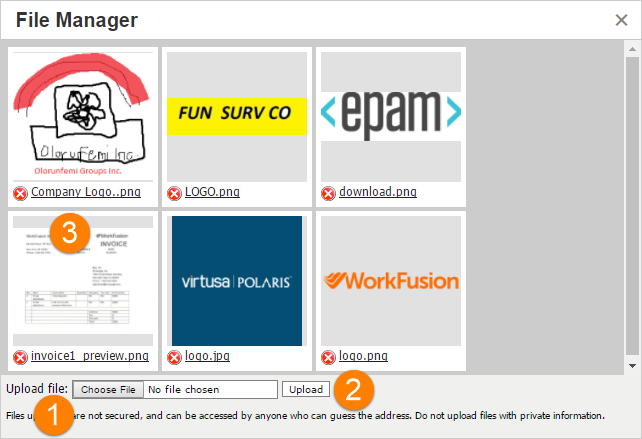
After uploading an image or entering the image URL, go to the Appearance tab to edit its formatting if needed.

Switch to Code Editor mode
By default, the WYSIWYG editor is set to the Task Designer mode enabling you to format all aspects of your questions, including links and images, without coding. Switching to the Code Editor mode allows you to edit the underlying source code (Javascript, HTML, CSS, and FreeMarker) used to render the Manual Task information.
For details on working with the code in the Code Editor mode, read the Manual Task guide for developers.
Preview design
Once input data is uploaded to your task, you can preview how it appears to workers in WorkSpace. For that, in the top right corner of the Task Designer page, click the Preview button. See a task preview example below.
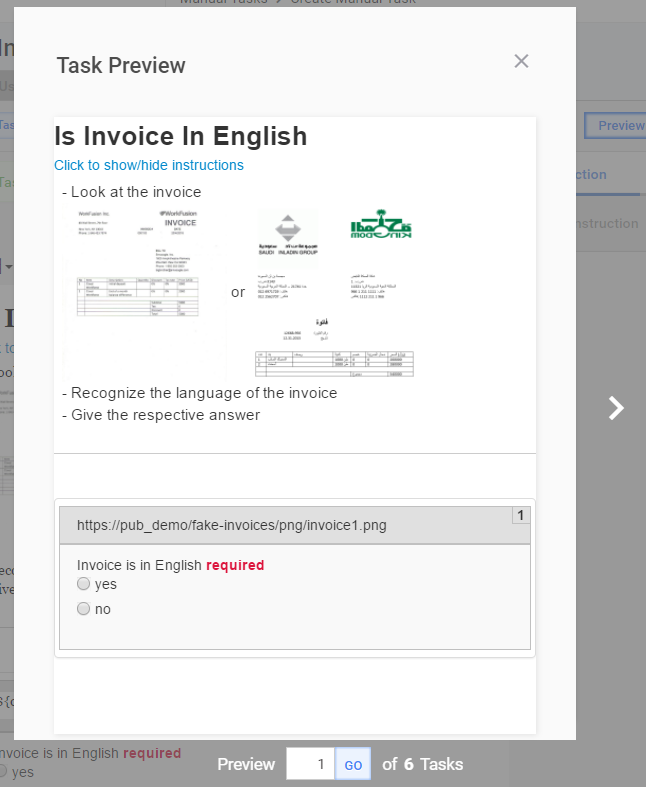
To switch from one preview to another if there is more than one, use the side arrow buttons or bottom navigation controls.
Save Manual Task design
Note that a task is not created until it is saved for the first time. When you finish designing a task, click the Save button.
tip
While designing a new task, it is advisable to click Save after each new element is added. Mind that tasks are NOT saved automatically.
Once you finished designing a Manual Task and saved it, proceed to set its Run parameters. For that, in the bottom right corner of the Task Designer, click the Next button or select the Run tab.
Save Manual Task as Use Case
To make a designed Manual Task reusable, create a Use Case out of it by clicking the Save as Use Case button.
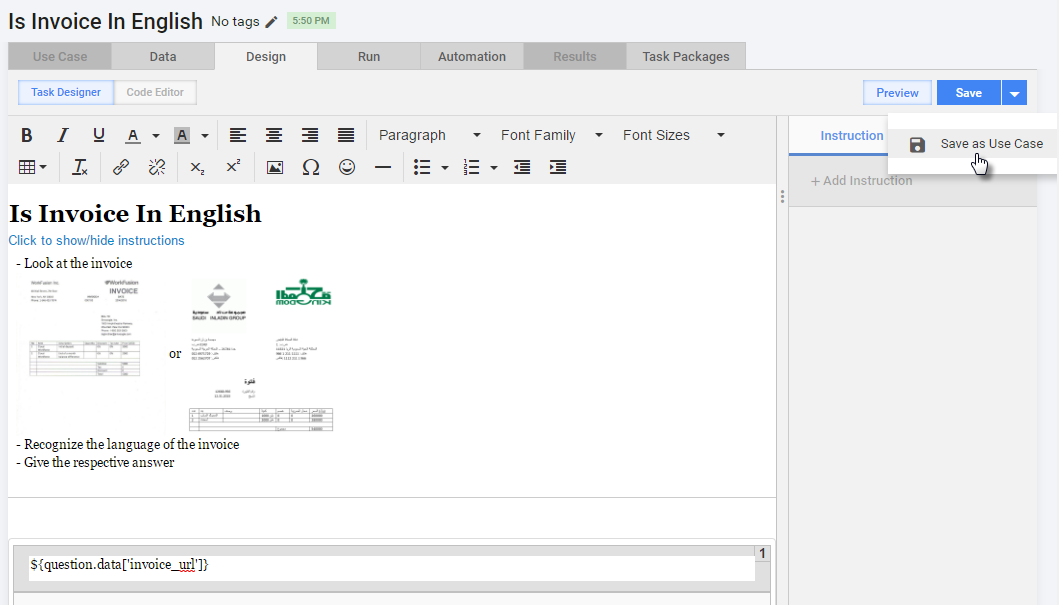
For details, refer to the Create Use Case from Task and Business Process article.