Configure OCR Bridge step and OCR providers
The OCR Bridge step lets you process documents in a Business Process (BP) and pass optical character recognition (OCR) results to the next step, such as a Model or labelling Manual Task step.
Add no-code OCR Bridge step to Business Process
To add a no-code OCR Bridge step to a BP, follow the steps below:
In an existing BP, navigate to the Workflow tab.
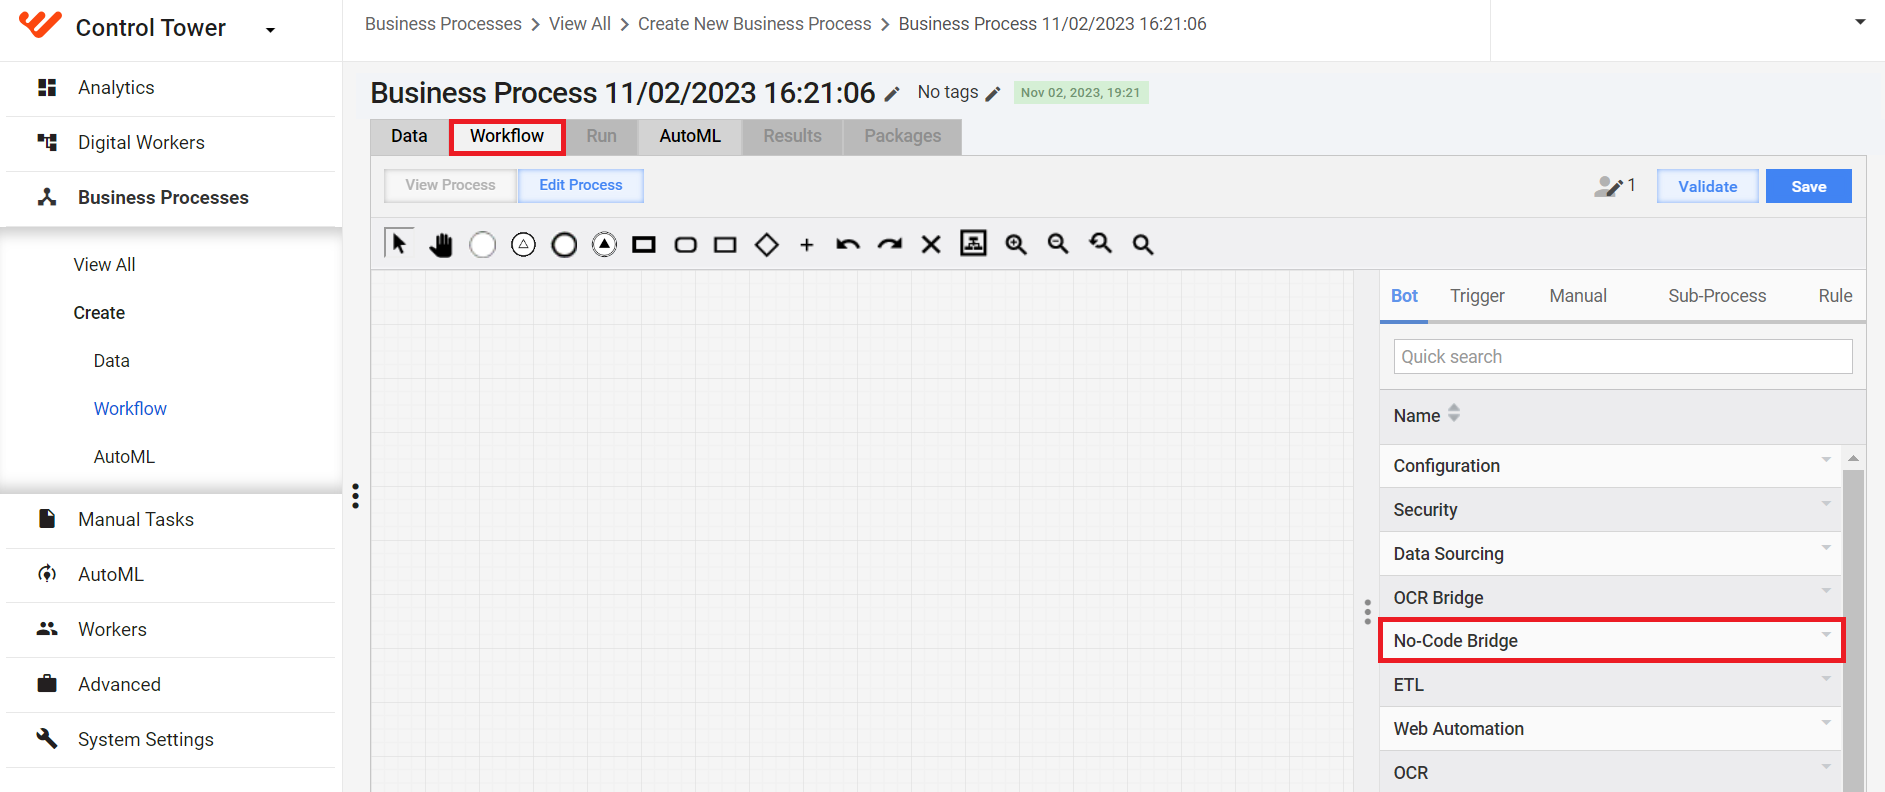
In the step panel on the right, select Bot and click No-Code Bridge to open the list of available no-code steps.
Add the No-Code OCR Bridge step to the Workflow Designer canvas in one of the following ways:
Reuse an existing step. Drag an existing No-Code OCR Bridge step from the panel on the right to the canvas. In this case, any changes you make to the step are applied across all BPs where the same step is included.
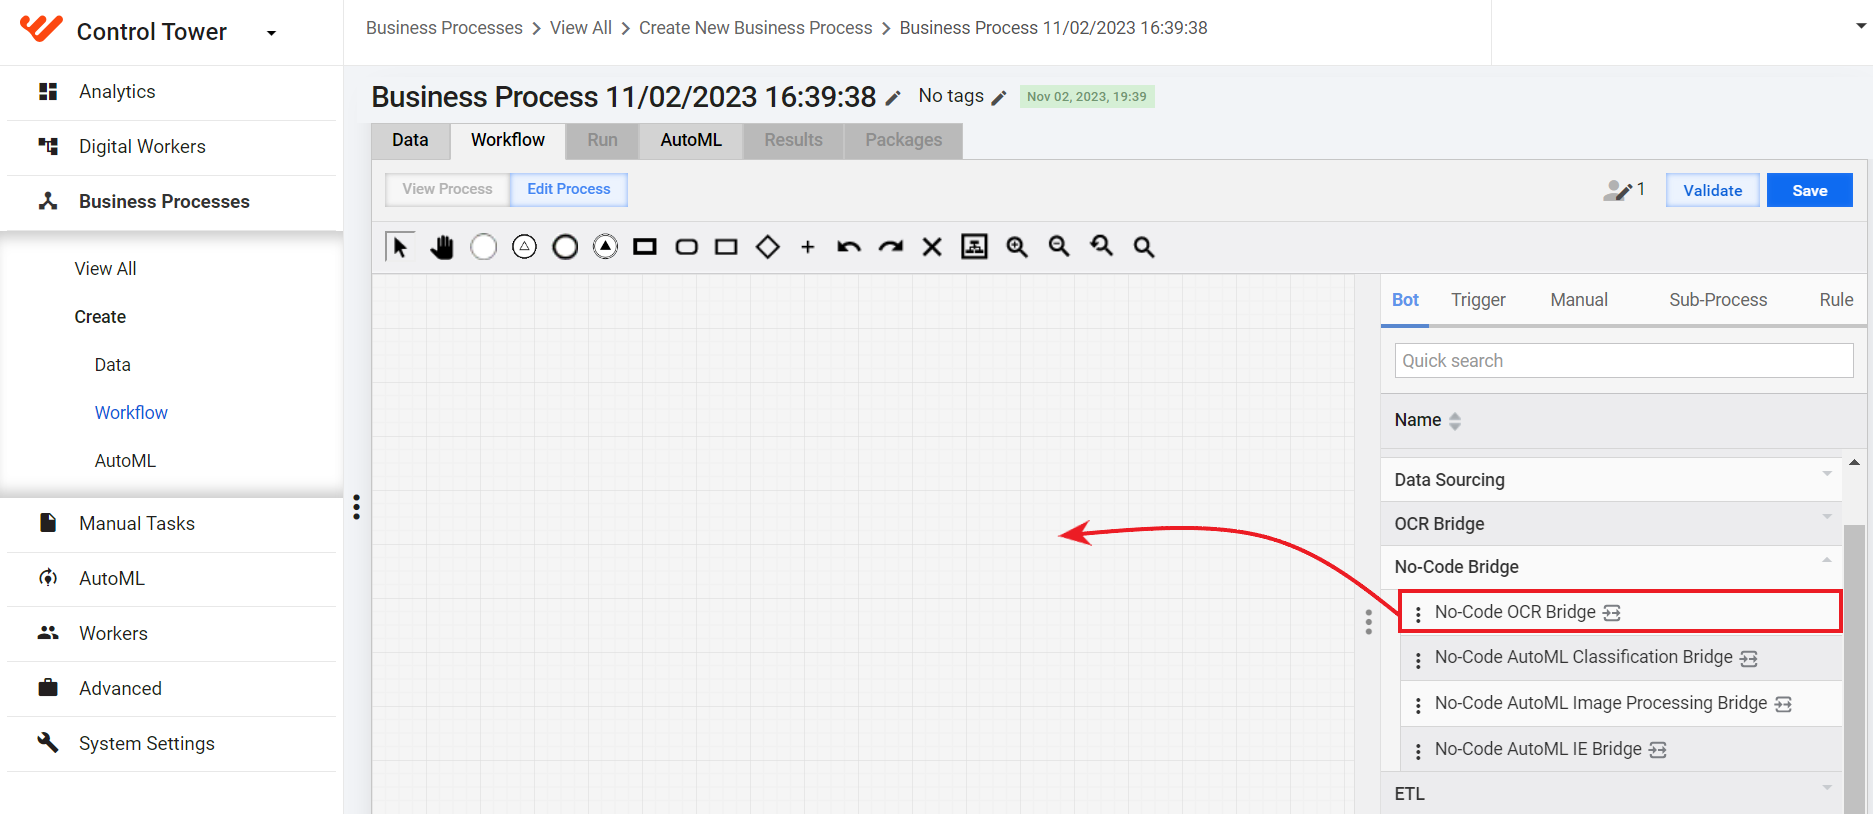
Copy an existing step. In the panel on the right, hover over the No-Code OCR Bridge step and click the displayed Copy button. As a result, you create an independent No-Code OCR Bridge step instance: the changes you make in the copy are not synchronized with the source.
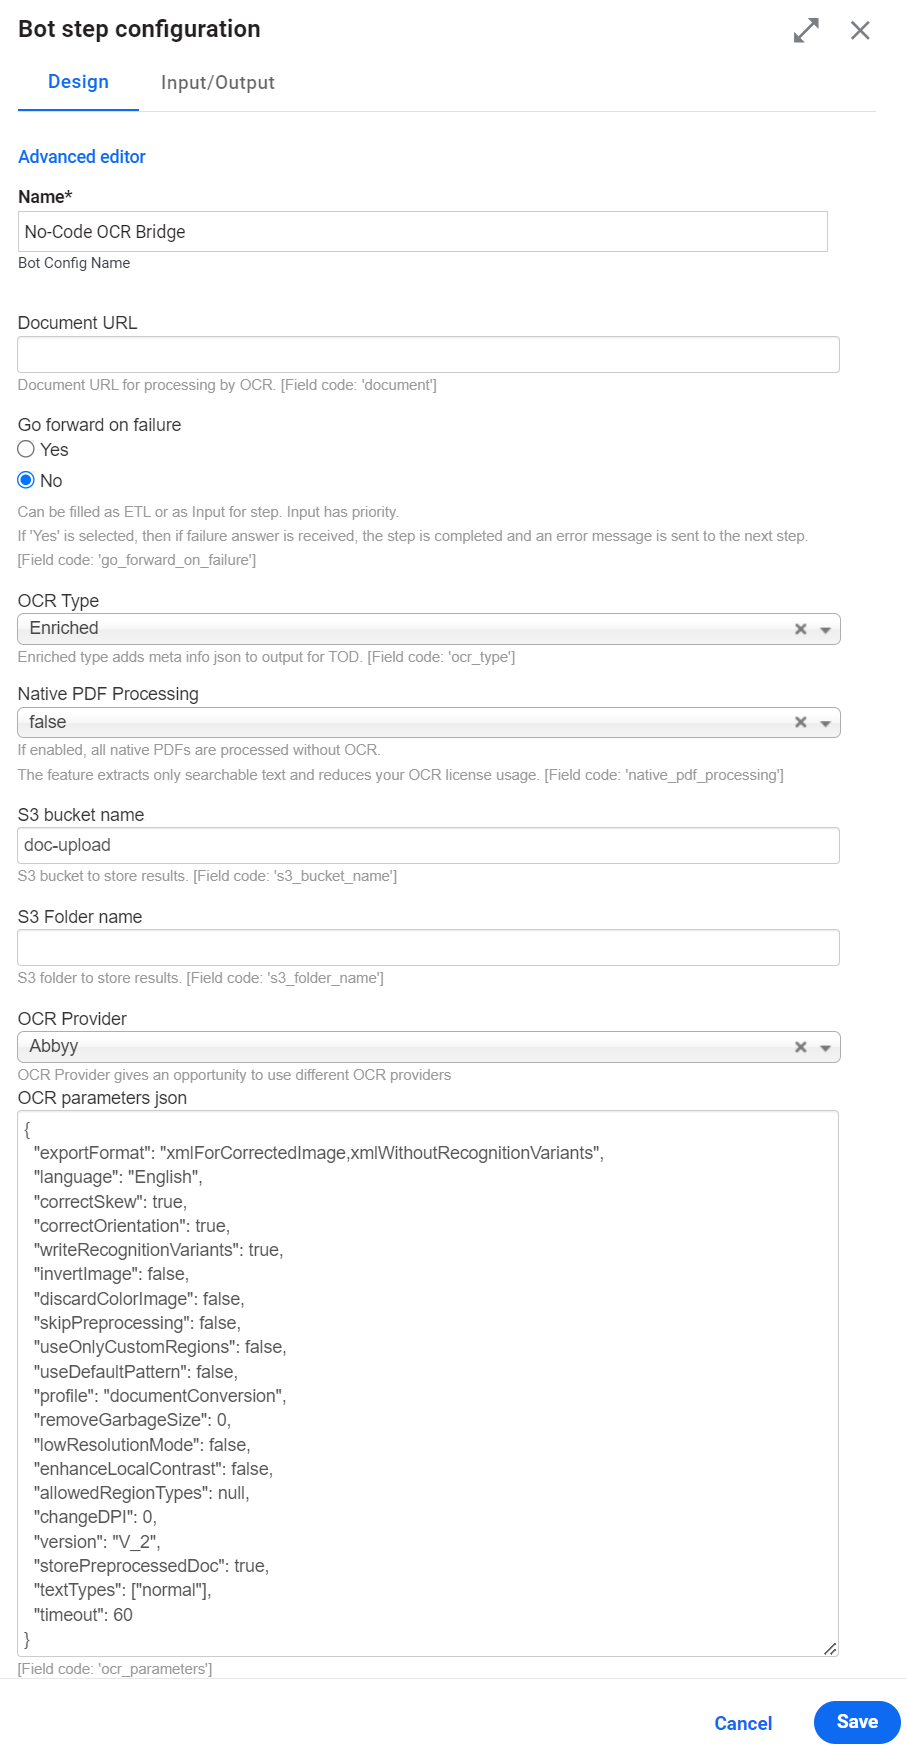
Double-click the step on the canvas and set a name for the step in the Name field.
Navigate to the Input / Output tab of the OCR step to set up the input and output contracts.
Note that if you set up the inputs and outputs, the whole BP becomes a schema-based one, and you will have to configure inputs and outputs for the rest of the steps in the same BP (if those are not configured yet). For details, see the guide.
Go back to the Design tab and configure the OCR step parameters.
Click Save to save the created OCR configuration.
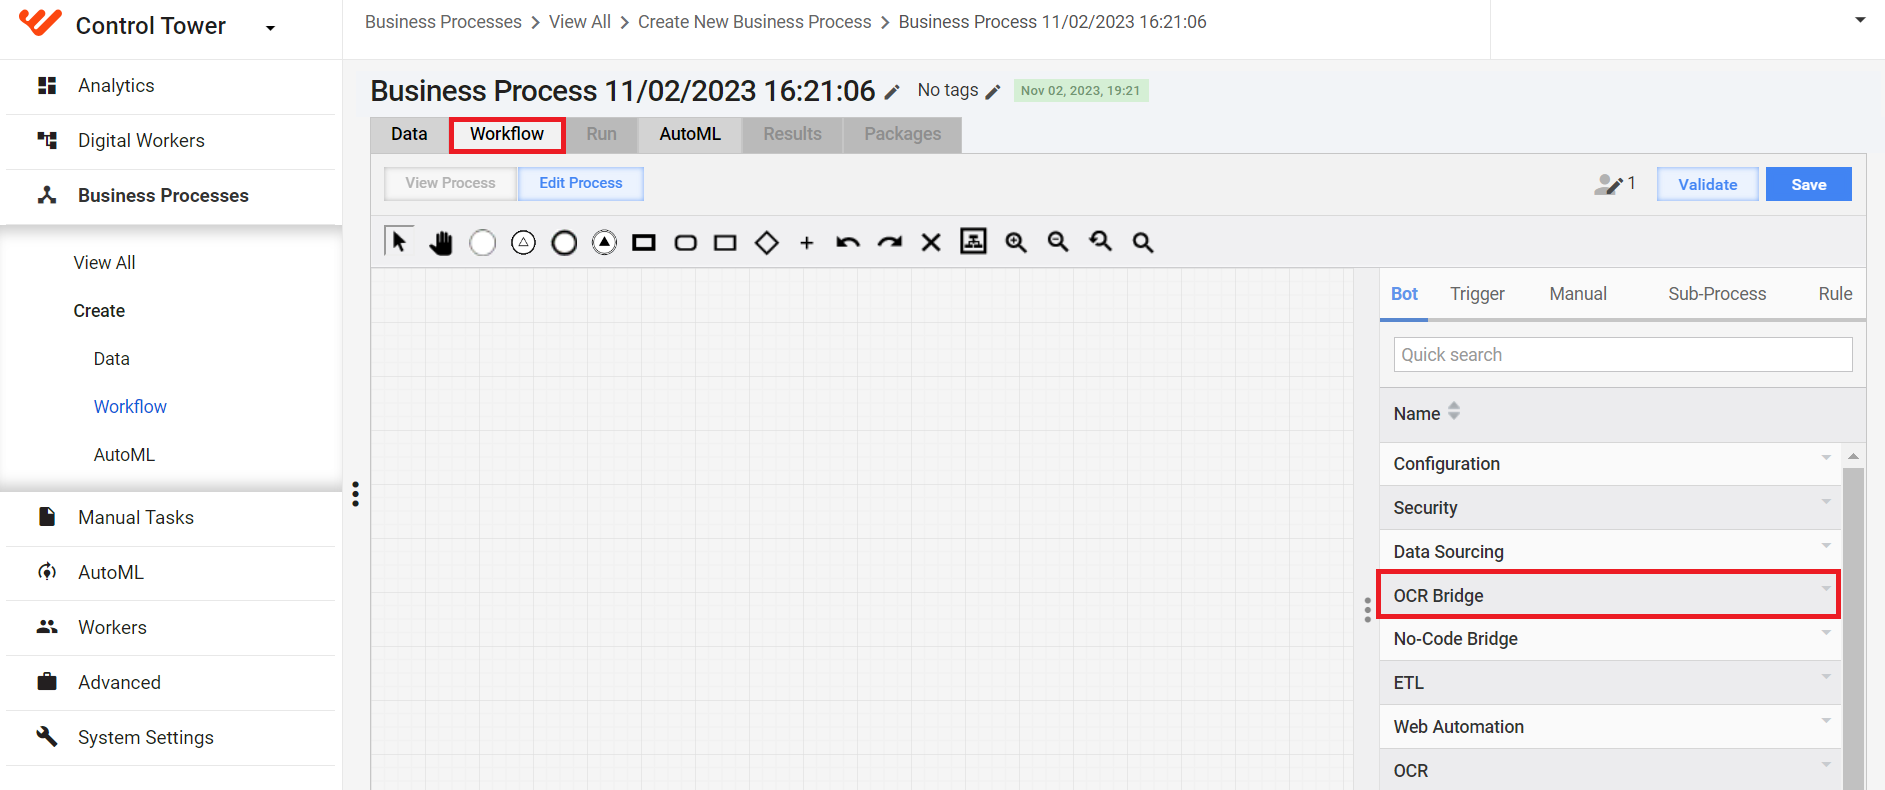
Alternatively, you can use a regular OCR Bridge step to set up the OCR processing in a BP. The setup sequence is similar to the one described above.
Configure OCR step
To configure an OCR step, double-click the step in the canvas to open the configuration window (if it is not open yet) and perform the following actions on the Design tab:
Set the OCR step input parameters.
Choose an OCR engine.
Set the OCR parameters corresponding to the chosen OCR engine.
Set step input parameters
| Parameter | Code | Default value | Description |
|---|---|---|---|
| Document URL | document_url | original_document_url | URL of the document to be processed by OCR |
| OCR Type | ocr_type | Enriched | OCR type values: Standard and Enriched (prepare output for a labelling Manual Task) |
| S3 bucket name | s3_bucket_name | doc-upload | S3 bucket to store results |
| S3 folder name | s3_folder_name | empty | S3 folder to store results |
| OCR Provider | ocr_provider | ABBYY | OCR provider:
|
| OCR parameters | ocr_parameters | See OCR JSON sample | See the OCR parameters. |
Choose OCR provider
To configure an OCR provider, choose one from the OCR Provider drop-down list and set the required paratemers. For details, read Set OCR parameters.
Work.AI supports the following OCR providers:
- ABBYY
- Azure AI Document Intelligence
- Google Vision
For providers other than ABBYY, mind the following considerations:
If you select Google Vision or Azure AI Document Intelligence, check that the default configuration includes the following parameters:
In the OCR Type field, choose Enriched.
In the OCR parameters json box, update the settings as follows:
exportFormat:xmlForCorrectedImage,xmlWithoutRecognitionVariantswriteRecognitionVariants:trueskipPreprocessing:falsestorePreprocessedDoc:truetimeout:60
Note: if any of these settings are not configured as listed, OCR throws an exception.
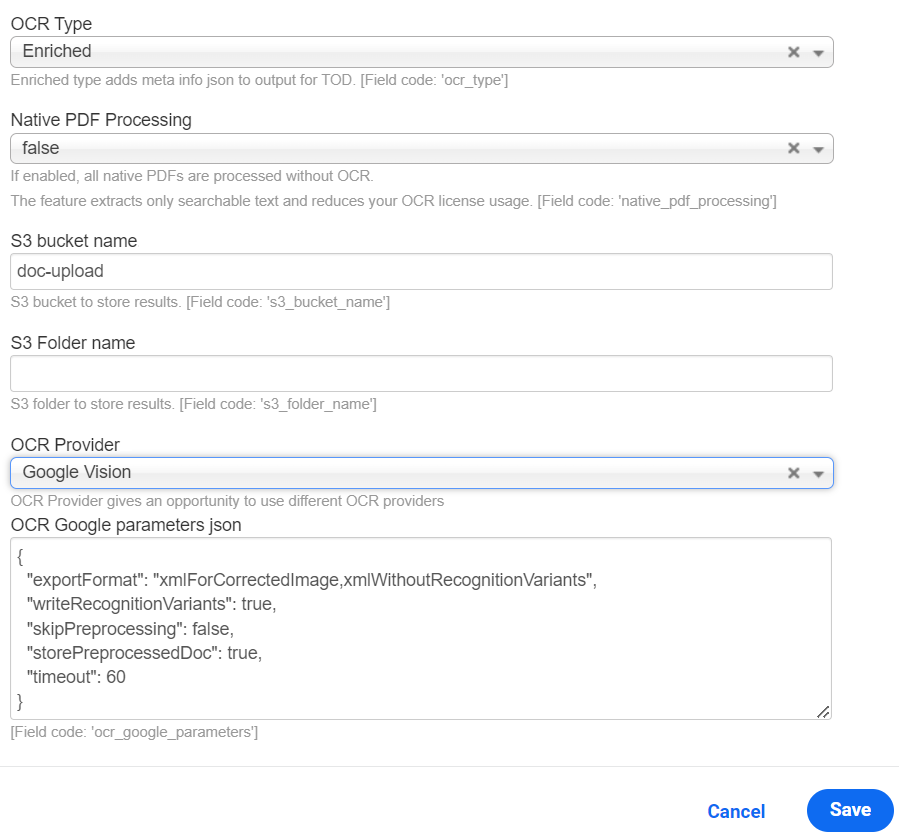
To use Google Vision or Azure AI Document Intelligence, set up additional Secrets Vault credentials.
Set Secrets Vault credentials
The Work.AI platform does not manage Google secret keys and Azure credentials, so you must add them using one of the methods described below.
Method 1. New installation
As you install Work.AI, set the following properties in config.yml:
ocr_google_keyocr_azure_passwordocr_azure_endpoint
ocr_google_key must contain a Base64-encoded JSON Google key. Otherwise, escaping issues can occur in Ansible. If you pass the key as JSON or as separate properties, the private key can cause issues because it contains \n new lines and vault values with new lines.
Method 2. Existing installation
Set or create the same properties in config_overrides.yml in /opt/workfusion/wf_installer.
To override the parameters in the backup, run:
./install.sh install installer-backup -e @config_overrides.yml
To restart the OCR service with the parameters from config_overrides.yml, run:
./install.sh configure ocr -e @config_overrides.yml
If the steps above cause errors, make sure that the Ansible vault pass and key properties are set:
cd /opt/workfusion/wf_installer

export ANSIBLE_VAULT_PASS=$(cat config_overrides.yml | grep ansible_vault_password | cut -c 25- | tail -1)

export ANSIBLE_PRIVATE_KEY_FILE="id_rsa"
Set OCR parameters
| Parameter | Values | Description |
|---|---|---|
exportFormat | OCR API export format. You can define multiple export formats using a comma as a separator: xml,xmlForCorrectedImage. Mind that, for correct processing of a labelling Manual Tasks, you cannot use more than three export formats. | |
txt | Default export format. | |
xml | Contains characters or words along with their location in the original document (coordinates or frames). | |
xmlWithoutRecognitionVariants | The same as xml but does not contain character-related data. | |
xmlForCorrectedImage | The same as xml, except the location is taken from a processed or adjusted document. | |
pdfSearchable | ||
html | ||
language |
| Predefined language. You can also define multiple languages using a comma as a separator: English,German,Polish. |
correctSkew | boolean | The page skew is detected and automatically corrected. |
correctOrientation | boolean | The page orientation is detected. If it differs from normal, it is rotated automatically. |
writeRecognitionVariants | boolean | Causes the xml and xmlForCorrectedImage formats to contain all variants of characters or words that OCR considers a possible recognition result. |
invertImage | boolean | Inverts images. |
discardColorImage | boolean | Leaves only the black-and-white plane in a prepared image. |
skipPreprocessing | boolean | Disables all preprocessing steps for a document. The default value is false. If you set to true, the convertTo and changeDPI parameters are disabled. |
useOnlyCustomRegions | boolean | Skips the original analyzing stage and extracts information from custom regions only. |
useDefaultPattern | boolean | If true, it requires applying the default pattern from the OCR application bundle. |
profile | documentConversion | Converts documents into editable formats. |
textExtraction | Extracts text from documents. | |
barcodeRecognition | Extracts barcodes. | |
removeGarbageSize | integer | Removes garbage from images: excess dots smaller than a specific size. Optional; valid value > 0 and -1 for the automatically detected garbage size. |
lowResolutionMode | boolean | Improves the recognition of images with low resolution. |
enhanceLocalContrast | boolean | Specifies whether the local contrast of an image should be increased. |
convertTo | none | Automatically detects the file type and conversion to TIFF before processing (only conversion to TIFF is supported). Accepts images: PDF, PNG, JPG, JPEG. |
changeDPI | integer [50 : 3200] valid range null or 0 for disable | Specifies a new value for the resolution, for example, changeDPI=300. The recommended resolution for a source image is 300 DPI for typical texts (10 pt or larger) and 400-600 DPI for texts in smaller fonts (9 pt or smaller). |
version | V_2 | ABBYY FRE 12 |
V_1 | ABBYY FRE 11 | |
storePreprocessedDoc | boolean | Specifies whether preprocessed documents should be saved in the data storage. |
textTypes |
| Specifies the type of the text in the document. You can define several text types using a comma as a separator: normal,matrix. |
timeout | integer | Sets the maximum allowed timeout in seconds for a single task execution by an OCR Worker. The timeout countdown starts when an OCR Worker starts executing a task. When the task execution exceeds the given timeout, the task is forcibly killed. If you do not set the value, the default value (0) is used, and your Business Process (BP) does not have time to process a task. |
If native_pdf_processing is set to true, the skipPreprocessing and convertTo parameters are disabled. Such parameters as changeDPI and storePreprocessedDoc take effect only on saving pages of an input PDF.
In case of issues with input data, see the Issues related to input data support guide.
OCR JSON sample
{
    "exportFormat":"xmlForCorrectedImage,xmlWithoutRecognitionVariants",
    "language": "English",
    "correctSkew": true,
    "correctOrientation": true,
    "writeRecognitionVariants": true,
    "invertImage": false,
    "discardColorImage": false,
    "skipPreprocessing": false,
    "useOnlyCustomRegions": false,
    "useDefaultPattern": false,
    "profile": "documentConversion",
    "removeGarbageSize": 0,
    "lowResolutionMode": false,
    "enhanceLocalContrast": false,
    "allowedRegionTypes": null,
    "changeDPI": 0,
    "version": "V_2",
    "storePreprocessedDoc": true,
    "textTypes": ["normal"],
    "timeout": 60
}
Review output
OCR Result: document processing results in the JSON format
Code:
ocr_resultExample:
{
    "originalDocument": "https://minio-host/doc-upload/1.pdf",
    "documents": {
        "xmlForCorrectedImage": "https://minio-host/doc-upload/bp-id/task-id/1- xmlForCorrectedImage.xml",
        "xmlWithoutRecognitionVariants": "https://minio-host/doc-upload/bp-id/task-id/1-xmlWithoutRecognitionVariants.xml"
    },
    "pageDetails": "https://minio-host/doc-upload/bp-id/task-id/preprocessed/links.json"
}
Task ID: the ID of an OCR task
- Code:
task_id - Example:
066416ed-20e8-4e96-9df1-7f7e133f1211
- Code:
Meta Info JSON extended info for the ToD Manual Task
- Code:
meta_info_json - Example:
{
    "pages": "https://minio-host/doc-upload/bp-id/task-id/preprocessed/links.json",
    "ocrXmlUrl": "https://minio-host/doc-upload/bp-id/task-id/1-xmlWithoutRecognitionVariants.xml",
    "imageUrl": "https://minio-host/doc-upload/1.pdf"
}- Code:
Process time: record process time in milliseconds
- Code:
_sys_ocr_process_time - Example:
24053
- Code:
See a JSON example for https://minio-host/doc-upload/bp-id/task-id/preprocessed/links.json below:
[
    {
        "imgUrl": "https://minio-host/doc-upload/bp-id/task-id/preprocessed/1.png",
        "charsUrl": "https://minio-host/doc-upload/bp-id/task-id/preprocessed/1.json",
        "height": 3300,
        "width": 2550,
        "charsCount": 2216
    }
]
To set your Java Native Worker to work with OCR Bridge step data, it is recommended to use the respective dependency from the WorkFusion's repository:
<groupId>com.workfusion.spa</groupId>
<artifactId>bridge-step-contracts</artifactId>
Using the library facilitates the implementation and reduces the time to production for such solutions.
Set up OCR REST configuration properties
| Property | Default value | Description |
|---|---|---|
execution.bridge.task.queue | exec.<CT_HOST>.result.ocr | Name of the OCR Bridge queue |
execution.bridge.prefetch.count | 100 | Prefetch count of the Bridge queue |
execution.bridge.thread.count | 20 | Count of threads for consuming messages of the Bridge queue |