AWS CloudFormation templates
Instead of manually provisioning AWS resources, which introduces the possibility of doing it inconsistently, or worse, reusing the same resources like Security Groups from other stacks, which sacrifices infrastructure agility and potentially raises numerous security issues, Workfusion designed and implemented a way to provision new resources which would comply with following requirements:
- Environment isolation
- Unified and single way to spawn AWS resources
- Repeat-ability
- Re-usability
- Transparency
- Incremental Infrastructure updates
- Infrastructure as code
There are three common templates:
- VPC
- SG
- EC2
The correct order of staging these templates is VPC > SG > EC2.
Create a new Virtual Private Cloud stack in the Cloudformation interface.
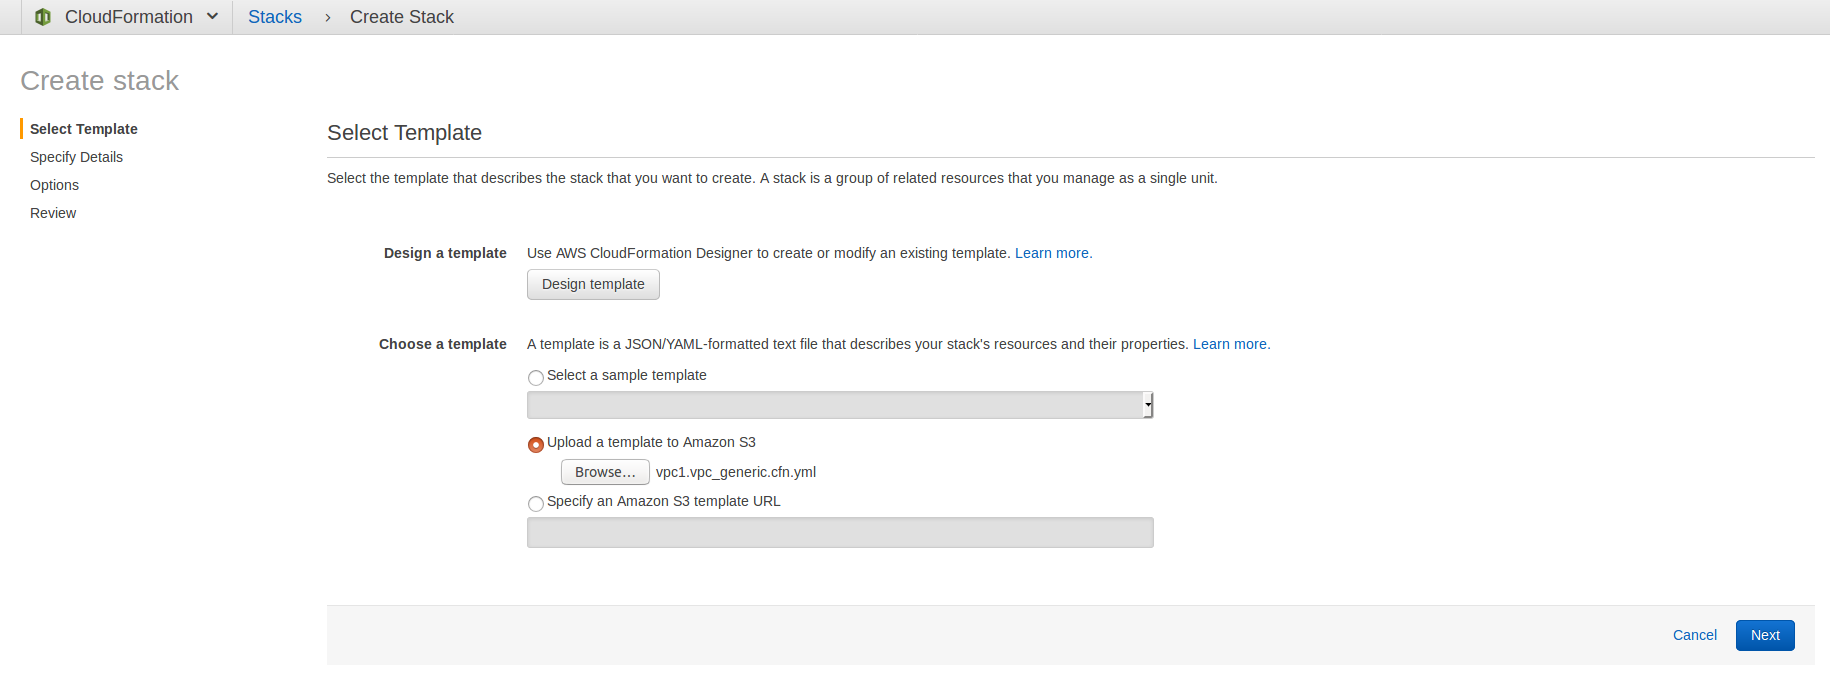
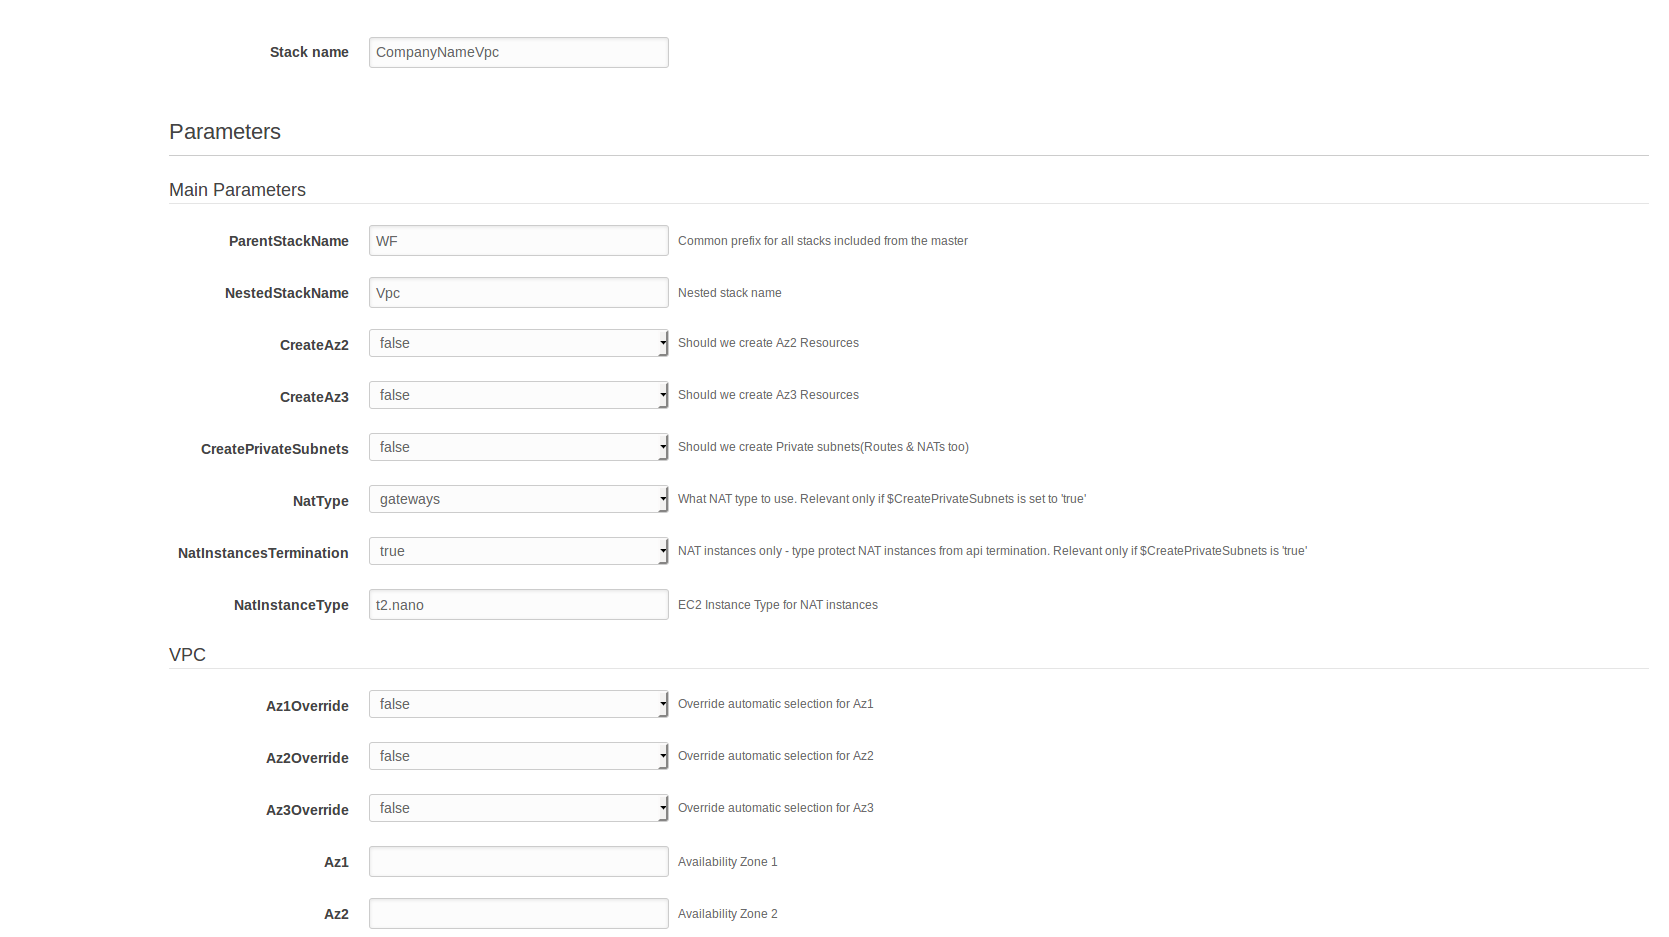
Fill in and set the fields below:
- Stack name: stack name, for example, CompanyNameVpc
- ParentStackName: parent stack name, for example, WF
- NestedStackName: nested stack name, for example, Vpc
- CreateAz2:
false - CreateAz3:
false - CreatePrivateSubnets:
false - NatType: gateways
- Az1Override:
false - Az2Override:
false - Az3Override:
false - VPCCidr: choose not their internal network range
All other fields are left default.
Create a new Security Groups stack in the Cloudformation interface.
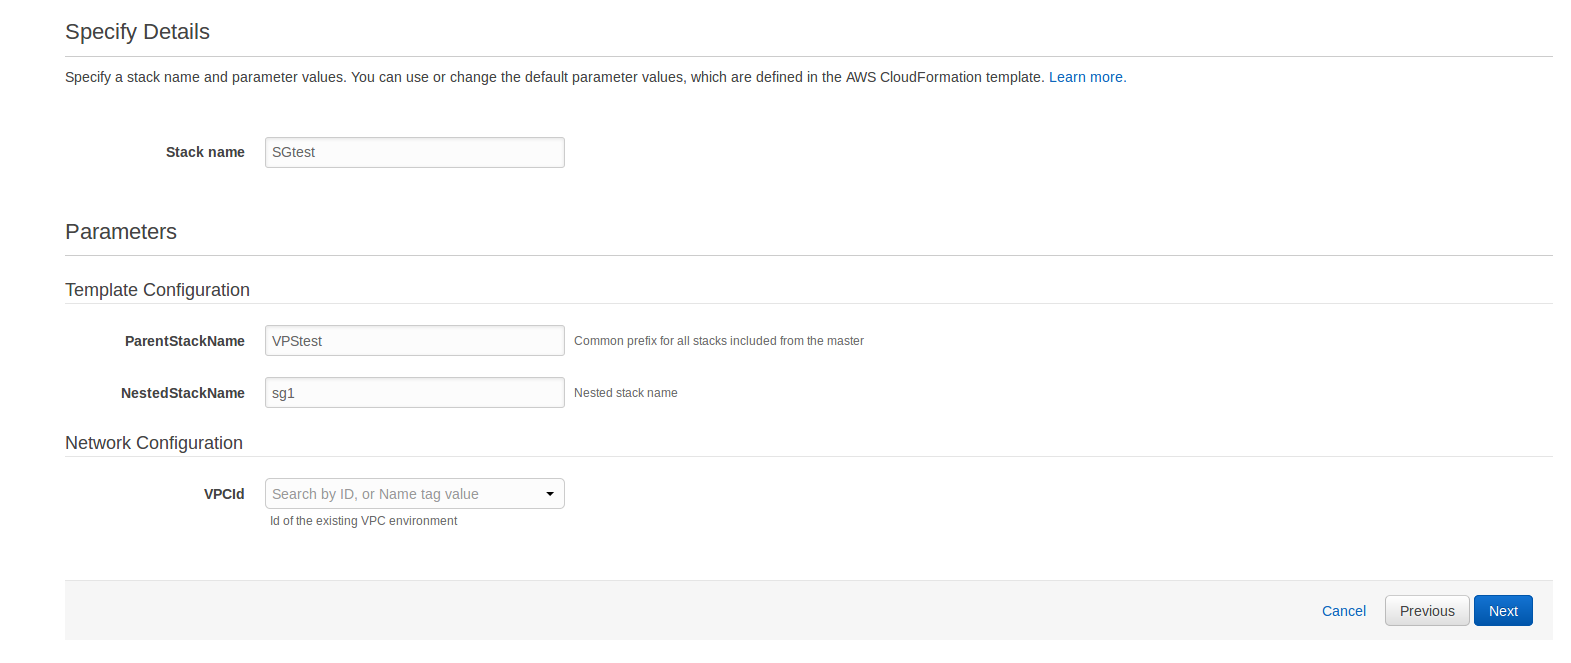
Fill in the fields below:
- Stack name: stack name, for example, CompanyNameSG
- ParentStackName: parent stack name, for example, WF
- NestedStackName: nested stack name, for example, Sg
- VPCId: choose your VPC ID
All other fields are left default.
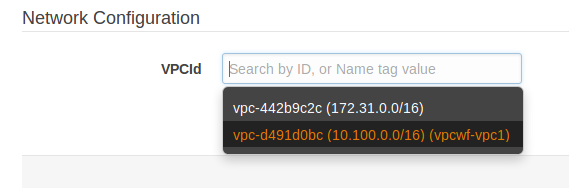
Create a new Elastic Compute Cloud stack in the Cloudformation interface, for example, for DB server. The step should be done for each server type, APP, DB, OCR, etc.
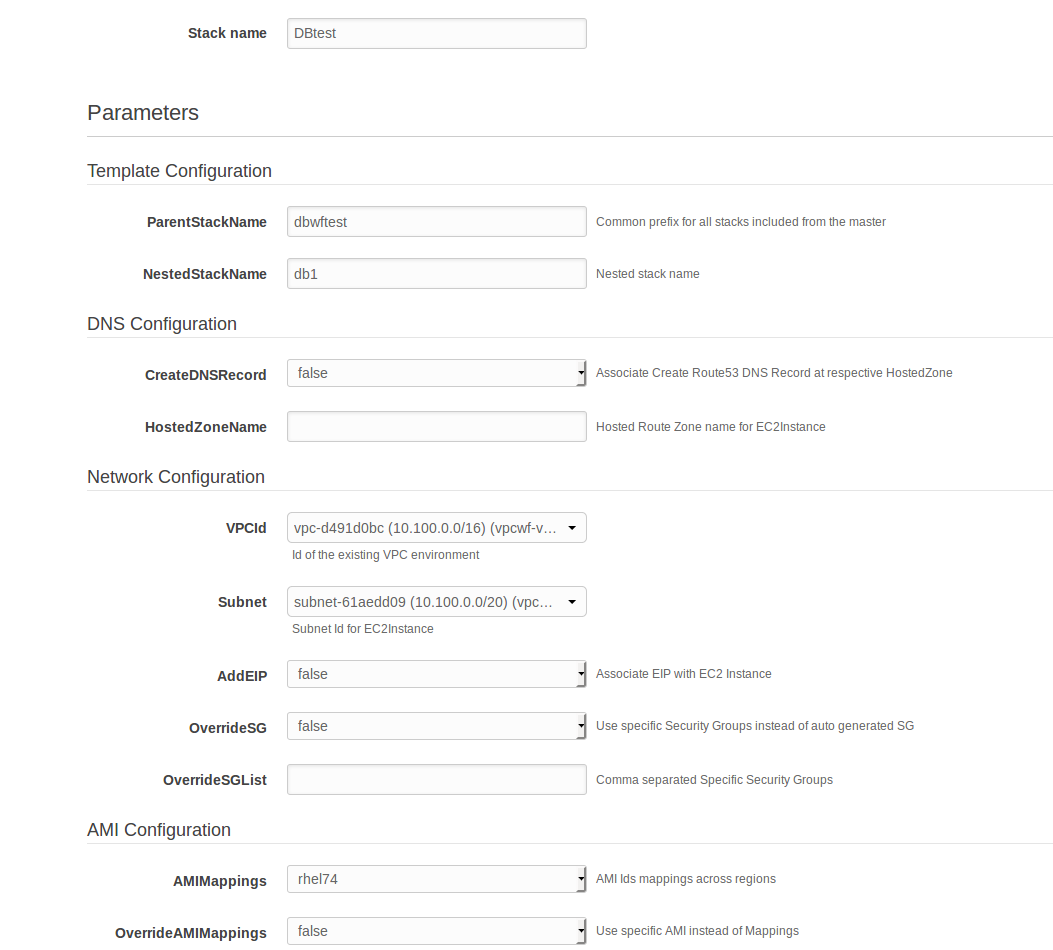
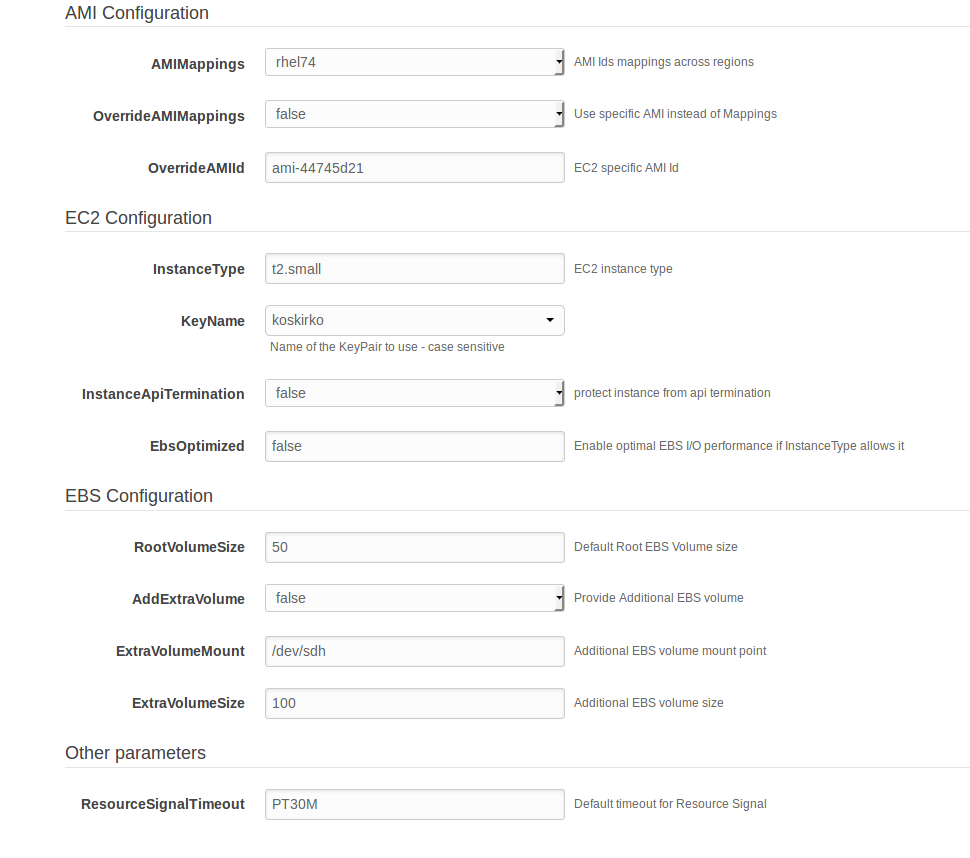
Fill in the fields below:
- Stack name: stack name, for example CompanyNameDB
- ParentStackName: parent stack name, for example, WF
- NestedStackName: nested stack name, for example, Db
- CreateDNSRecord:
false - VPCId: choose your ID
- Subnet: choose your VPC subnet
- AddEIP:
falseortrueif needed - OverrideSG:
false - OverrideSGList: choose your SG ID from SG stack
- InstanceType: choose the required size
- KeyName: choose your key
All other fields are filled in according to your server requirements.
For more information on instance types, see here.
Currently you can use those instance types for DEV and PROD.
DEV
| Role | CPU | MEM | HDD** | Type |
|---|---|---|---|---|
| DB | 4 | 16 | 1TB | m5.xlarge |
| APP | 8 | 32 | 250GB | m5.2xlarge |
| APM | 2 | 4 | 100GB | t2.medium |
| OCR | 4 | 16 | 250GB | m5.xlarge |
| VDS | 8 | 32 | 2TB | m5.2xlarge |
| VDS slave | 8 | 32 | 100GB | m5.2xlarge |
| RPA | 8 | 16 | 250GB | c5.2xlarge |
| BI | 4 | 16 | 250GB | t2.xlarge |
PROD
| Role | CPU | MEM | HDD** | Type |
|---|---|---|---|---|
| DB | 8 | 32 | 1TB | m5.2xlarge |
| APP | 8 | 32 | 250GB | m5.2xlarge |
| APM | 2 | 4 | 100GB | t2.medium |
| OCR | 8 | 32 | 250GB | m5.2xlarge |
| VDS | 8 | 32 | 2TB | m5.2xlarge |
| VDS slave | 8 | 32 | 100GB | m5.2xlarge |
| RPA | 8 | 16 | 250GB | m5.2xlarge |
| BI | 8 | 32 | 250GB | m5.2xlarge |
**HDD must be as a additional disk attached to a separate mount point.
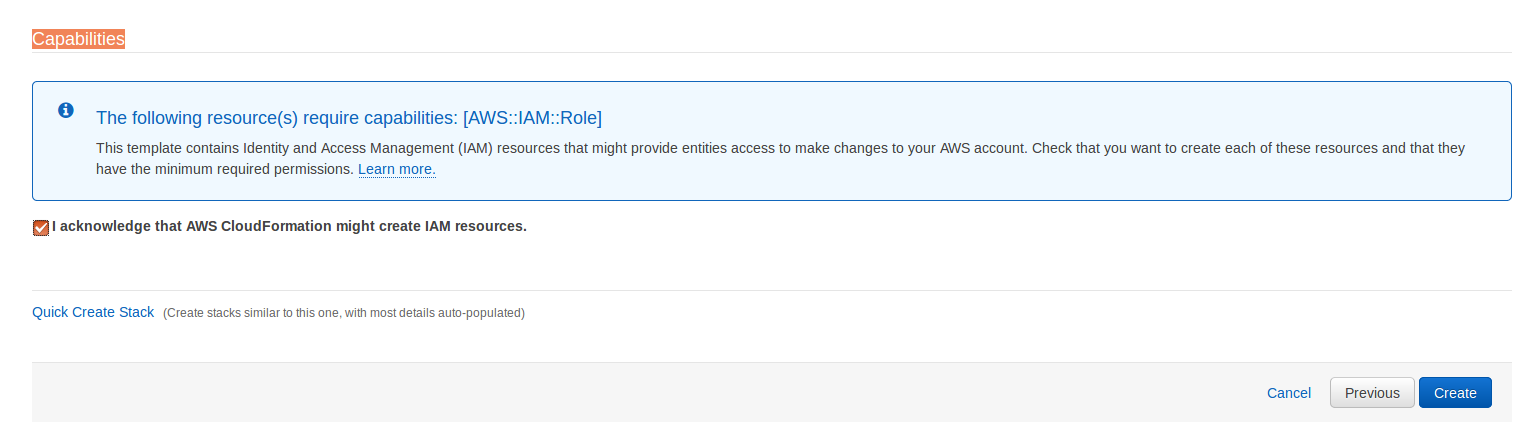
Apply the capabilities.