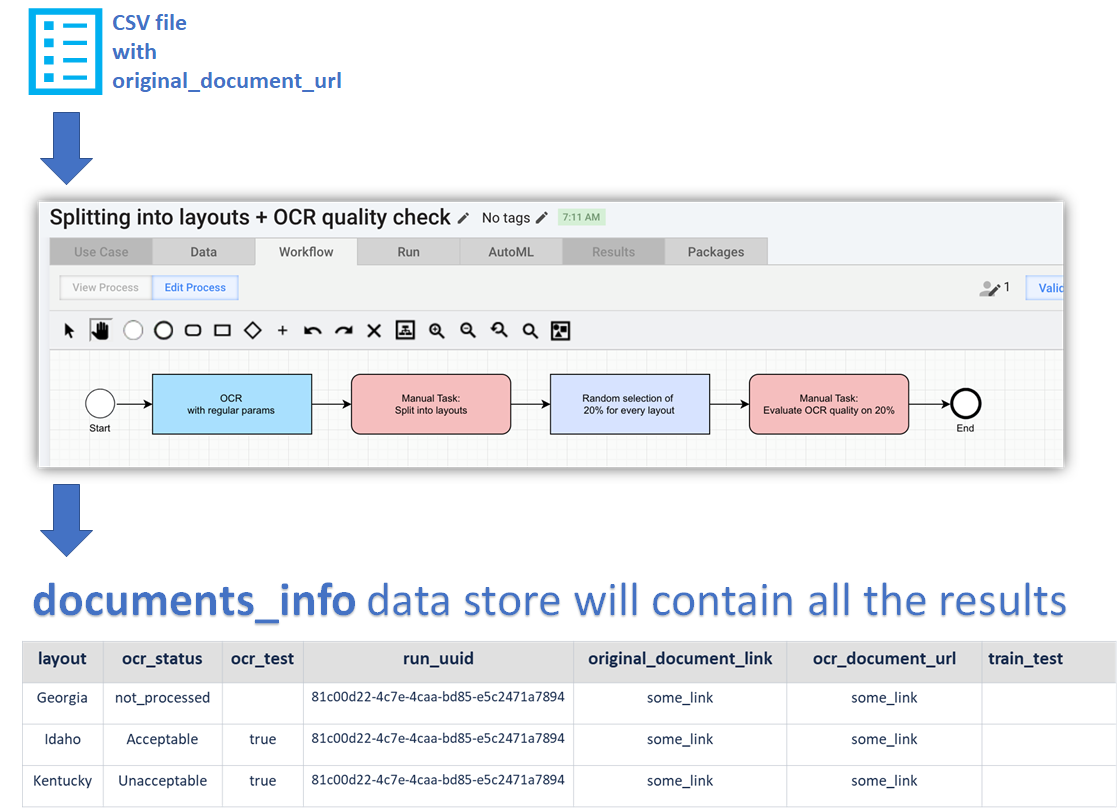
Business Process 1: Splitting into layouts and OCR quality check
Skip Business Process if documents are already OCRed
If your documents already have XML or HTML format and you don't need to OCR them and check OCR quality (so you want to skip Business Process 1), you can just create a Data Store manually following the the steps described below:
Fill the BLANK for documents_info Data Store in with the following information:
layout: type of layout.run_uuid: insert any value without spaces - the same for all documents, for example, "my-identifier" or simply "1".original_document_link: links to original files (if you have them) or links to XML (HTML) files.ocr_document_url: links to XML (HTML) files.ocr_document_url_tagged: empty (but must exist).train_test: empty (but must exist).
Create a new Data Store, named as it specified in your Settings Data Store (i.e. that one, which you created during Preparation Step 2) - the
documents_infoparameter - and upload the file from the previous step: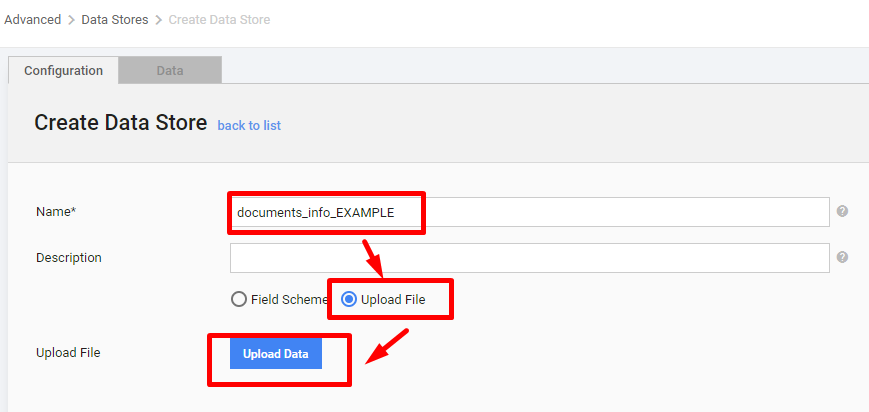
As a result in
documents_infoyou will have something similar: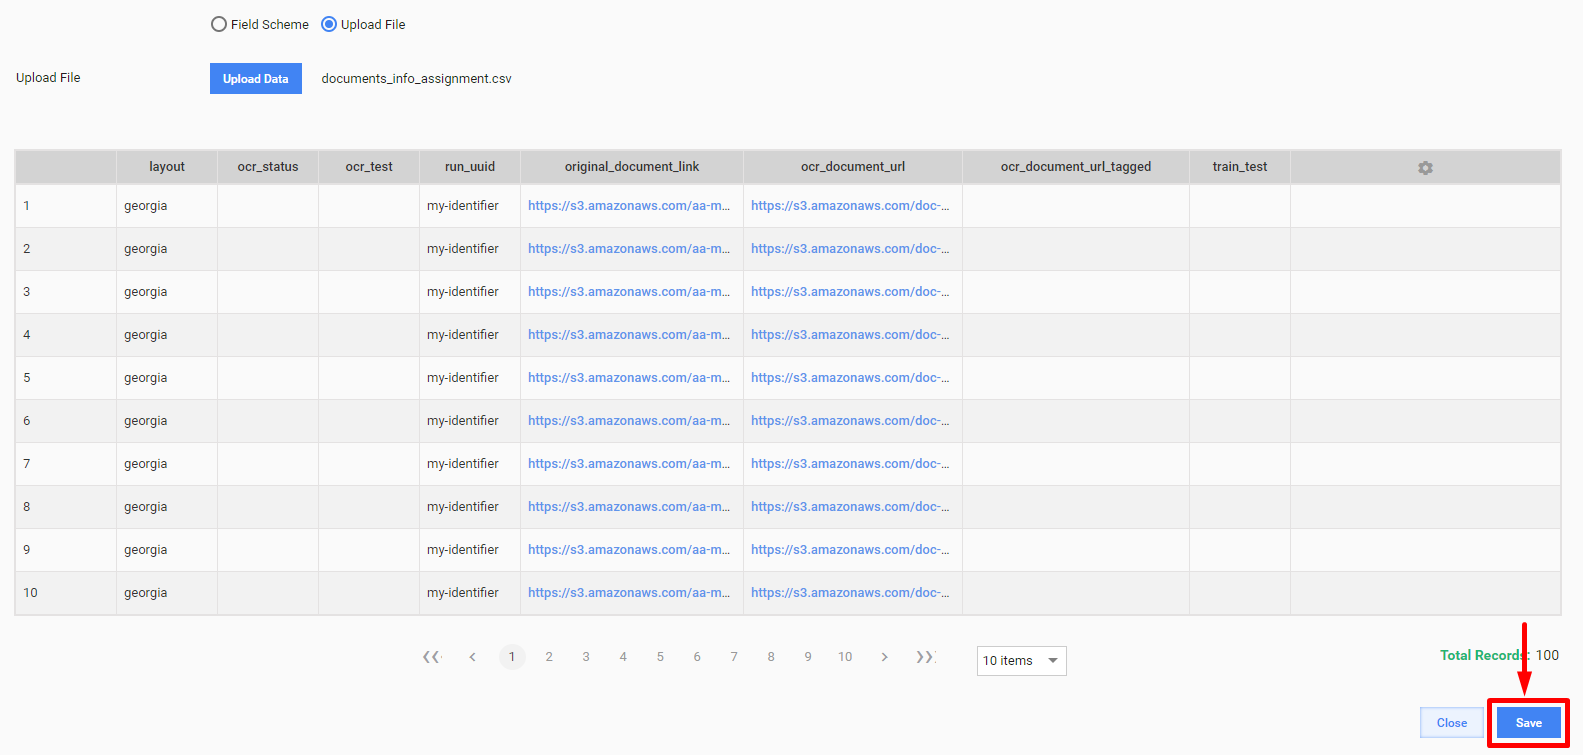
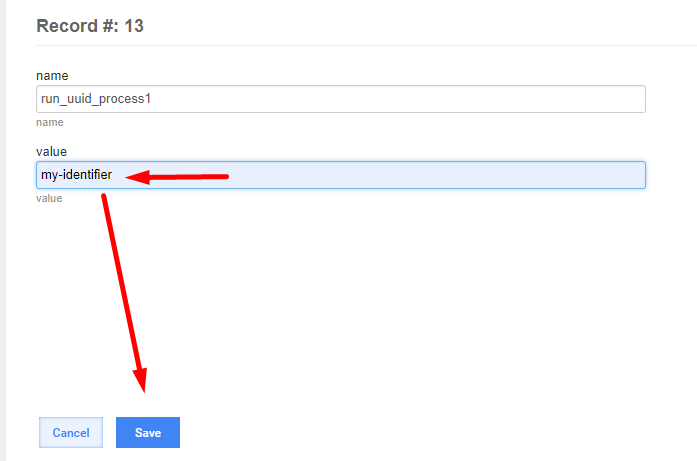
Change
run_uuid_process1in your Settings Data Store to make it the same as the value you specified forrun_uuidduring filing the BLANK file for the Data Store (two previous steps).
Go to the Business Process 2 instructions.
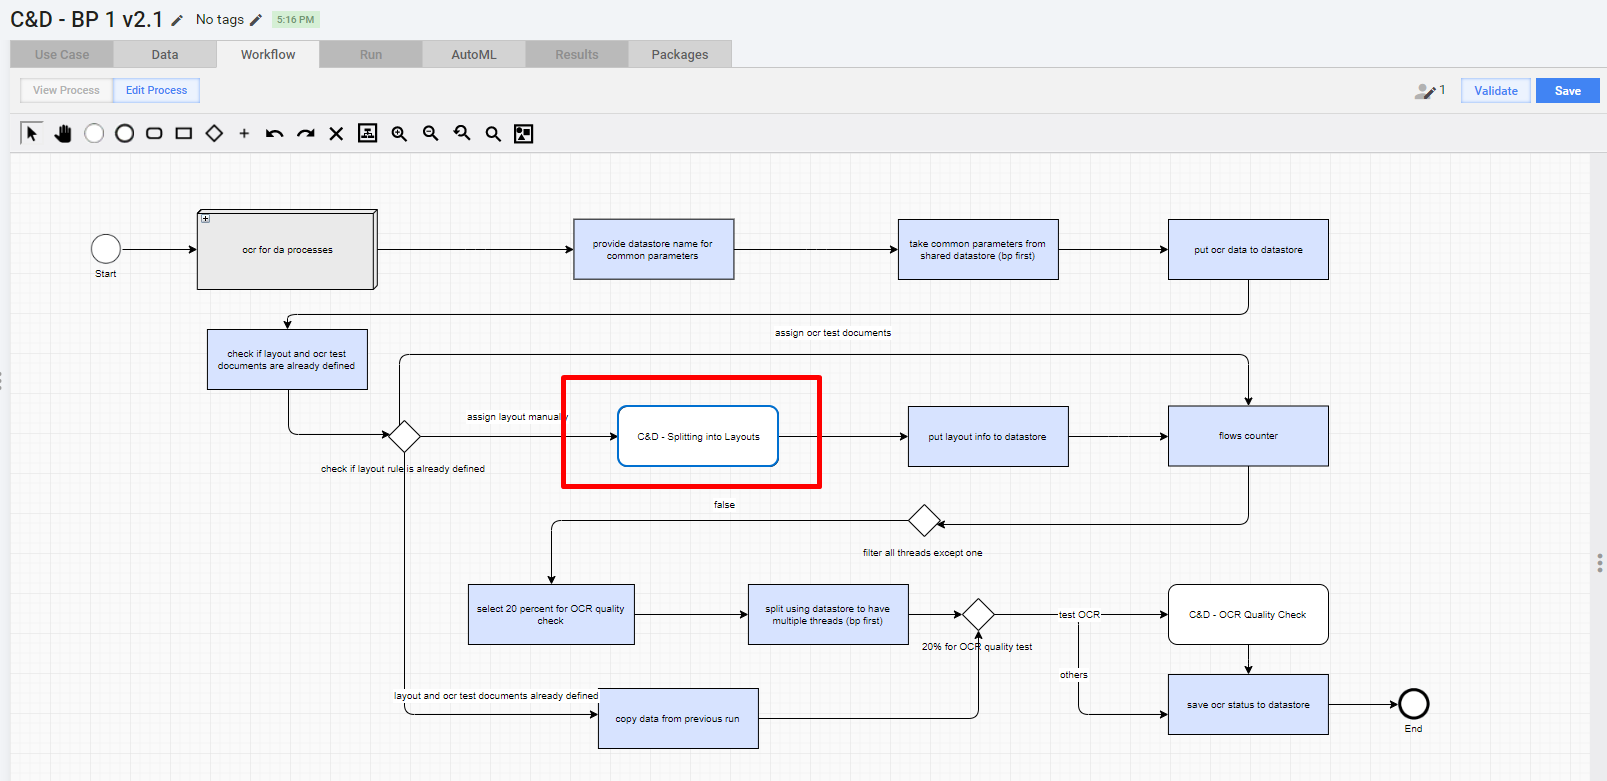
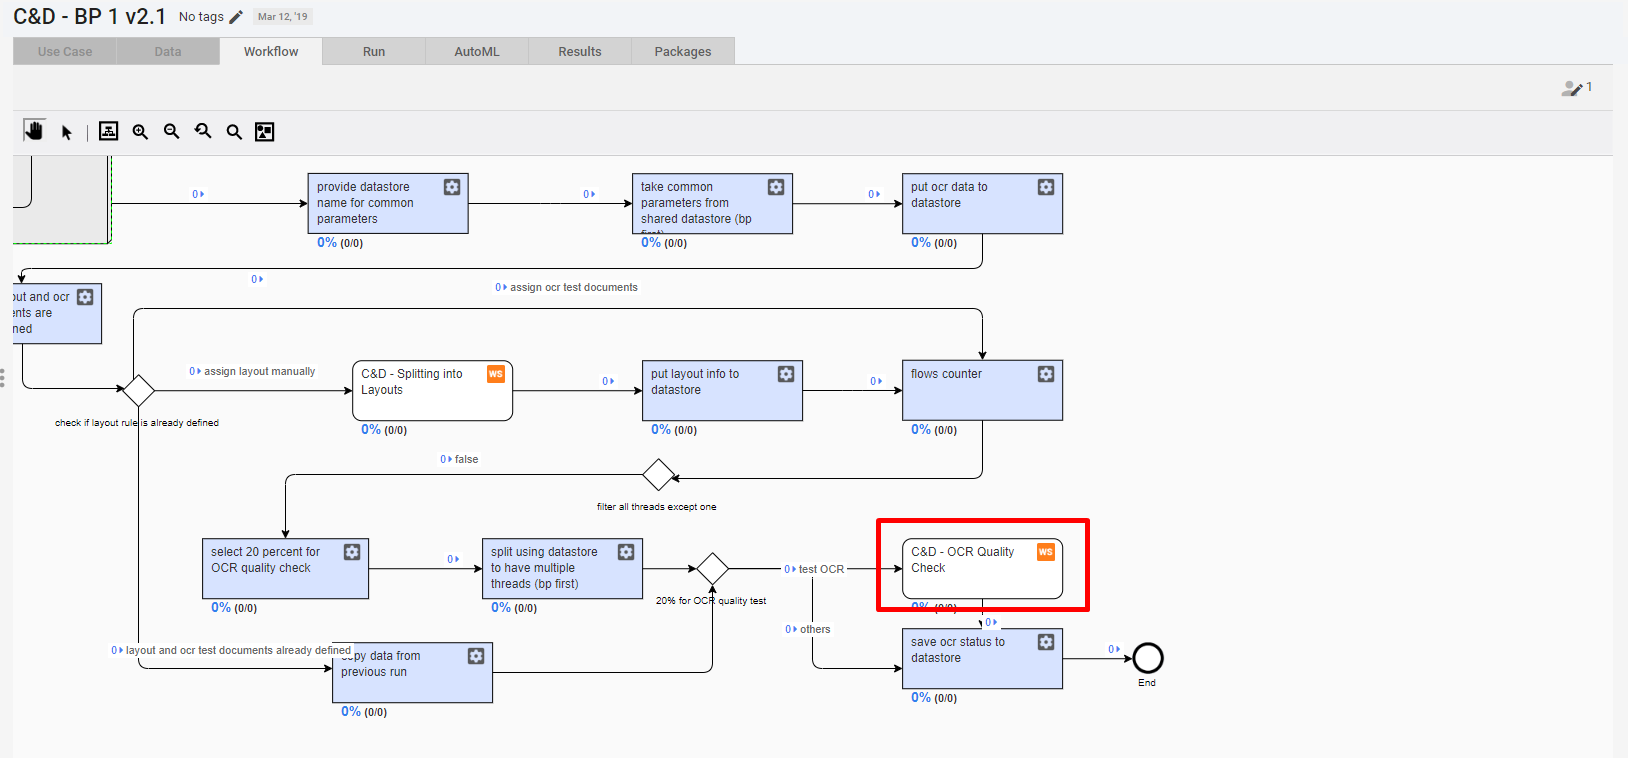
The workflow is as follows:
Import package and create deep copy of It
Import the BP 1 package to Control Tower.
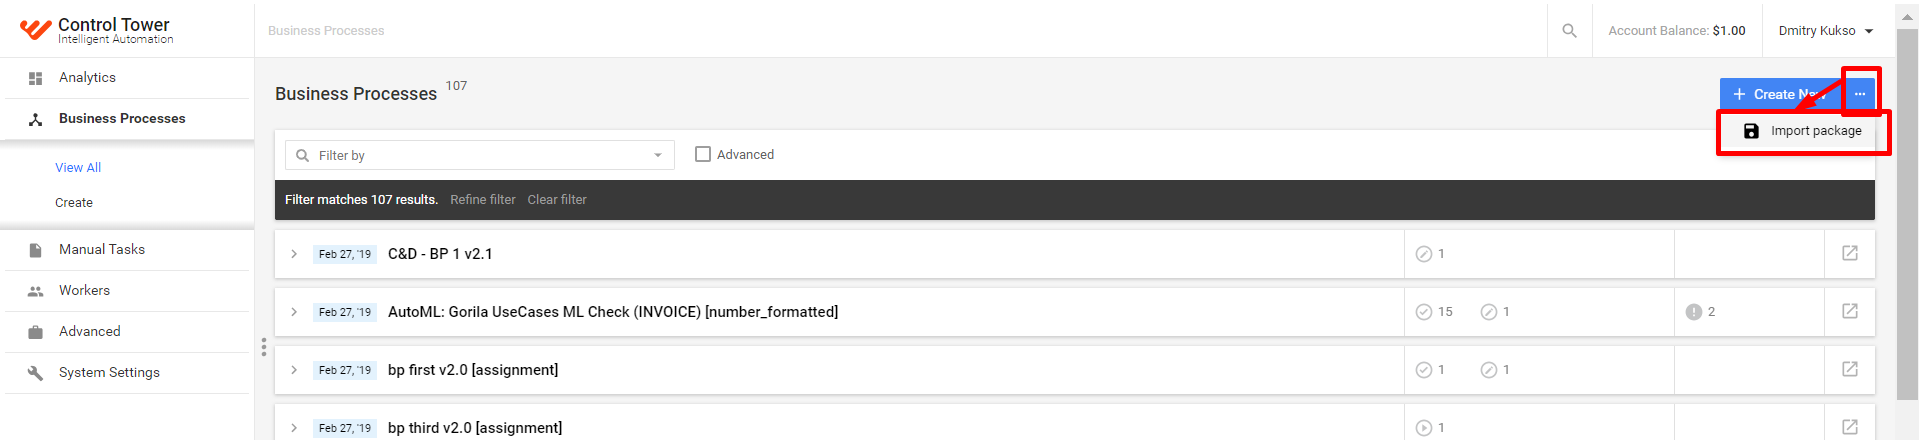
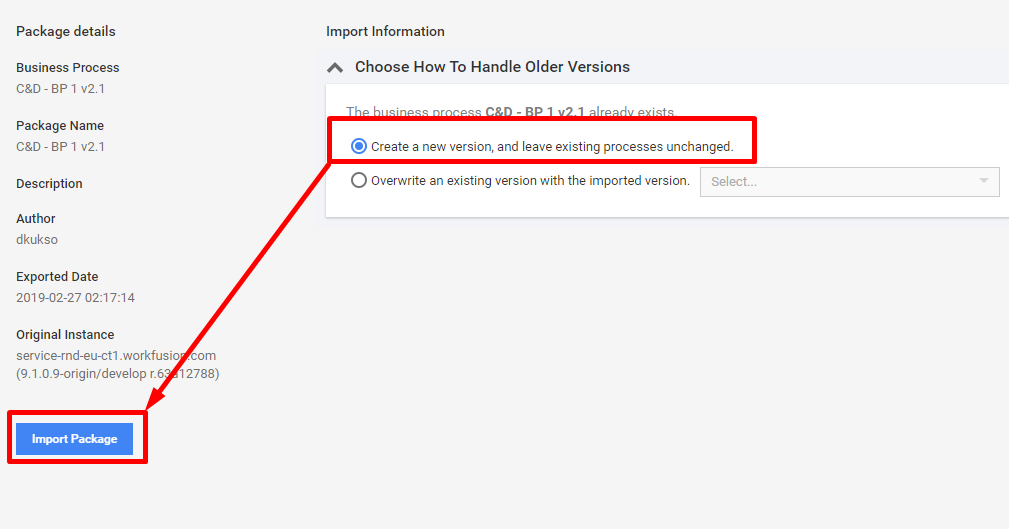
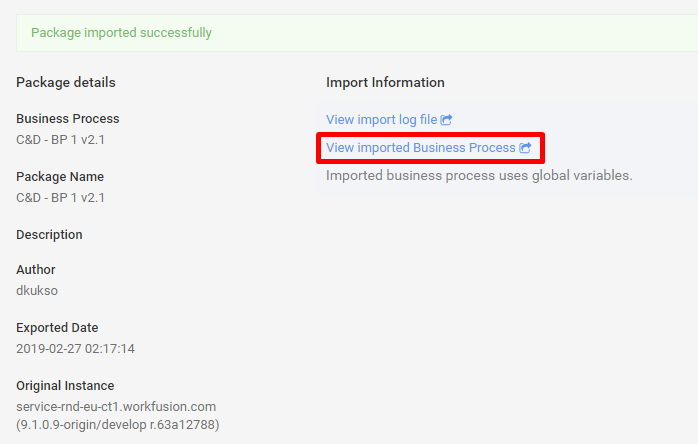
Create deep copies of imported packages to preserve your settings from changing by other users on Control Tower.
When you import the downloaded package on the instance where other users can use the same processes as you do, your Business Process steps have the same name as other users' step names, so when they change some parameter (for example name of the Settings Data Store), it is automatically changed in your BP, and vise versa.
To preserve yourself and others from being confused, fallow the following recommendations:
Import the package to Control Tower.
Provide some data to make the Run tab be available:
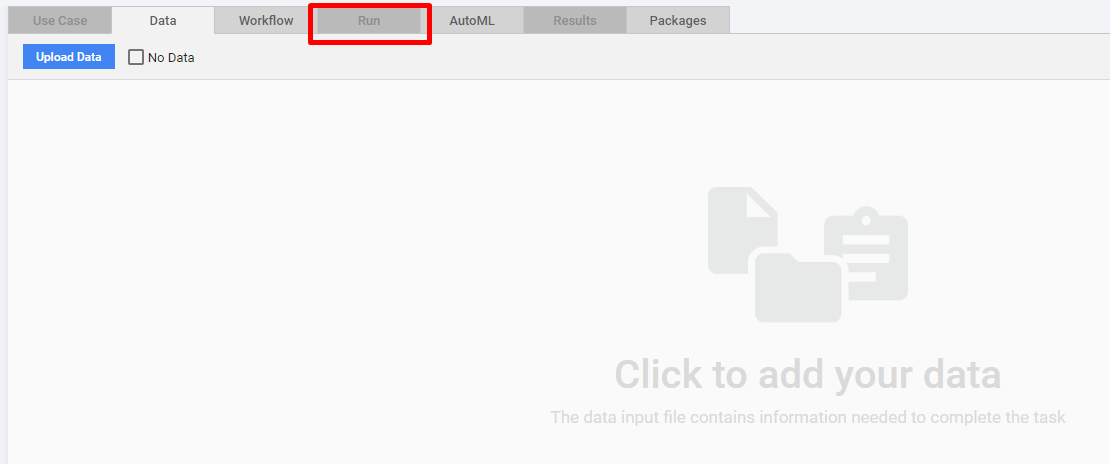
On the Run tab, select Copy from Actions.
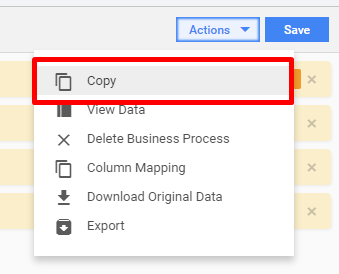
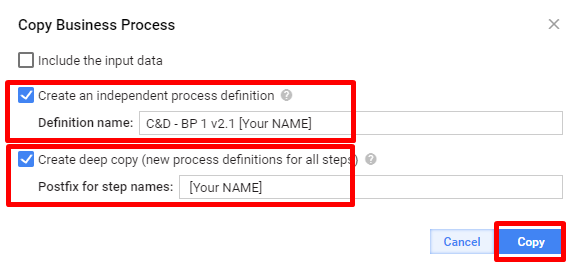
Specify a new Process Name and Postfix for step names. Copy the process.
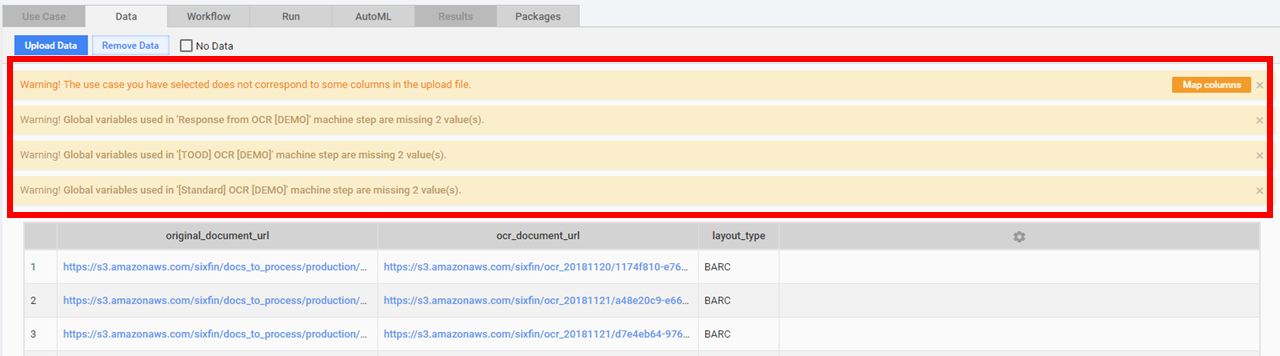
Upload input data and ignore warning messages
After the Business Process is imported, you can upload an input file with the original_document_url column and if applicable the layout column.
After this, you see warning messages. You can ignore them and continue working with the Business Process. Go to the next step.
Specify root folder on S3 in OCR sub-process settings
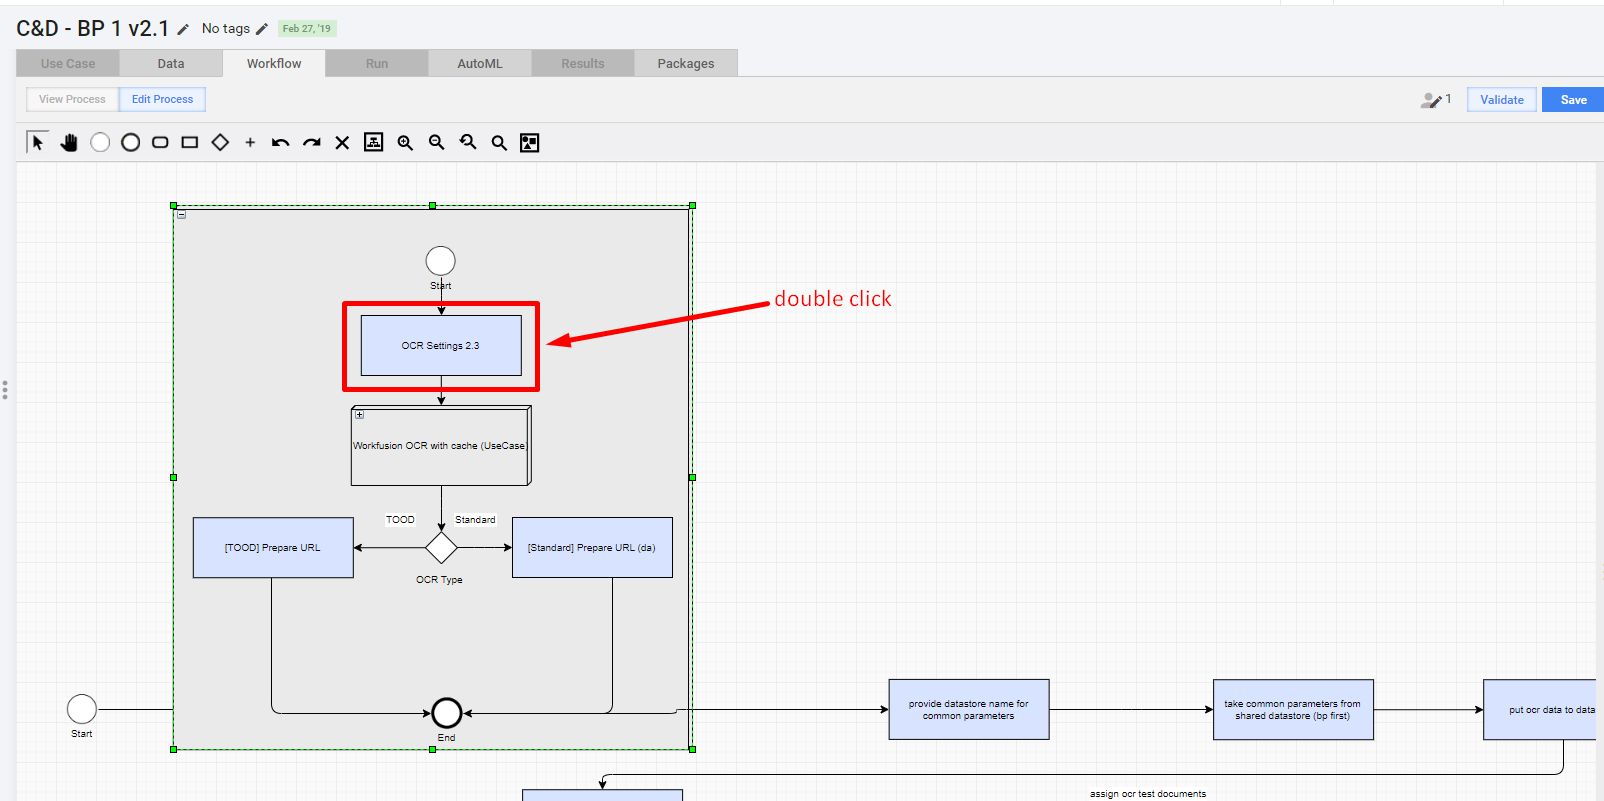
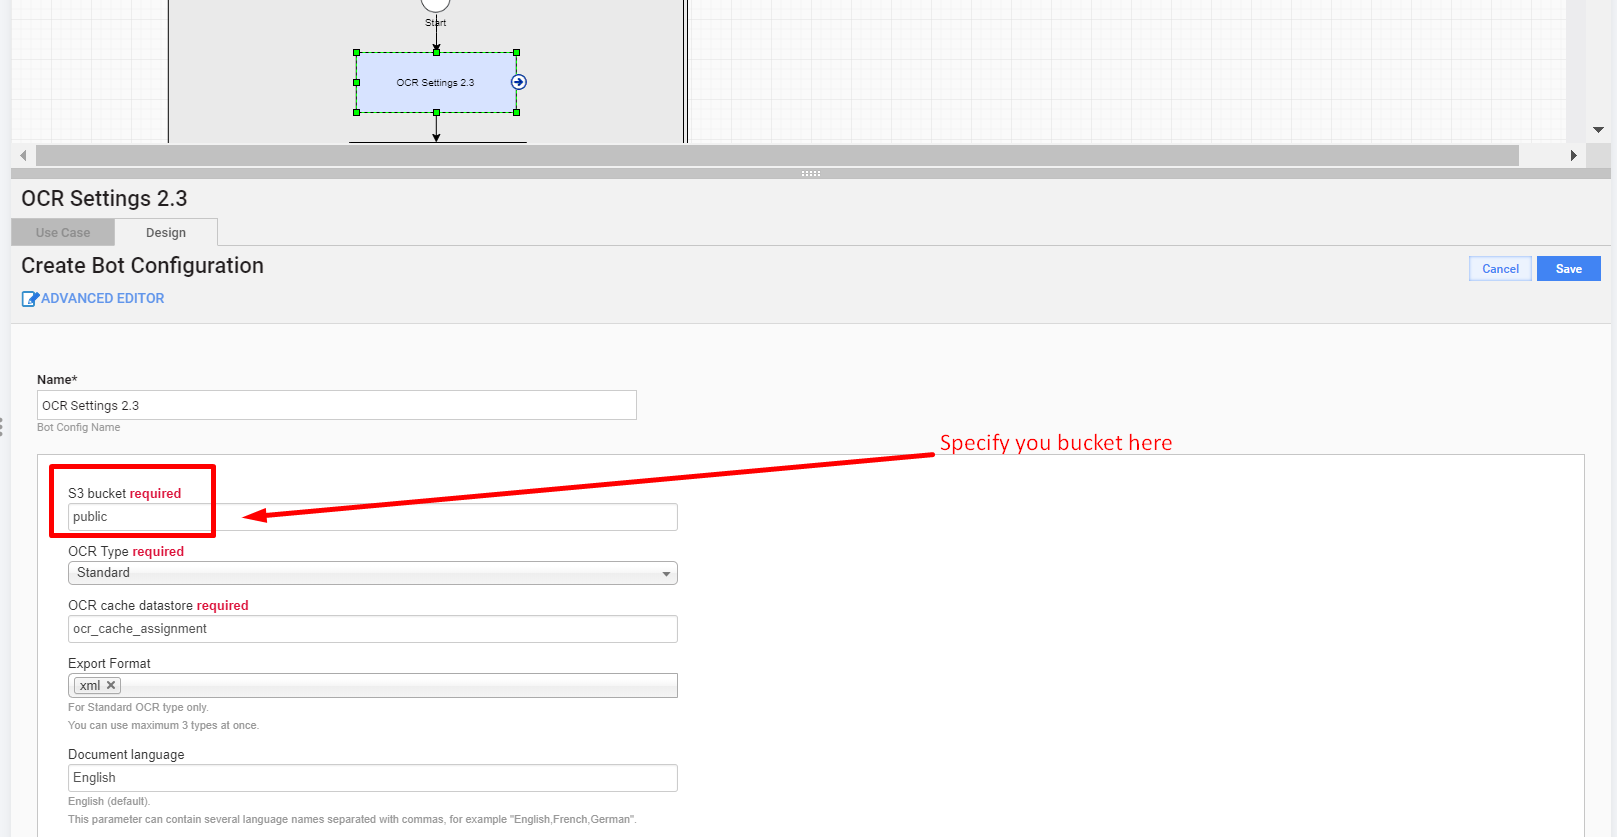
As mentioned in the preparation step 1, you need to have a root folder on S3 to store the OCR results. Specify this folder's name in settings for the OCR sub-process as well:
On the Workflow tab, expand the OCR sub-process and double-click on the OCR Settings 2.3 step:
Specify your bucket name.
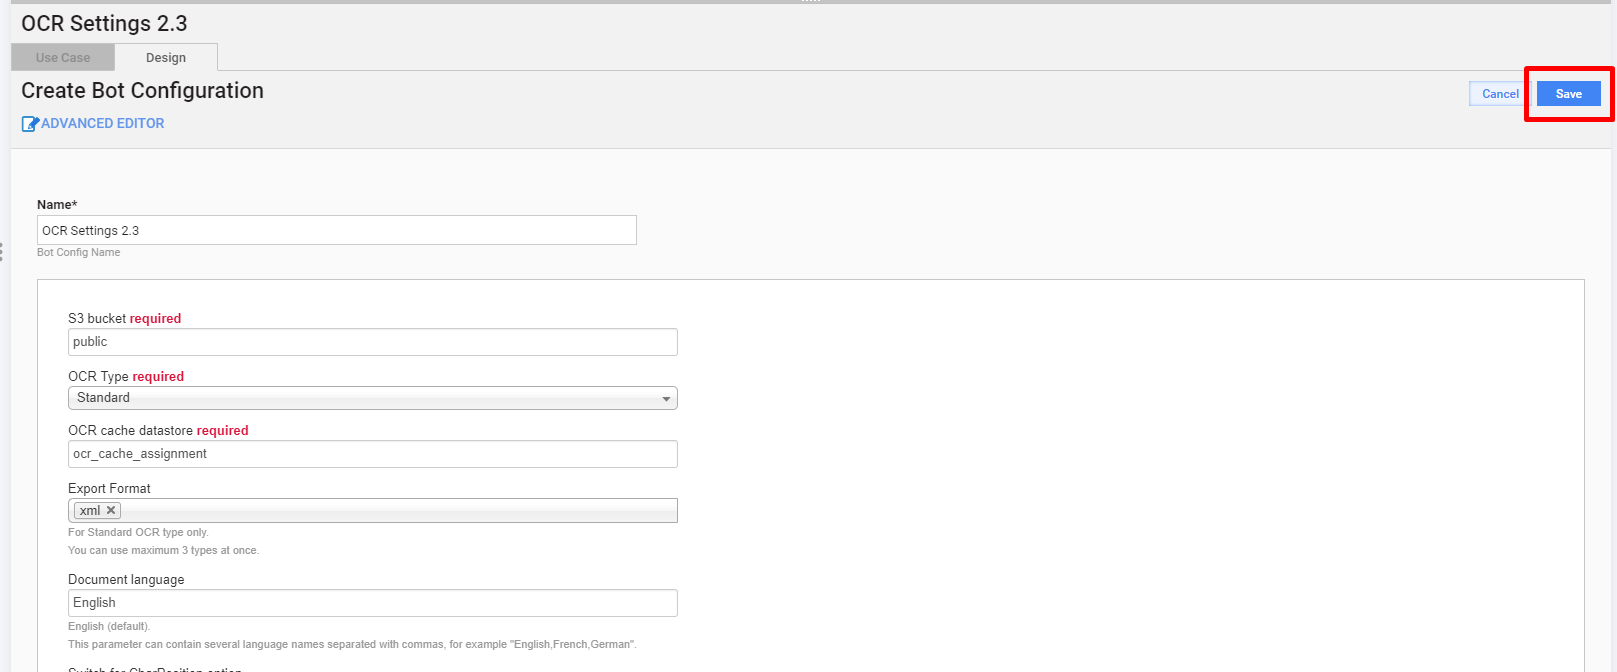
Click Save.
Specify Settings Data Store name
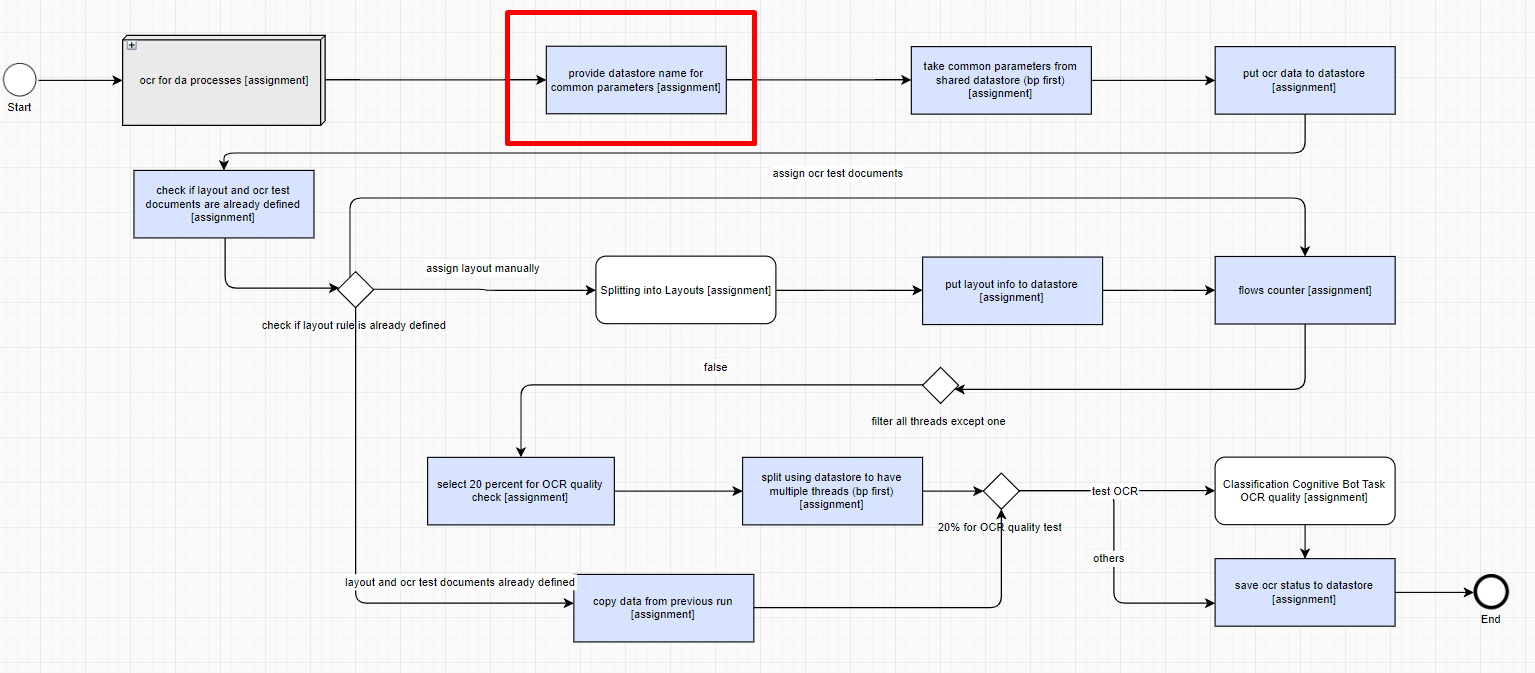
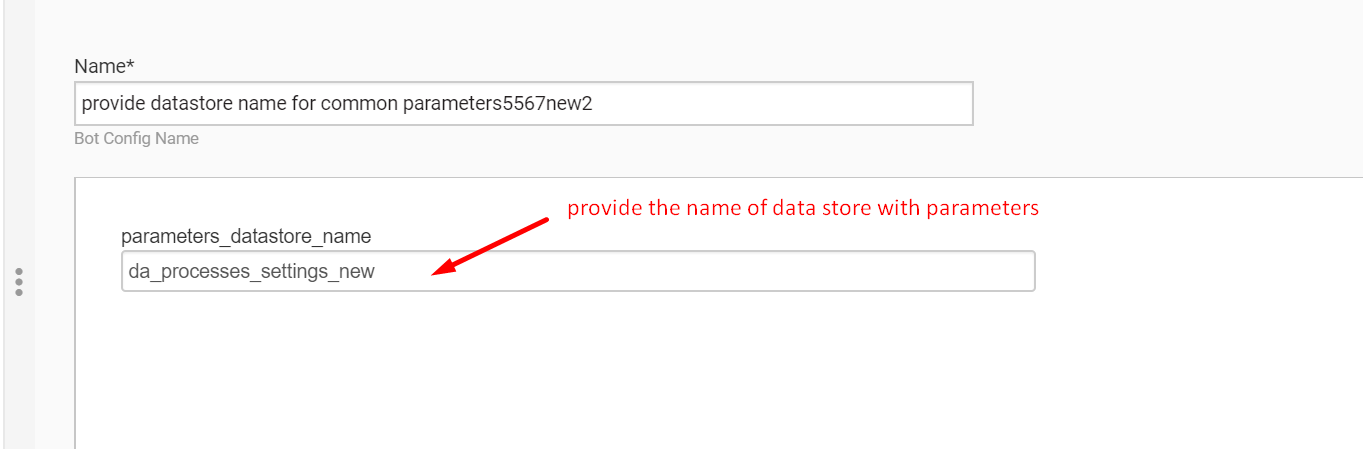
On the Workflow tab, double-click the second bot step and provide your unique name of the Settings Data Store where all the parameters are stored (i.e. that one, which you created during Preparation Step 2).
Reconfigure Splitting into Layouts Manual Task
note
If the layouts are assigned in the input file, the Splitting into Layouts Manual Task is skipped, so you can ignore this step and run the process.
If you don't have already defined layouts and you are going to complete the Manual Task for layouts assignment, in the imported Business Process, reconfigure the Splitting into Layouts Manual Task and correct sub-answers according to the names of layouts you have in your Use Case.
Two options are possible: listing possible layouts one by one in the Options field (suitable for small number of layouts), or using the input from Data Store option (suitable for many layouts).

If you want to list layouts in Options field, write Name1=value1, Name2=value2, and so on, where
Nameis what is displayed to a user,valueis a layout assigned to a document.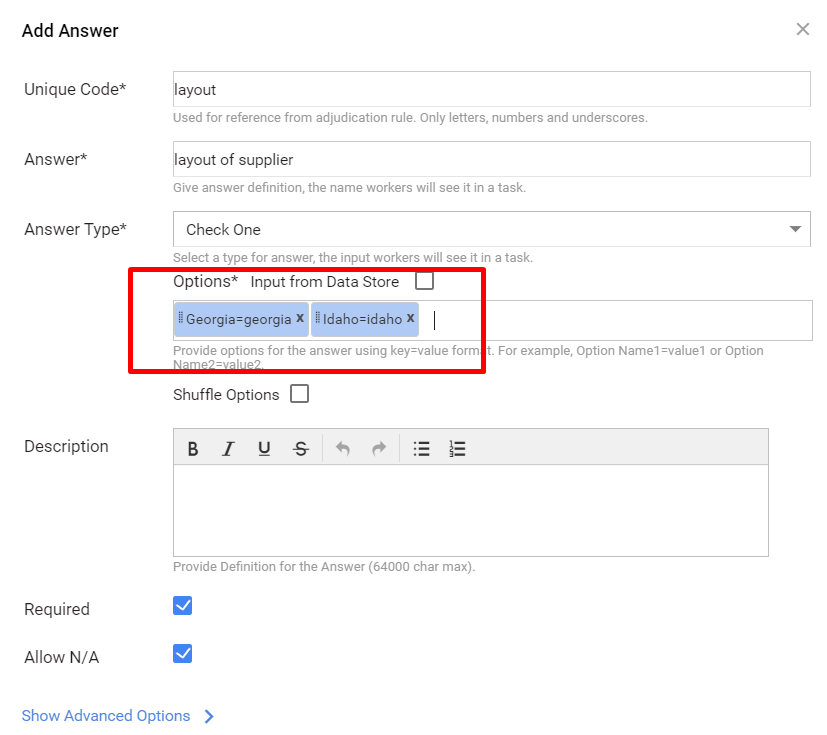
If you want to provide possible layouts from the Data Store, do as follows:
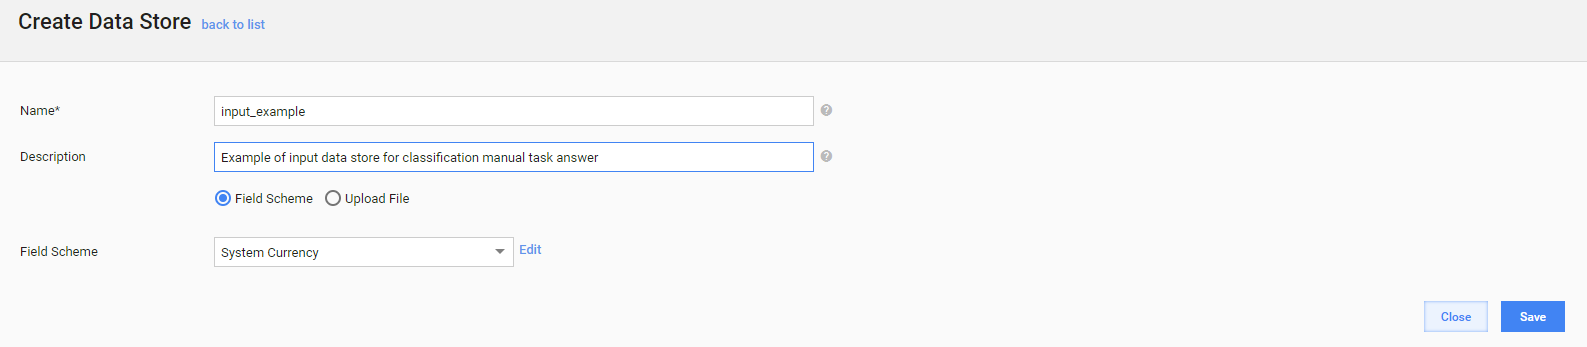
- Go to Advanced > Data Stores > Create Data Store.
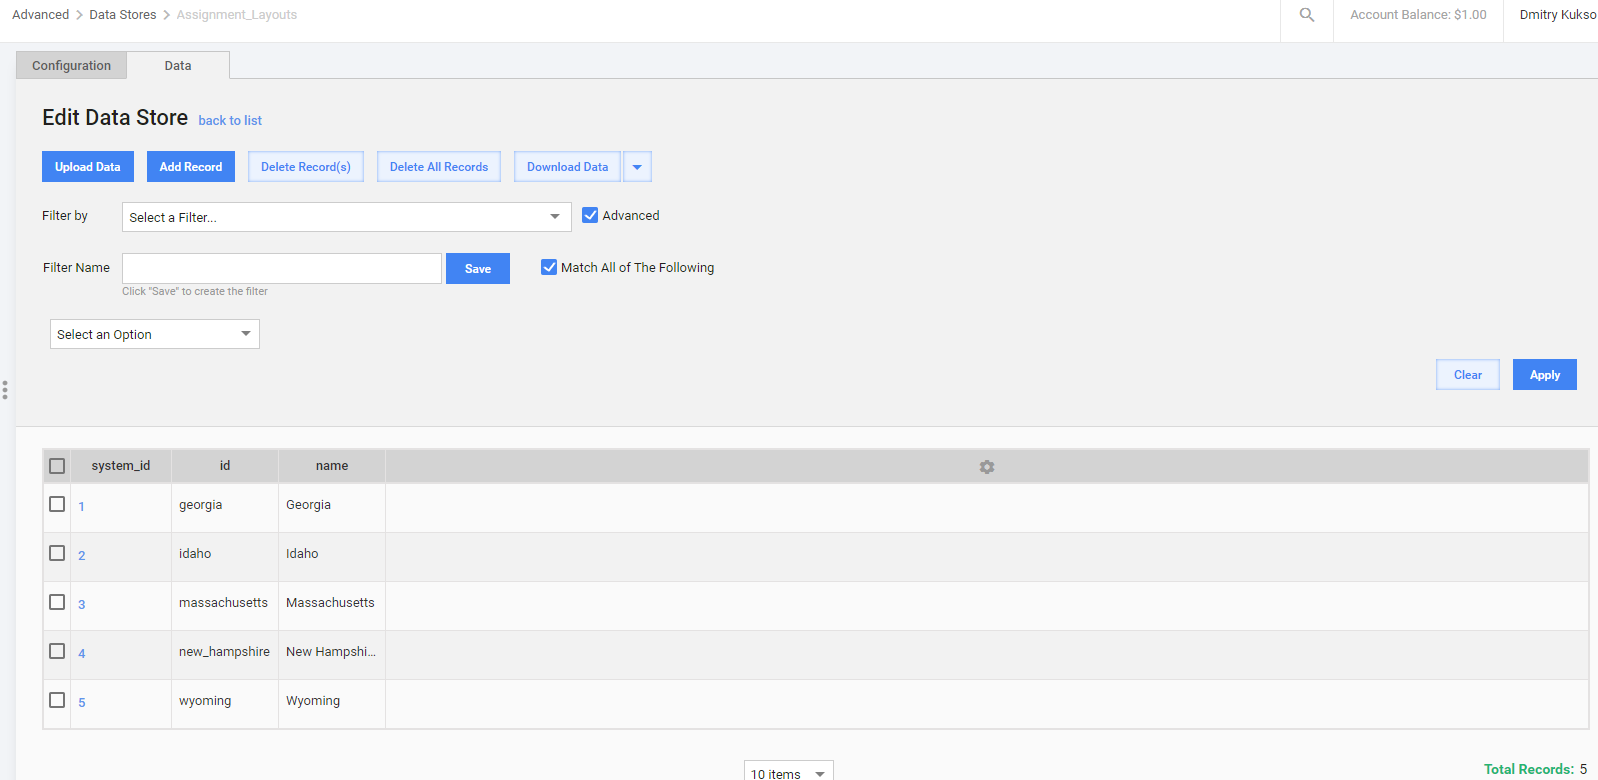
- Give a name to your Data Store, write description if needed. The Data Store should contain:
- id column: the value (layout name) actually assigned to a document.
- name column: the corresponding name displayed to a user in the Manual Task (can be the same as or differ from id).
- system_id is created automatically.
So there are two options to create a Data Store:
Check Field Scheme and select the System Currency field scheme from the list. After this, add all your possible layouts (id and name for each) manually.
Check Upload File and upload a CSV file with the id and name columns that contain values for all your layouts.
The result is as follows:
Run Business Process and complete Manual Tasks
note
If the layouts are assigned in the input file, the Splitting into Layouts Manual Task is skipped.
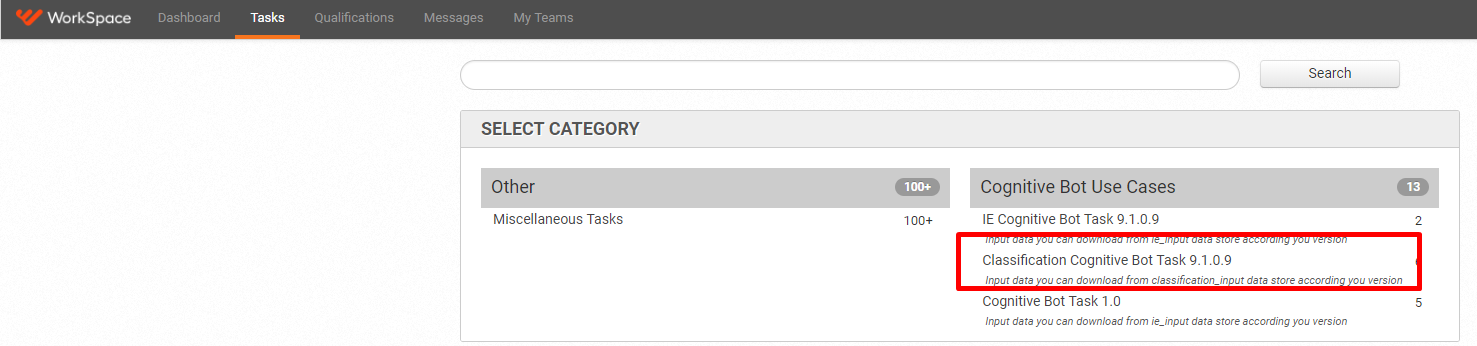
When the OCR step is finished (it can take some time depending on document size), start completing the Splitting into Layouts Manual Task in Workspace in the Classification Cognitive Bot Task 9.1.0.9 category.
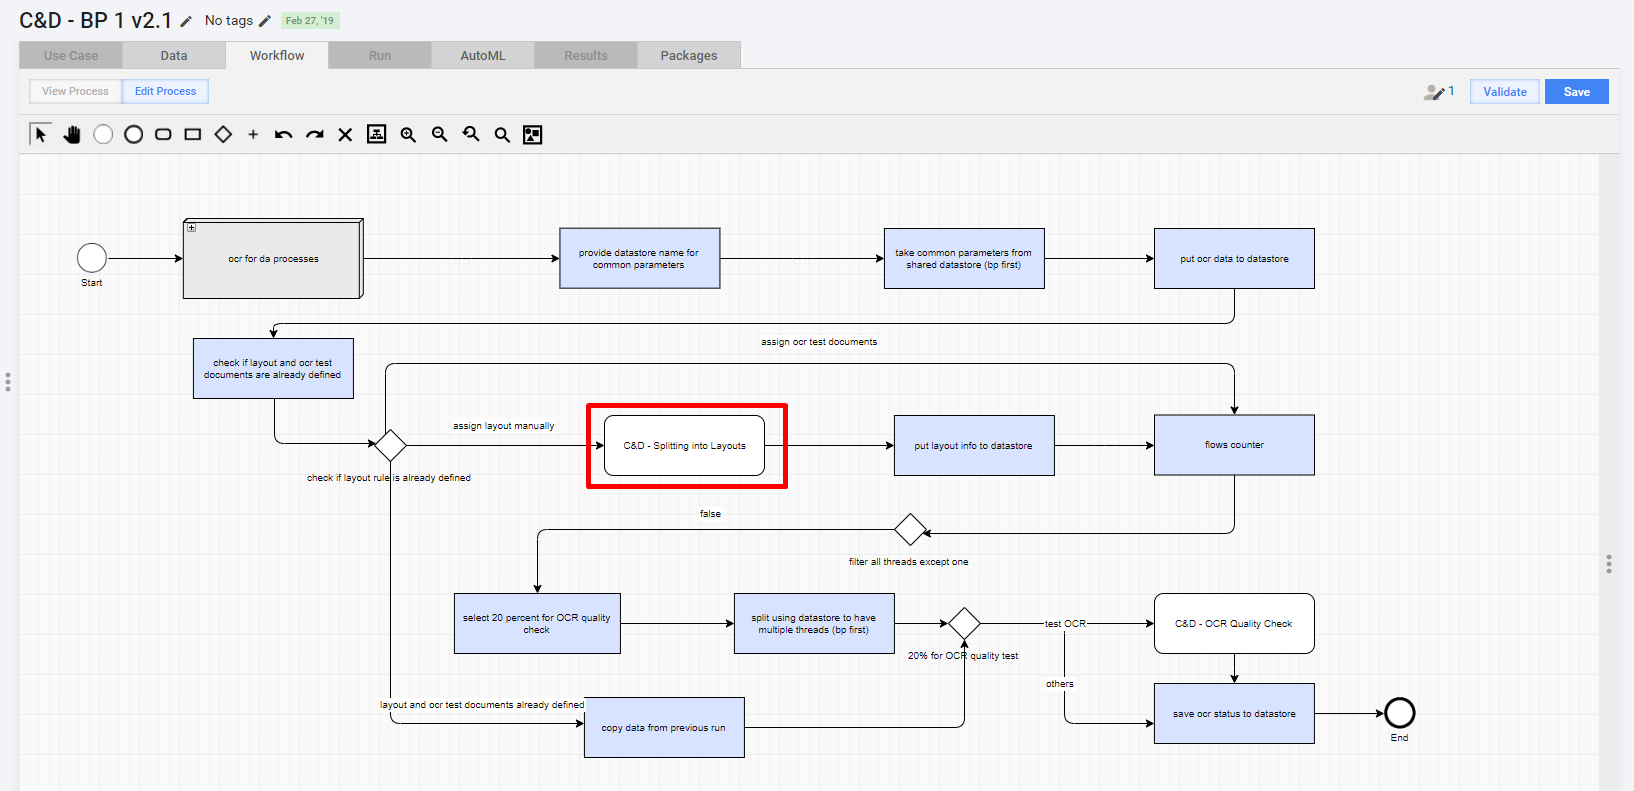
There are two options to do it:
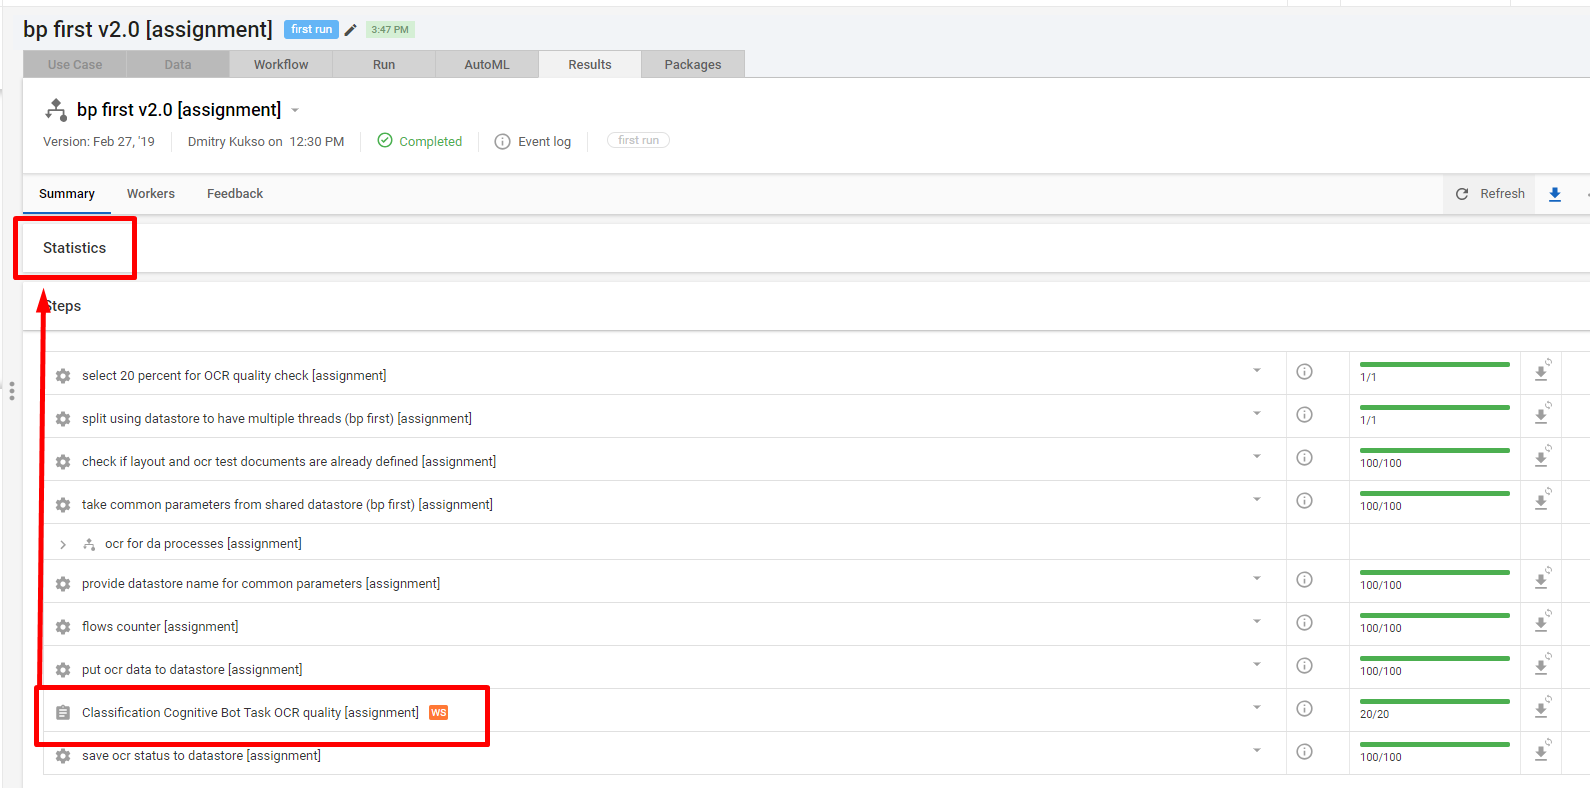
- On the Results tab of the Business Process, expand Steps, select your Manual Task, and expand Statistics:
After this, you see a link:
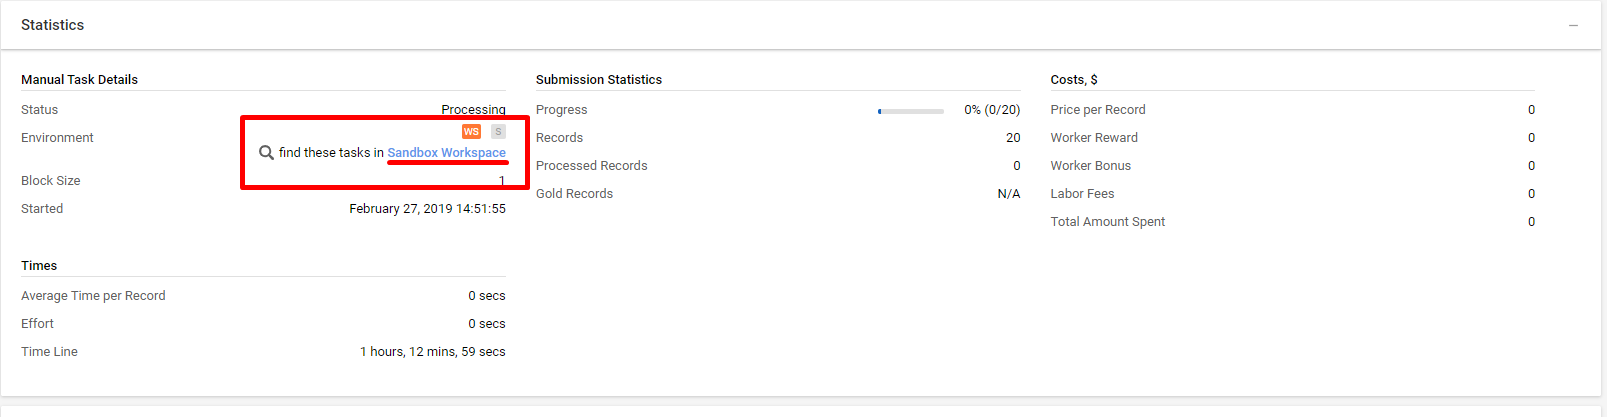
- Or just find your task in the list of Manual Tasks.
After layouts are assigned, the Classification Cognitive Bot Task OCR quality Manual Task is available. Here, DA checks the quality of 20% of each layout.
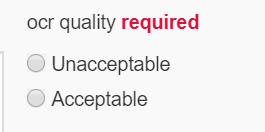
In the classification task, you see the following options:
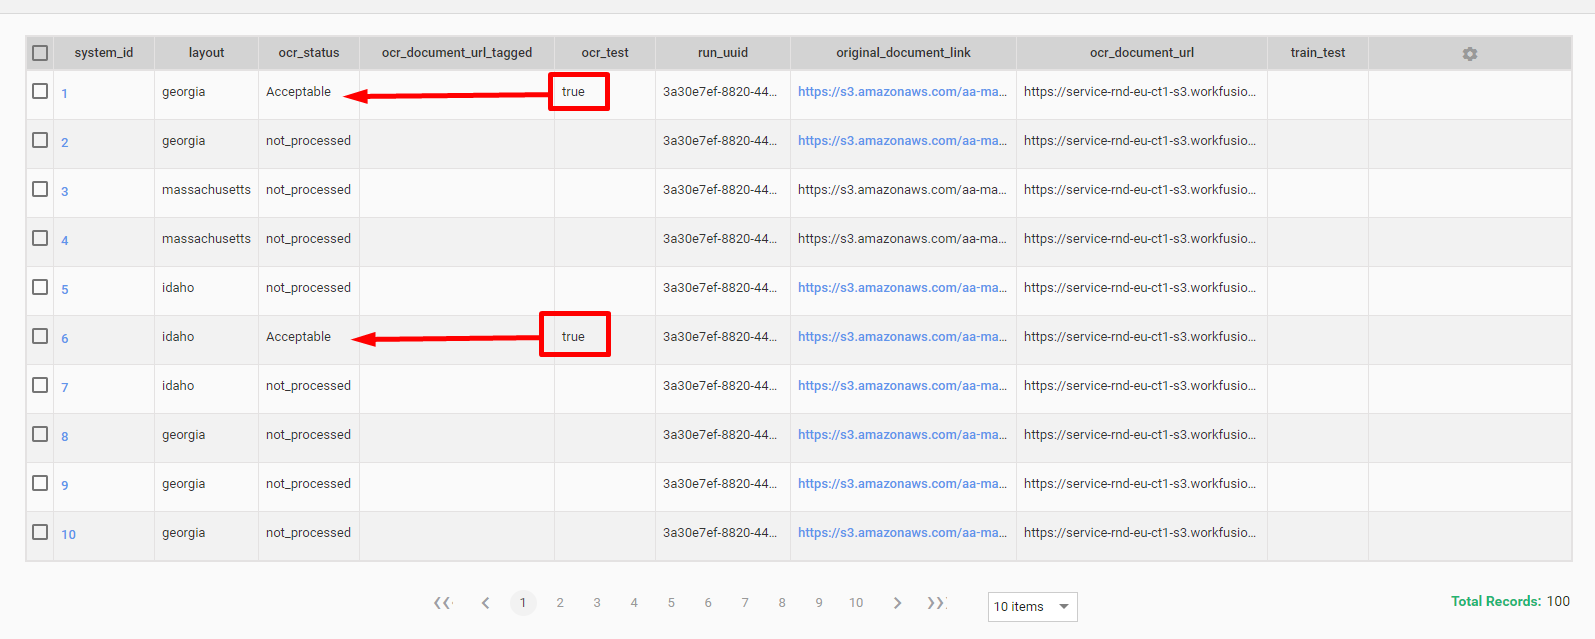
As the output, the Business Process puts all the information to the documents_info Data Store. This data can be used as the initial data for an OCR report.
Analyze results
After the BP with all its manual tasks is successfully completed, the documents_info Data Store (with the name you specified in the Settings Data Store) is automatically created.
The documents selected as random 20% and sent to a Manual Task for an OСR quality check have the true value in the ocr_test column and the ocr_status column contains your decision (those which did not participated in the OCR quality check have the not_processed value.
You can apply filter to see only marked documents:
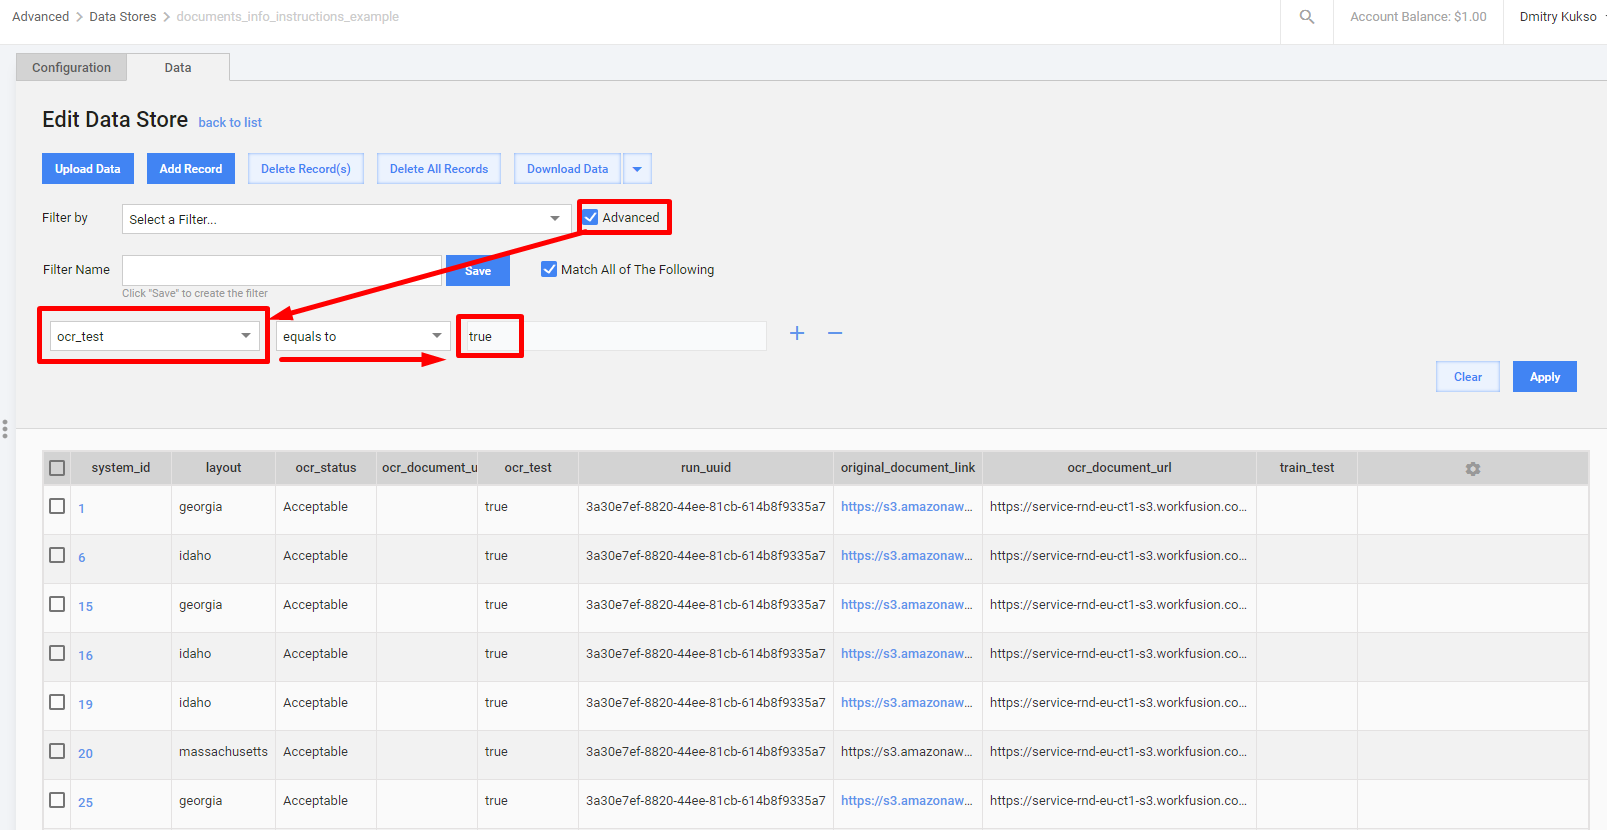
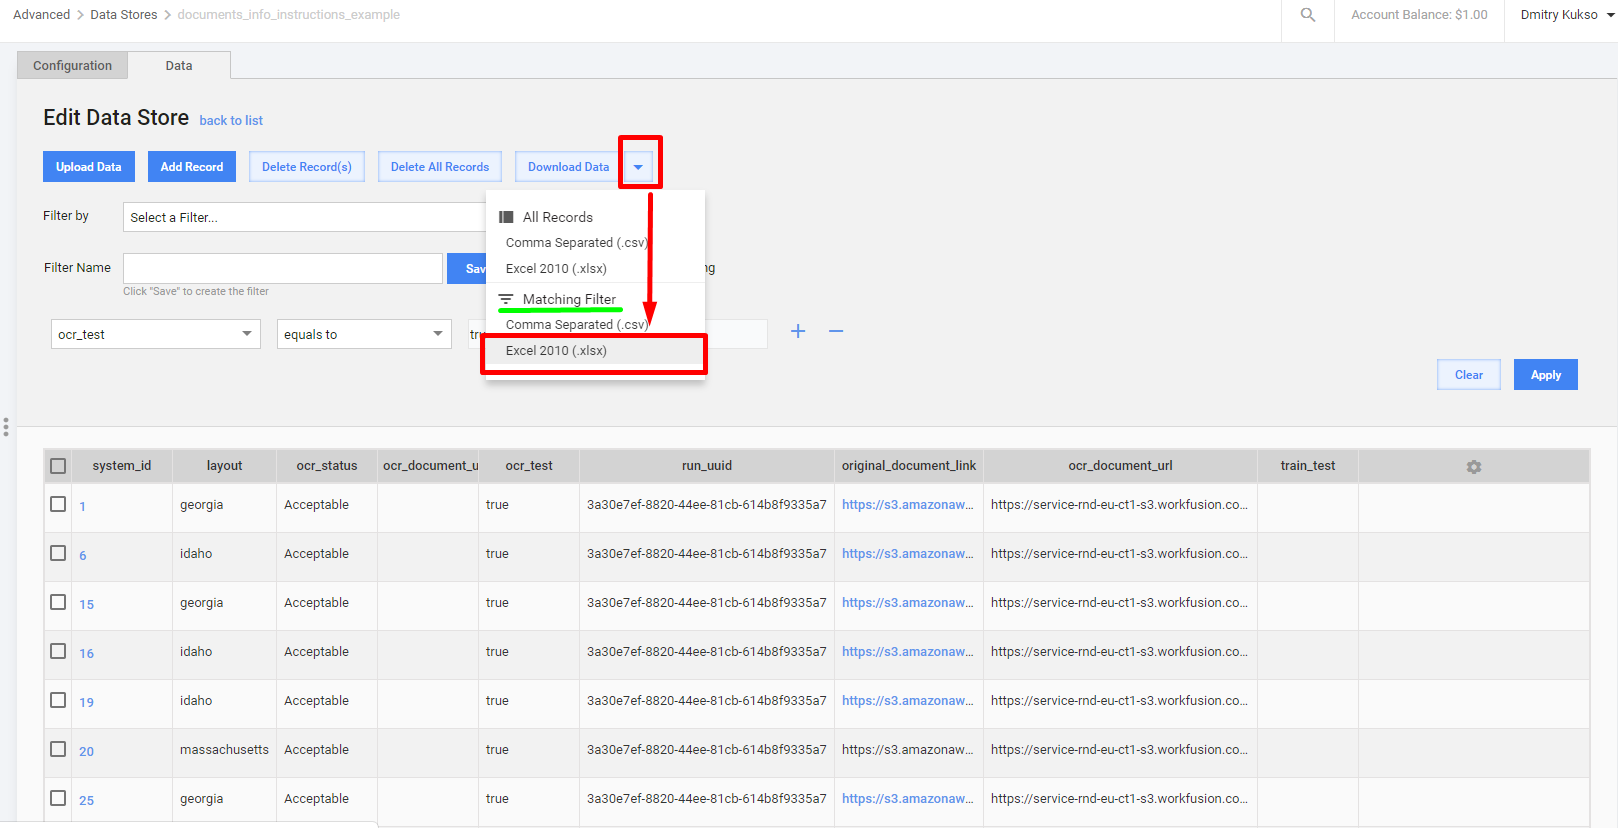
Then, you may download the results that match the filter as an XSLX file to get understanding of the overall OCR quality (percentage of Acceptable and Unacceptable documents):
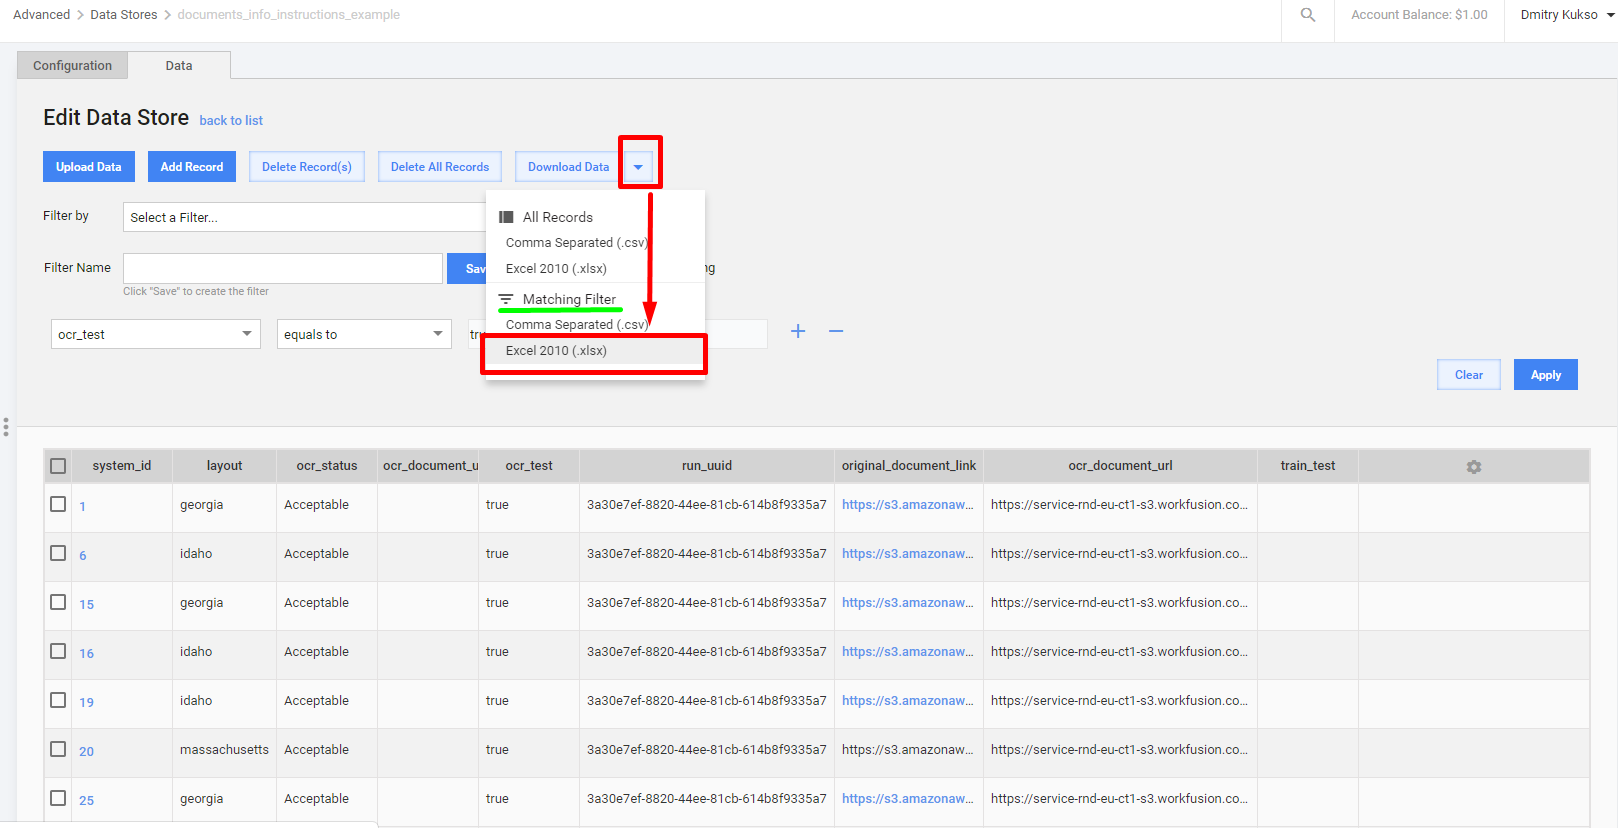
Use randomly selected 20% of documents as Test Set
Use marked documents as a TEST set.
If you have uploaded all the documents into the Business Process 1 and you haven't split them yet, using this randomly marked 20% of each layout as a Test Set is a really good way.
To do this, follow the following steps:
OBLIGATORY Download the results that match the filter (
ocr_testis equal totrue) as an XSLX file or a CSV file.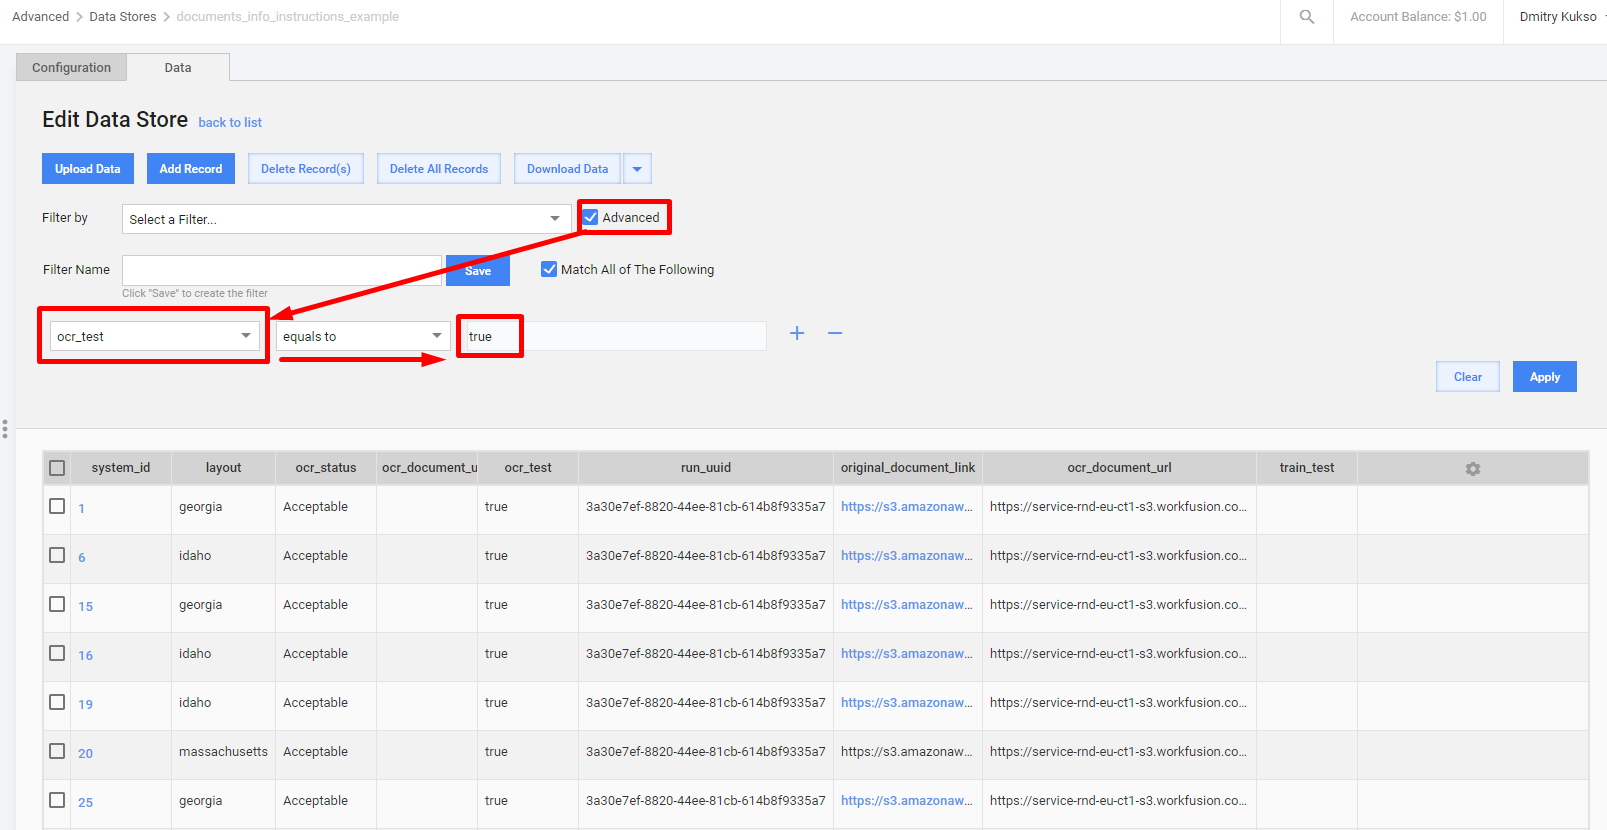
Exclude these documents from the documents_info Data Store to preserve them from participation in tagging of the Training set. To do this, select all records matching the filter (
ocr_testis equal totrue) and click Delete Record(s).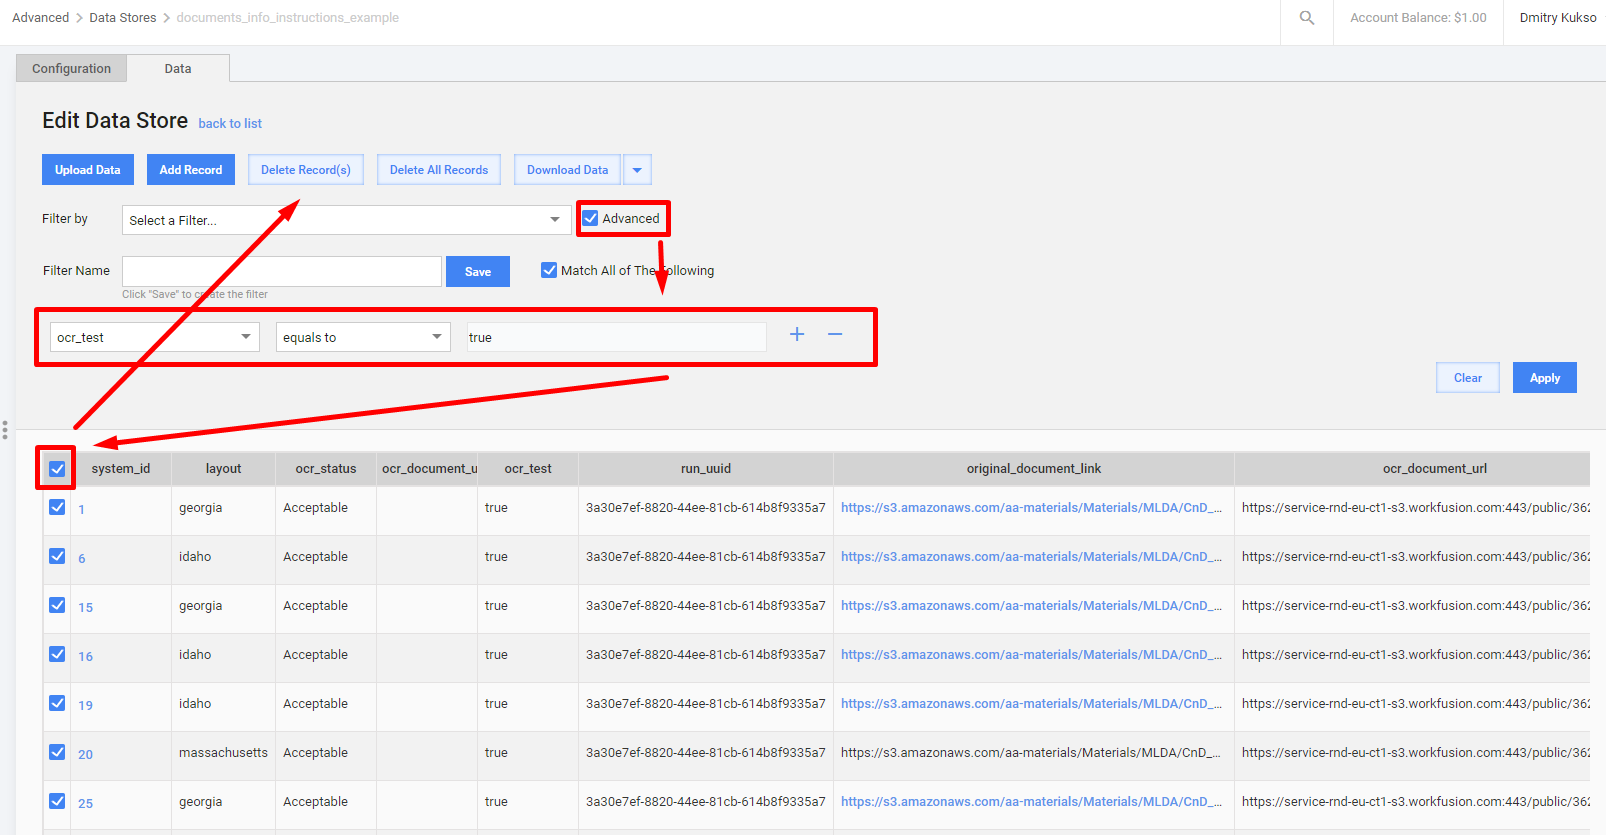
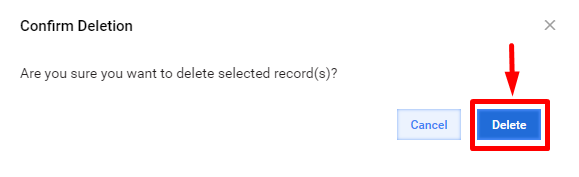
Confirm the deleting:
You will need to do this as many times as many pages you have:

After your training set collected using C&D Business Processes is ready, final Model can be trained and executed on the documents you have saved as Test Set to assist in tagging process. Automation Use Case with trained model will be used for this purpose. You can enable Analytics and get statistics on the AutoML dashboard right after the Automation BP is completed.
View Business Process 1 brief scheme