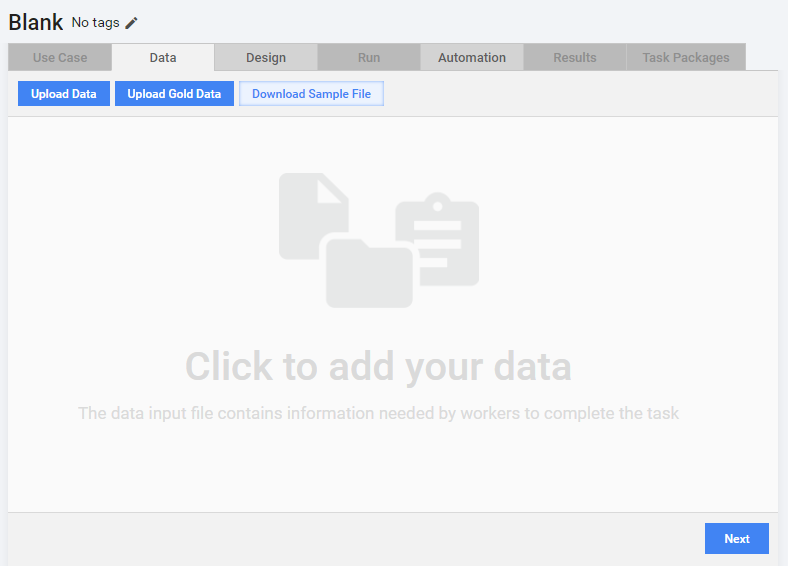
Upload data
Upload data
Task Data is a .csv file with source input data needed to run tasks (either manual or bot) within a business process.
The column headers in the file should be the same as the variables used within the task design can be remapped if necessary.
Each row of the Task Data file defines a Record.
tip
Before you begin creating your data file, revise your knowledge about the CSV format and find some tips how to create a .csv file.
Default Settings
- By default, the items (fields) must be delimited by the comma (","), while the file must be encoded in UTF-8.
- If you want to use another delimiter or another encoding, you should specify it later in the options.
Header line
- Your data file must contain a header line, where you define names for the columns in the Input data.
- The column names must contain alphabetical characters in lower case, numerical characters, and underscore only. Any other characters may violate creation of the Input data.
Links to files
- The files you are going to use in your task must be placed in an online or cloud storage supporting access over the HTTP protocol, e.g., S3, Dropbox, or Google Drive.
- Local files cannot be used.
Complete the following steps to upload and set a data file.
Click the Upload Data button, or click anywhere within the center position of the tab.
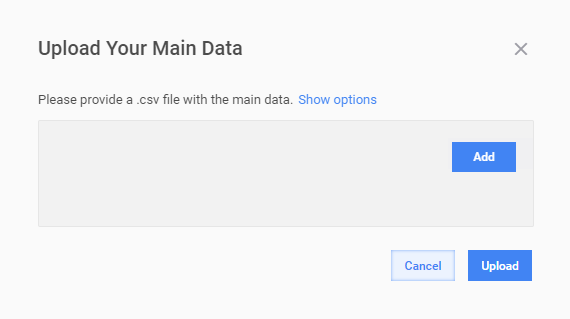
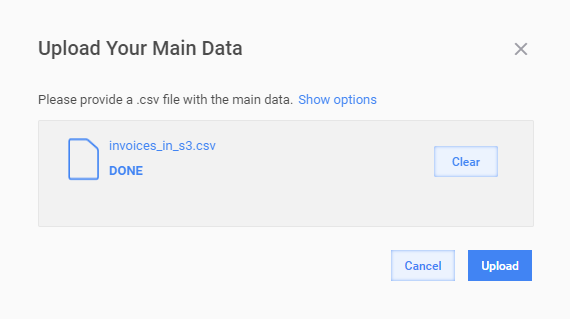
In the popup window, click the Add button, select a main input data file, and click Upload.
note
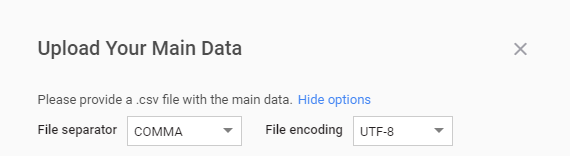
The WorkFusion platform automatically determines the File Separator and File Encoding parameters, which can be changed if needed.
Click Show options and select File Separator and File Encoding from the respective drop-down menus.
Click Clear to remove the selected file and select another one to upload.
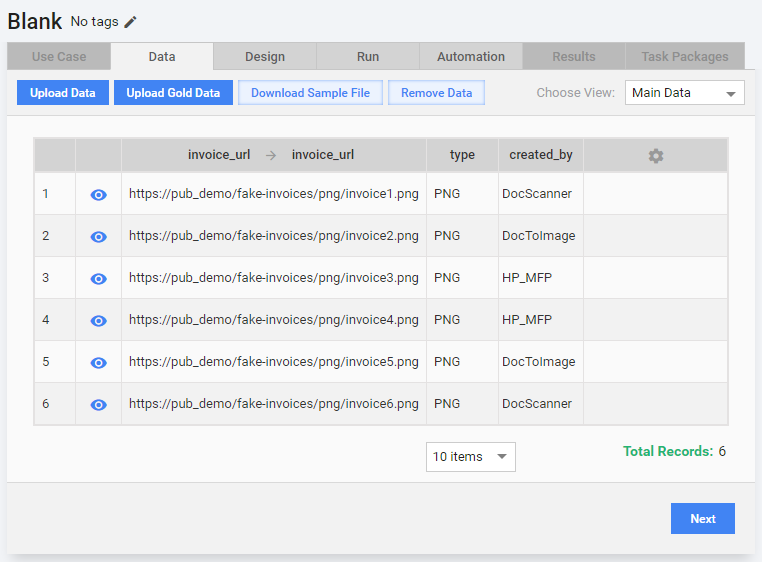
The contents of the input file is displayed along with the file's existing column headers. Click the Preview eye icon associated with any given row of data, to preview the Task using the corresponding data.
If the column headers do not match the variables within the Task design, a warning message is displayed alerting you which column names need to be remapped. To map/remap a column to a variable, click the column header found in the table and select an item from a drop-down.
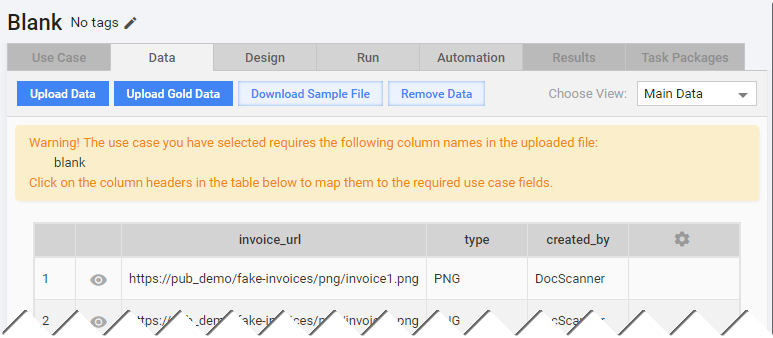
After you have mapped a column header to a Task variable (e.g. url =picture_address), you cannot use this column name to create a new variable (${question.data['url']}will be an invalid variable).tip
You can optionally remove the uploaded data by clicking the Remove Data button.
Click Next to proceed to the Design Task tab, if you are satisfied with the uploaded data.
note
You can go back to this step from the Design Task tab and upload new data, or remap column headers.
Import and export UTF-8 data
Many tasks involve data requiring UTF-8 encoding, especially for foreign languages (Chinese, Hebrew, Arabic, etc.).
This topic describes importing and exporting UTF-8 data to WorkFusion while creating Tasks, BPs or downloading snapshots.
Import
Problem
Sometimes while trying to upload data with Spanish, German, Chinese characters (¿, ñ, ë, 木) to the platform, WorkFusion will not upload a .xls or .xlsx file.
Saving as .txt or .csv eliminates the Chinese characters.
Saving as Unicode text preserves the characters but the file will not upload.
Solution
The easiest work-around is to copy/paste from Excel into a text editor, and save the text file from there.
For example, from Excel to Notepad.
- Save the Excel file as Unicode Text.
- Open this file in Notepad (Sublime or Notepad++). Or just copy all the data from Excel and paste it to a new Notepad document.
- Save the notepad file as a TXT file, being sure to update the encoding to UTF-8.
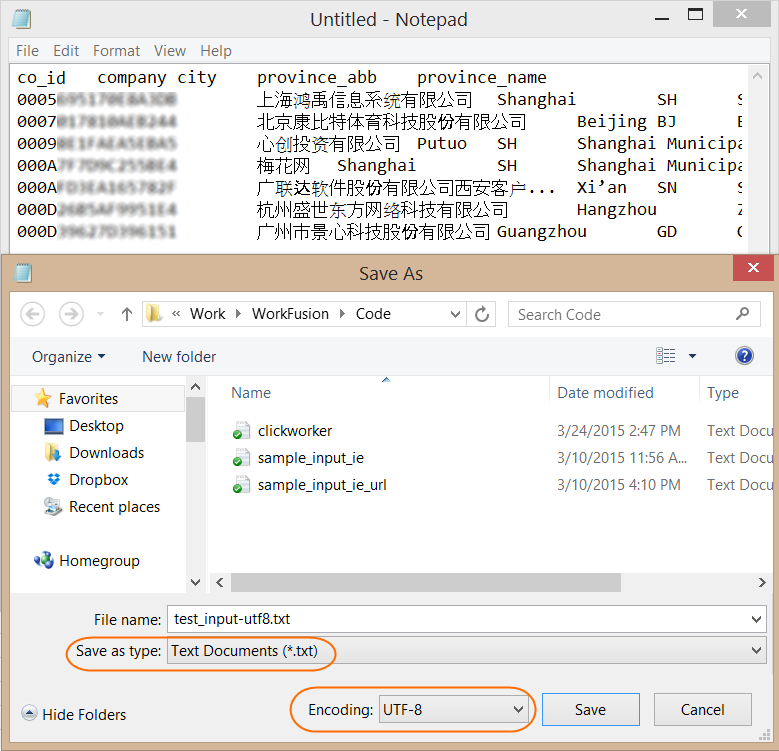
- Upload the file in WorkFusion, and it will adjust the upload to UTF-8 and tab-delimited.
tip
Detailed instructions can be found here.
Export
Problem
You uploaded a file to WorkFusion as TEXT (.txt) in UTF-8, but it is exporting as CSV and the characters are jumbled.
Solution
In this case, the data is fine but Excel does not display it correctly.
If you want to view it in Excel, do as follows
- Create a new blank book in Excel.
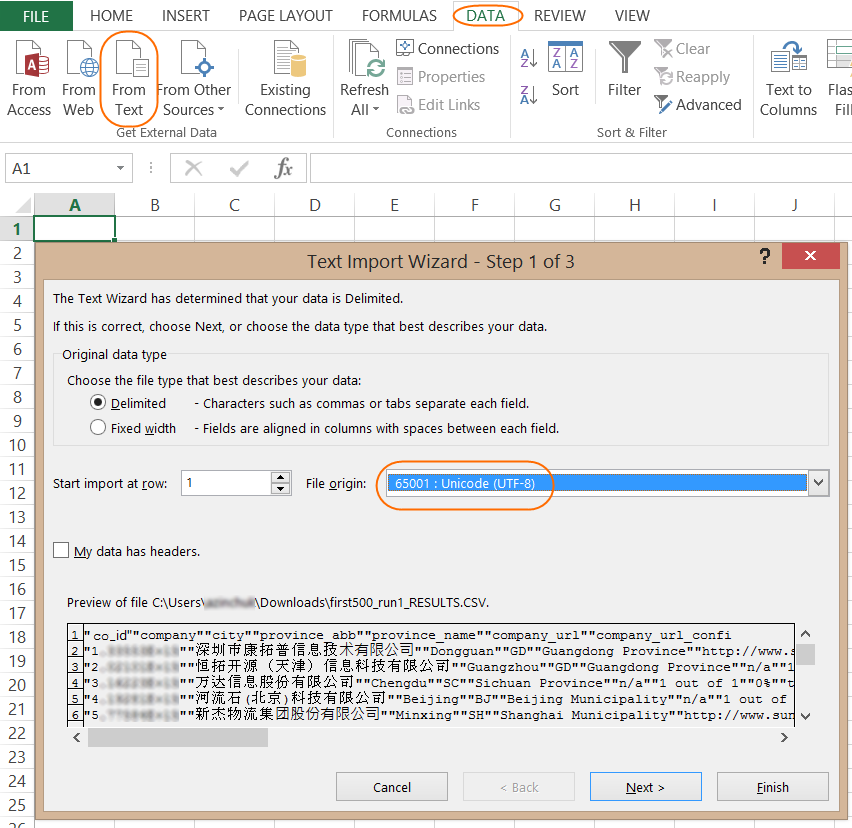
- On the top ribbon, select Data > From Text.
- Change the File Origin to Unicode (UTF-8) and finish the import process.