
Distribute tasks
General overview
There are various types of Bot Tasks. For example, several lines of businesses may want to automate different types of applications. In this case, there is a need to divide RPA Units into separate queues with one type of tasks to be transferred to the first queue, the second type of tasks—to the second, and so on. The reasons for the segregation can be as follows:
- Regulatory or security requirements.
- Business Processes of a significantly varying nature in terms of applications used.
- Segregated development teams for different Business Processes with no direct communication or collaboration path, for example, when different service providers are responsible for implementations.
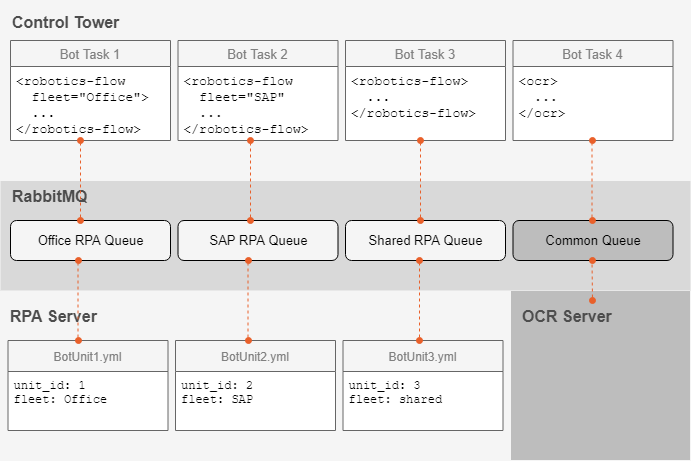
To distribute Bot Tasks, use the unified method of task routing via fleets. Fleets stand for groups of RPA Units used to segregate tasks according to their business purpose.
Thus, a specific fleet attribute is defined within the robotics-flow plugin. If no fleet attribute is provided, a task is sent to Shared Fleet. If no robotics-flow plugin is defined, a task is assigned to the Common queue to be transferred further.
Set up fleets
Mind the following requirements:
- Configuration of RPA Units is performed on the RPA Windows server.
- Bot Tasks need to specify a fleet to utilize. Dynamic fleet attributes with variables cannot be used. For more information, see Robotics plugins.
The basic steps are as follows:
Go to
INSTALL_DIR/bot-agent/conf/unitsand modify or copy theunit{Unit_id}.ymlfile, where{Unit_id}refers to the RPA Unit identifier.Change
unit_idandfleet.unit_id: 2 fleet: sharedsharedis the default fleet. If yourunit_idis more than 9, remove the last 0 in each port—the maximum number for one machine is 99.To define custom fleets to submit tasks to, specify
fleetfor each RPA Unit:unit_id: 3 fleet: SAP
tip
Refer to Install RPA Windows server for more details.
Apply fleets
The old way of specifying a fleet for an RPA Unit uses the fleet attribute of the robotics-flow plugin.
The following guide focuses on assigning a fleet to a given RPA Unit using a Bot Source. For more details, see Configure Bot Sources.
Set fleet for Bot Source
To set a fleet for a Bot Source, perform the following steps:
In Control Tower, go to System Settings > Bot Sources.
Click Create to create a new Bot Source or select an existing Bot Source from the list.
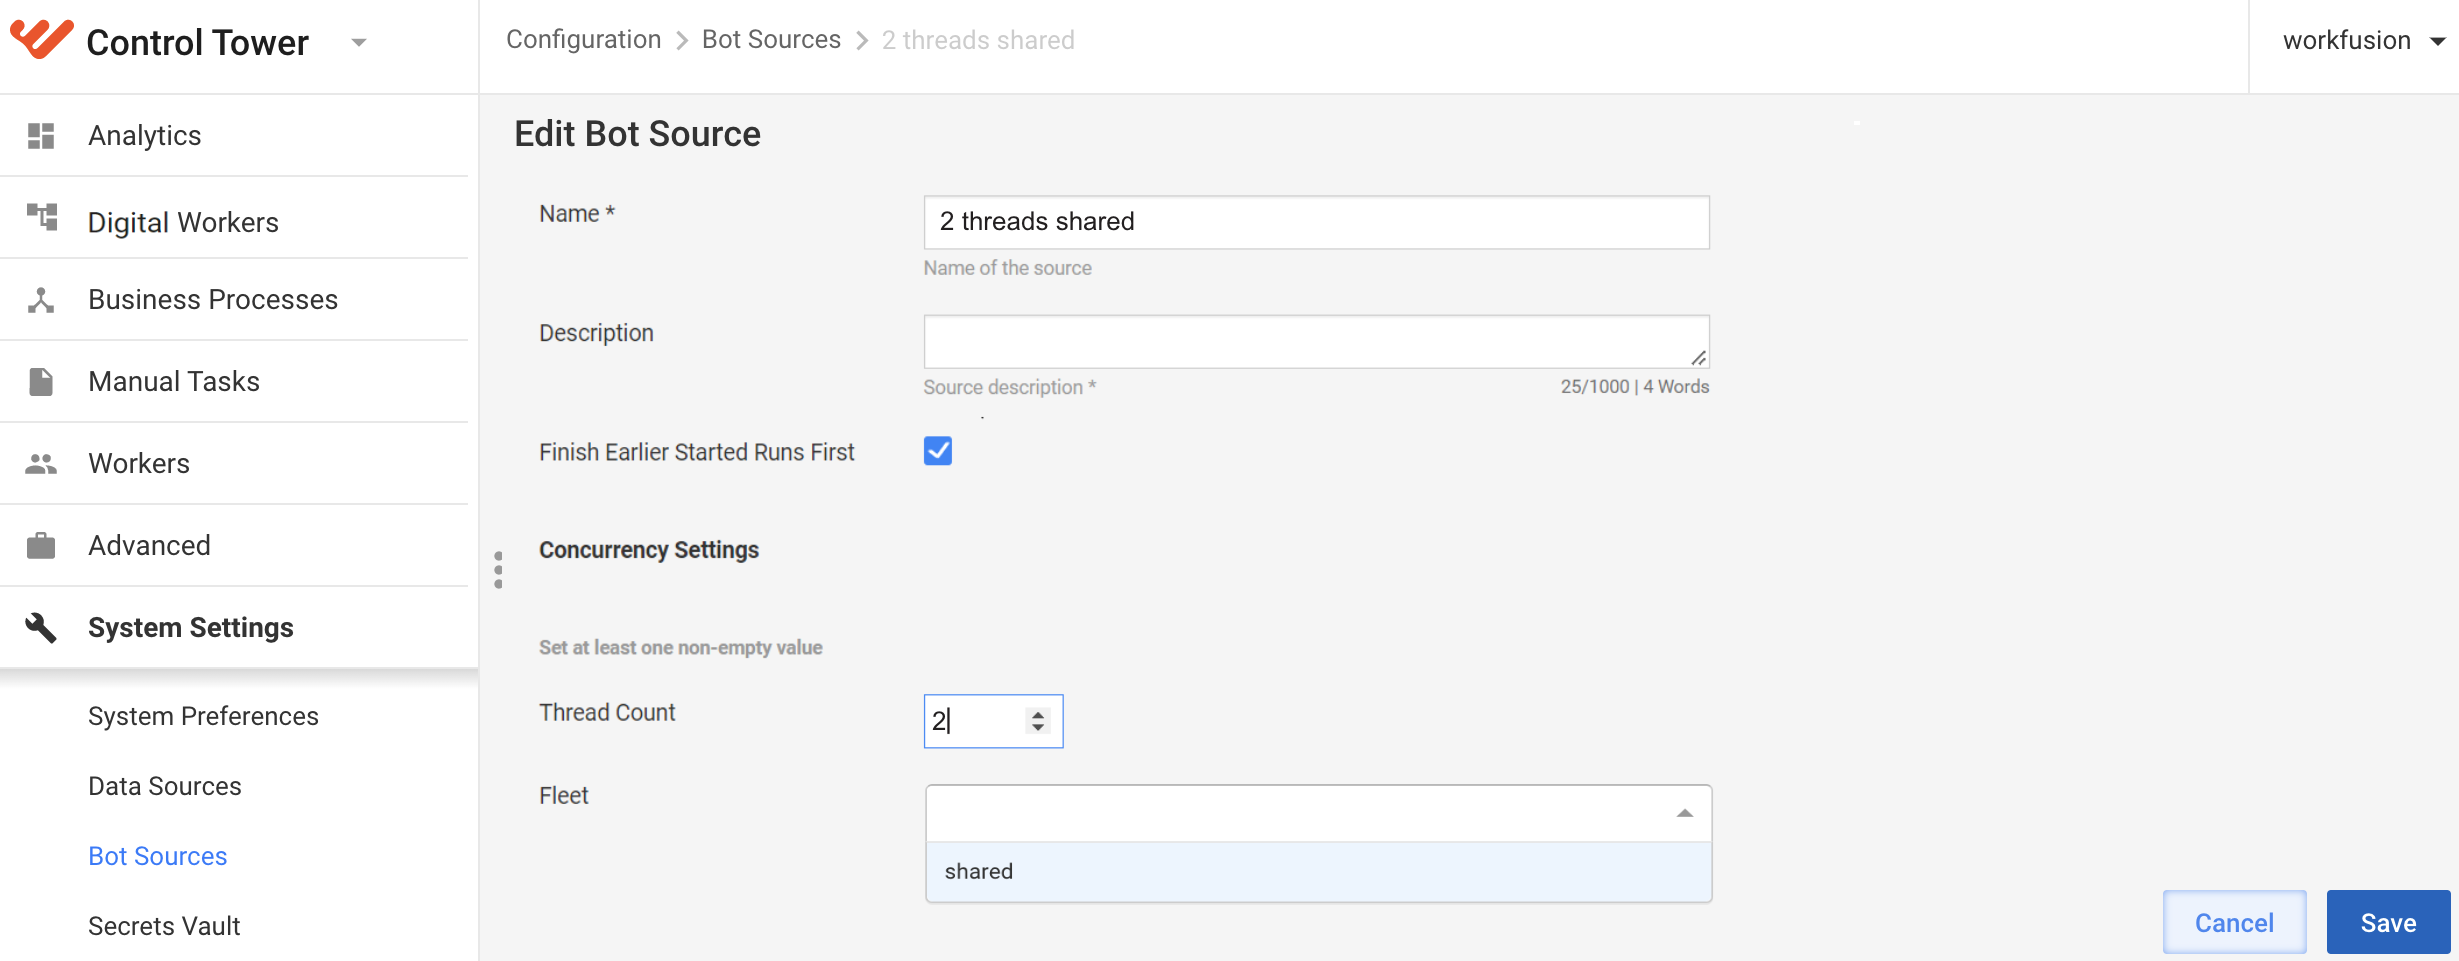
In the Fleet box, select a fleet. If the Thread Count field value is missing, set the fleet for the Bot Source so that you can use it.
Click Save.
Update fleet and thread count
If you change a fleet or thread count for an existing Bot Source used in the active Business Process, the changes are applied for new Business Process runs. In this case, you see the following warning message:
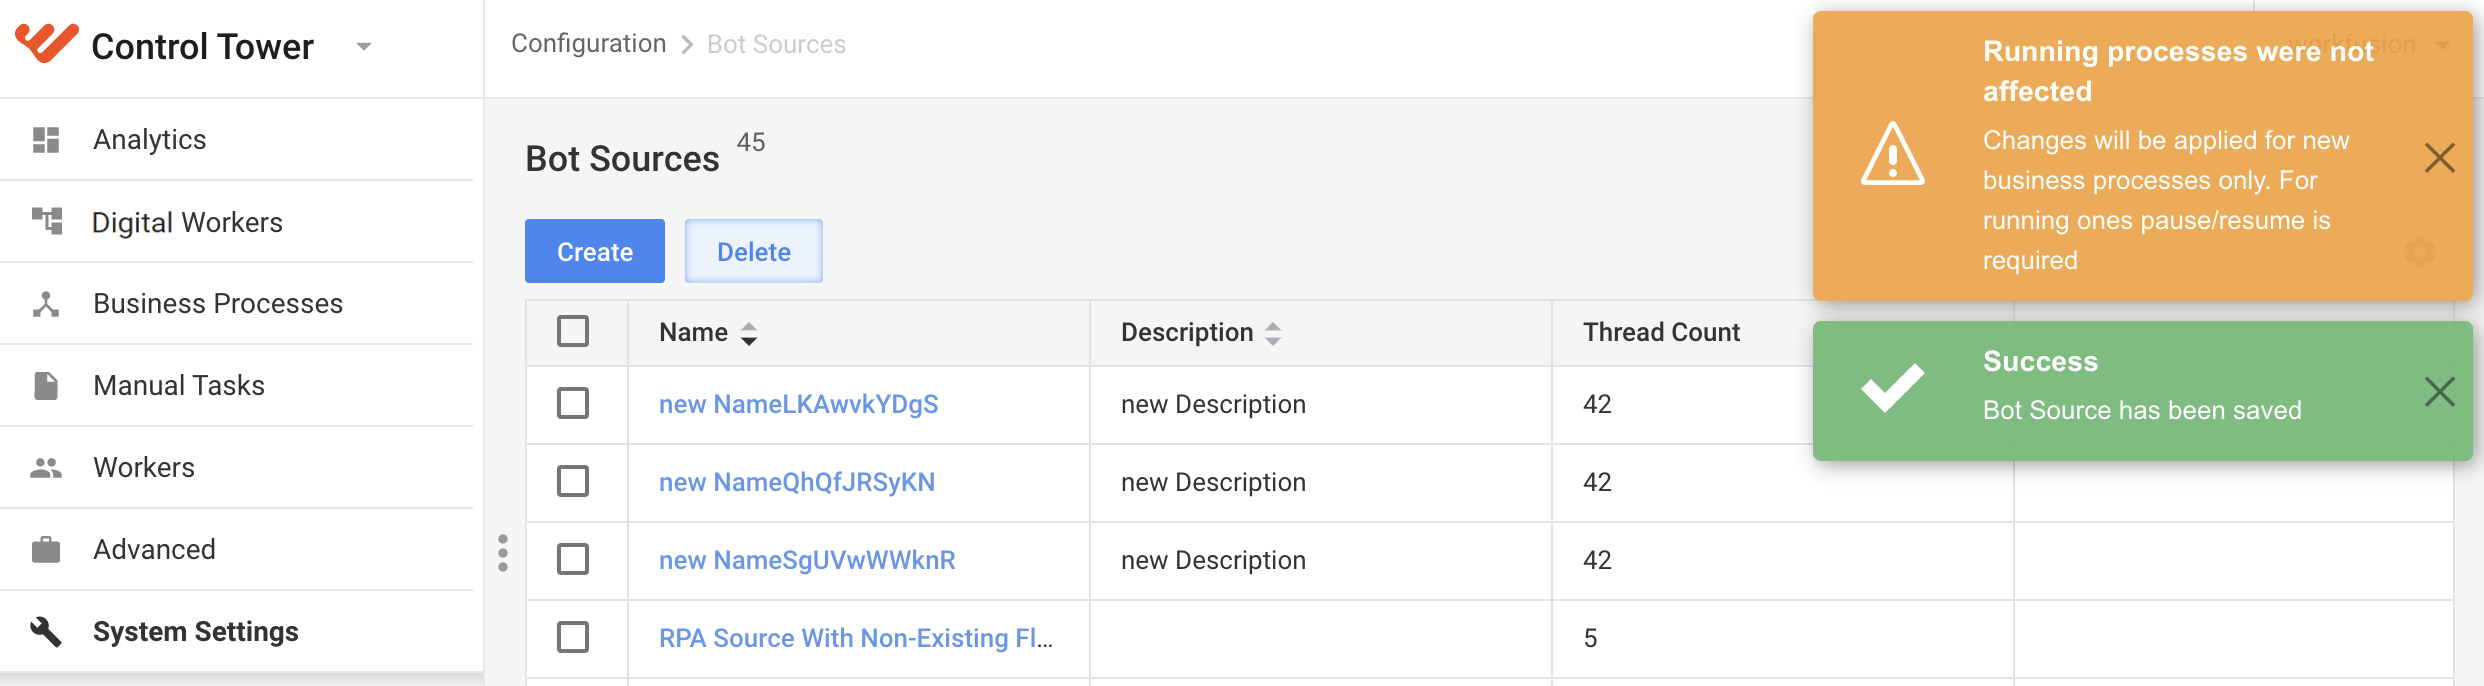
To apply a new fleet or thread count for running, pause and resume the given Business Process.
Fleet validation
If you try running a Business Process that contains Bot Tasks with non-existing fleets, these tasks fail after the waiting timeout is expired (by default, one hour). In this case, you get the following error message in event logs:
com.workfusion.spa.core.execution.api.task.
GenericTaskFailedException: There is no worker listening 'exec...com.worker.com.workfusion.spa.ct.worker-app.10.3.0.14.rpa.' queue for a long time. Task was exceeded wait limit and rejected.
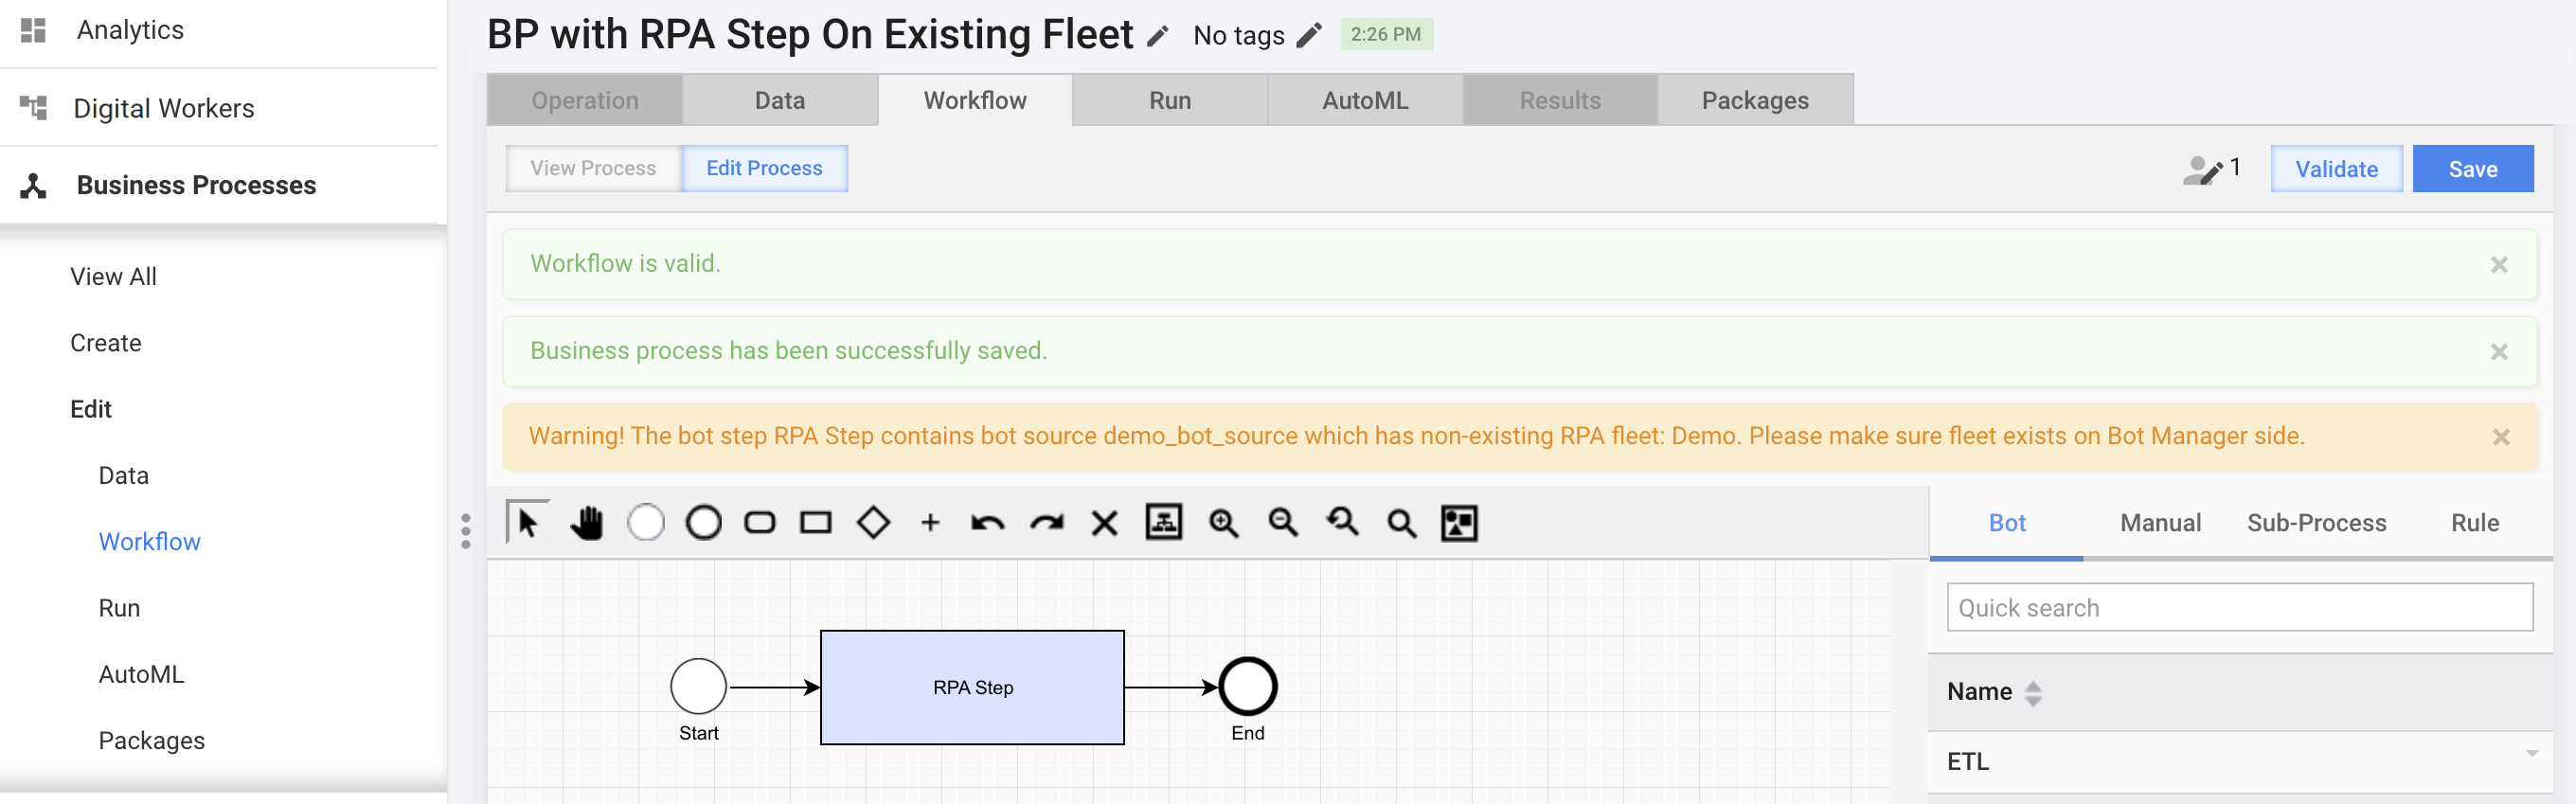
Also, if on the Design page, you save a Business Process with non-existing fleets, you see the following warning message:
Assign Bot Source to Bot Task
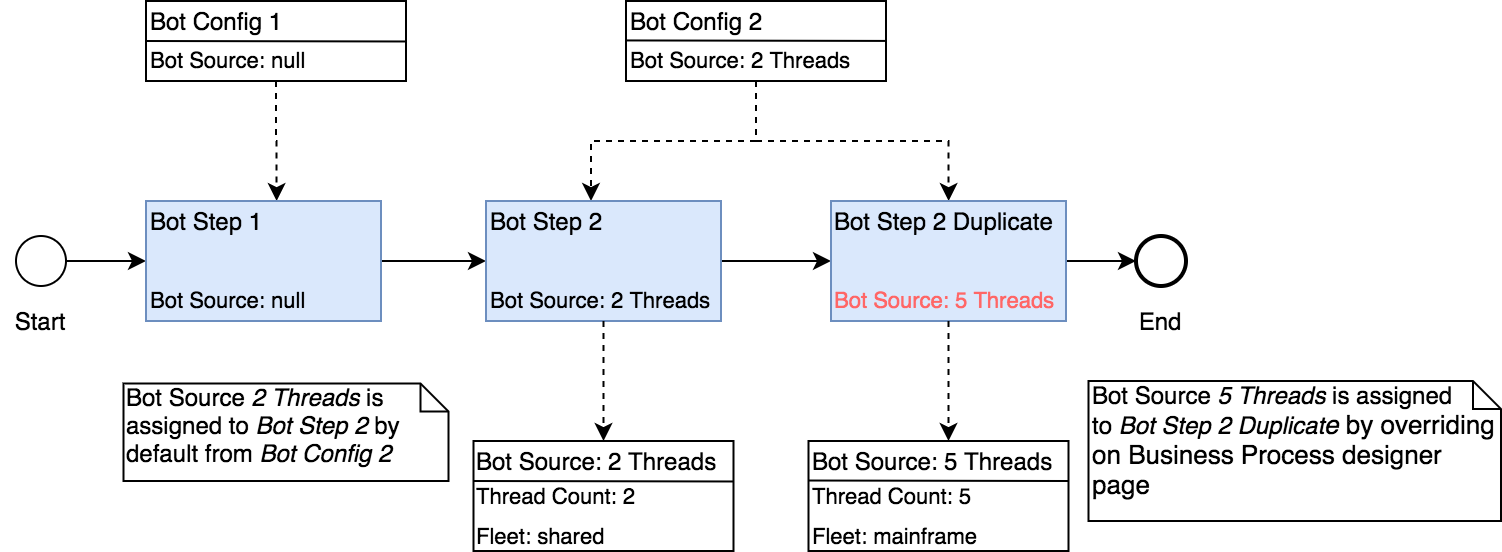
As shown in the following diagram, you can link each Bot Task (or Bot Step in the example) to a Bot Source. Bot Step 2 and Bot Step 2 Duplicate are created from Bot Config 2, but Bot Step 2 Duplicate has its Bot Source.
Thus, you can set Bot Sources on the Bot Task level independently. For example, if you have several Bot Tasks created from a single bot configuration, each task can have its Bot Source. When you add a Bot Task to the BP diagram using a drag-and-drop action, the Bot Source is inherited from the bot configuration.
Override Bot Source for Bot Task
Case 1. Add new bot configuration to BP diagram
To override a Bot Source for a Bot Task, do as follows:
In the Business Process, on the Workflow tab, add a Bot Task in one of the following ways:
Drag and drop from the Bot tab on the right panel to the Designer area.
Copy the existing Bot Task by right-clicking it and selecting Copy.
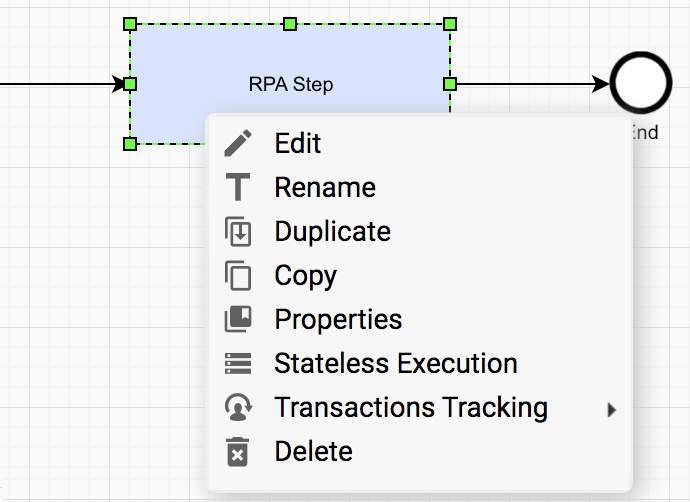
Create a new Bot Task and bot configuration by dragging the rectangle button from the Tools panel.

Connect the Bot Task with other steps.
Save the Business Process.
Double-click the Bot Task to which you want to assign a Bot Source.
Set the Bot Source.
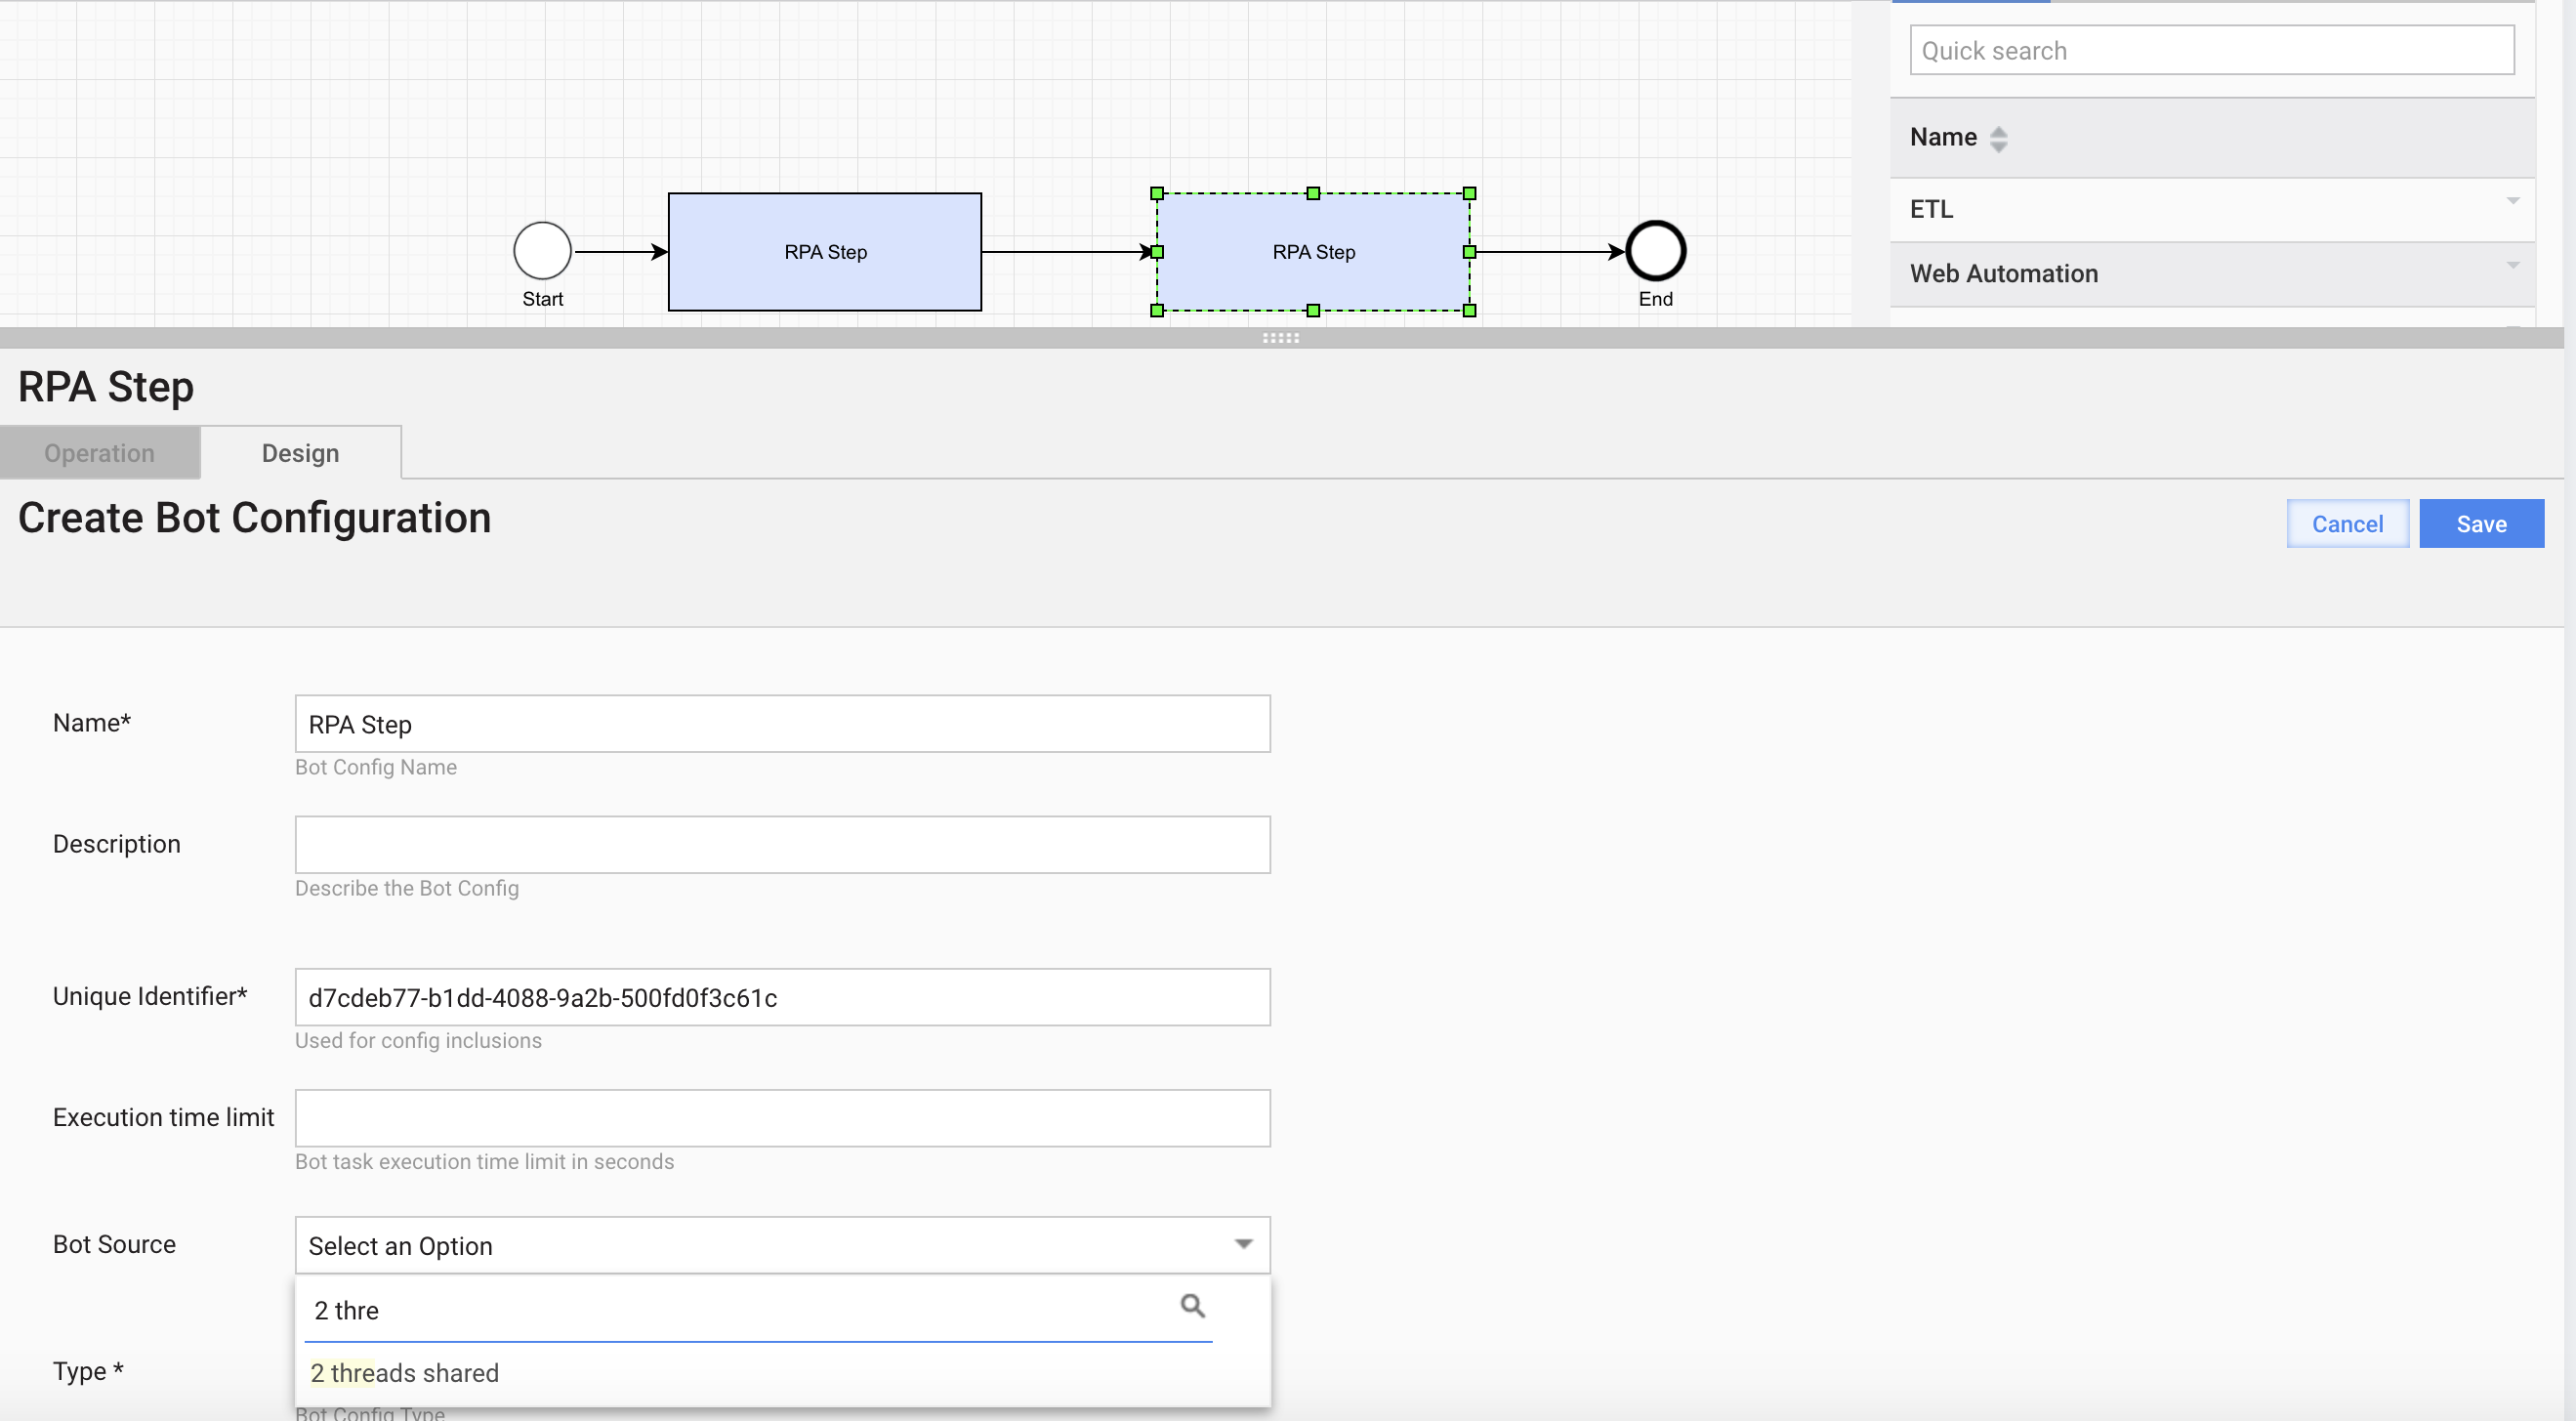
Save the Bot Task and the Business Process.
Case 2. Edit existing bot configuration
To override a Bot Source for a Bot Task when editing an existing bot configuration, perform the following steps:
- In the Business Process, go to the Workflow tab.
- Double-click the Bot Task to which you want to assign the Bot Source.
- Select the Bot Source from the drop-down menu.
- Save the Bot Task and the Business Process.