
Install Linux Bash Shell on Windows 10
related materials
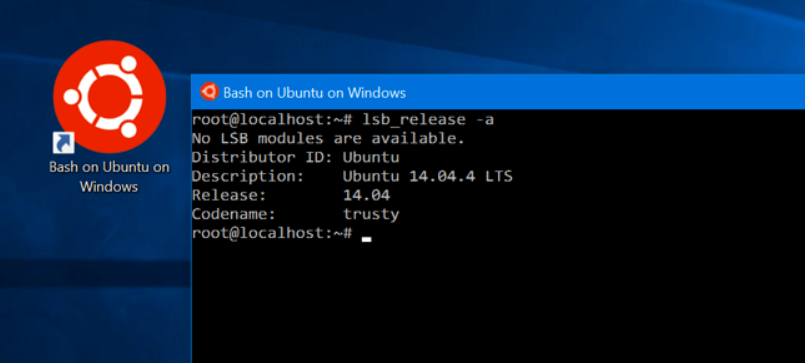
The Windows 10's Anniversary Update offers a big new feature for developers. A full, Ubuntu-based Bash shell can run the Linux software directly on Windows. This is made possible by the new "Windows Subsystem for Linux" Microsoft added to Windows 10.
View Bash Shell features
Bash Shell for Windows 10 is not a virtual machine, a container, or Linux software compiled for Windows (like Cygwin). Instead, Windows 10 gains a Windows Subsystem for Linux based on the Microsoft’s abandoned Project Astoria work for running Android apps on Windows.
Think of it as the opposite of Wine. While Wine allows you to run Windows applications directly on Linux, the Windows Subsystem for Linux allows you to run Linux applications directly on Windows.
Microsoft has worked with Canonical to offer a full Ubuntu-based Bash shell that runs atop this subsystem. Technically, this isn’t Linux at all. Linux is the underlying operating system kernel, and that isn’t available here. Instead, this allows you to run the Bash shell and the exact same binaries you’d normally run on Ubuntu Linux. Free-software purists often argue the average Linux operating system should be called "GNU/Linux" because it’s really a lot of GNU software running on the Linux kernel. The Bash shell you’ll get is really just all those GNU utilities and other software.
There are some limitations here. This won’t work with server software, and it won’t work with graphical software. It’s intended for developers who want to run Linux command-line utilities on Windows. These applications get access to the Windows file system, but you can’t use Bash commands to automate normal Windows programs, or launch Bash commands from the standard Windows command-line. They get access to the same Windows file system. Not every command-line application will work, either, as this feature is still in beta.
Install Bash on Windows 10
To get started, ensure you installed the Windows 10 Anniversary Update. This only works on 64-bit builds of Windows 10, so it’s time to switch to the 64-bit version of Windows 10 if you’re still using the 32-bit version.
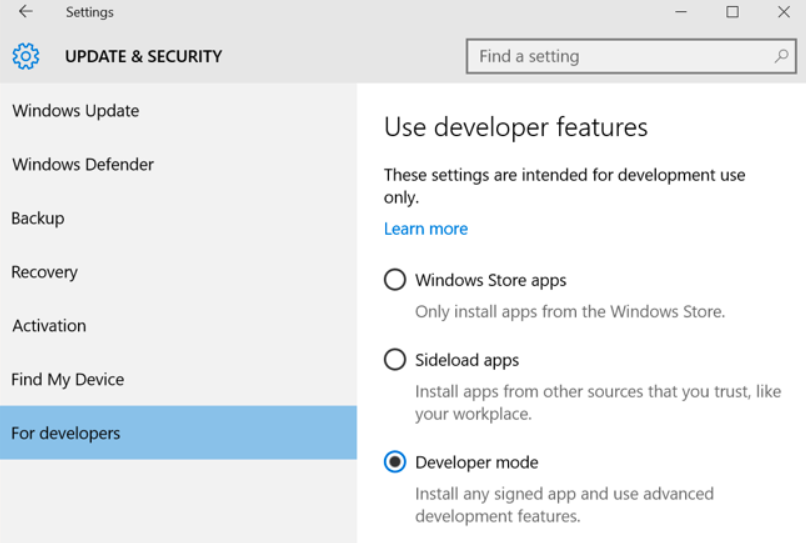
Once you’re sure you’re using the correct version of Windows 10, open the Settings app and head to Update & Security > For Developers.
Activate the Developer Mode switch here to enable Developer Mode.
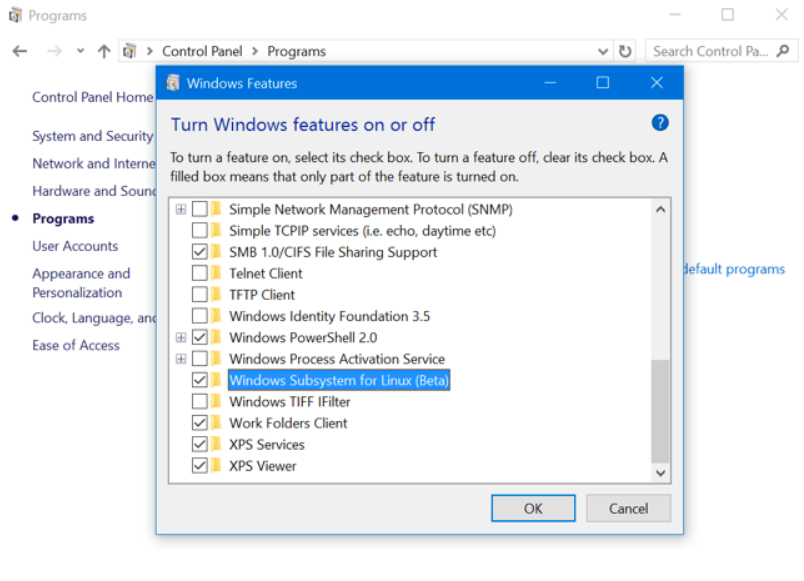
Open the Control Panel, click Programs, and click Turn Windows Features On or Off under Programs and Features. Enable the Windows Subsystem for Linux (Beta) option in the list here and click OK.
After you do, you’ll be prompted to reboot your computer. Click Restart Now to reboot your computer and Windows 10 will install the feature.
After your computer restarts, click the Start button (or press the Windows key), type
bash, and press Enter.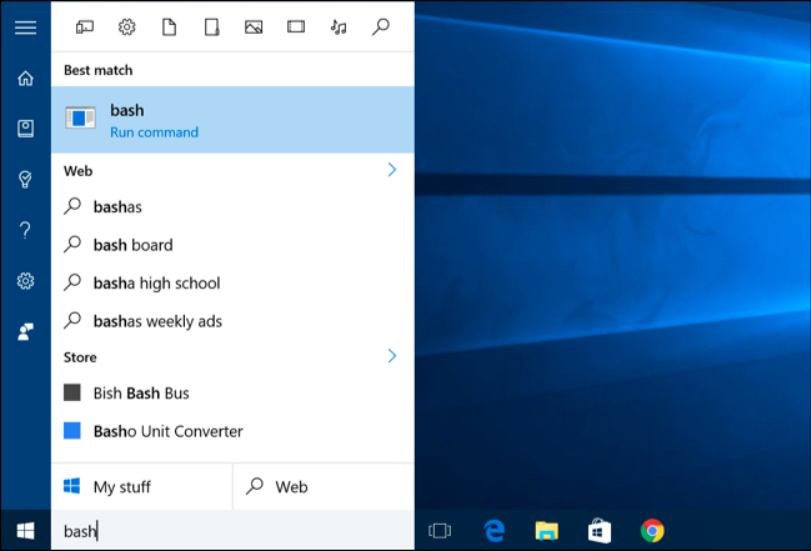
The first time you run the
bash.exefile, you’ll be prompted to accept the terms of service. The command will then download the Bash on Ubuntu on Windows application from the Windows Store. You’ll be asked to create a user account and password for use in the Bash environment.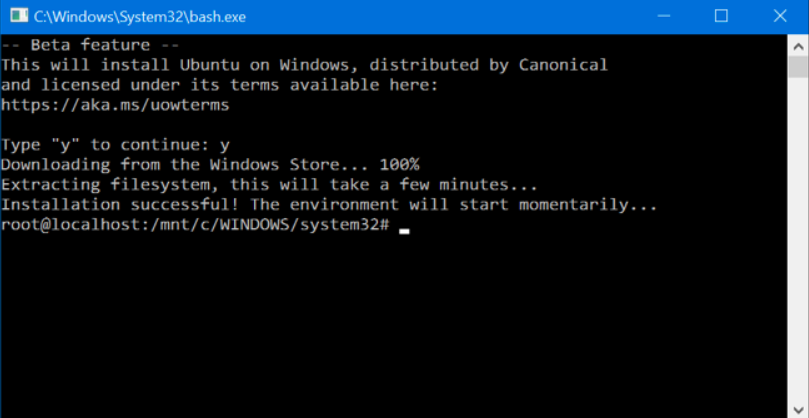
If you’d like to automate the installation of Bash instead, you can run the following command in a Command Prompt window. This will automatically agree to all prompts and set the default user to
rootwith no password:lxrun /install /y
Use Ubuntu’s Bash Shell and install Linux software
You’ll now have a full command-line bash shell based on Ubuntu. Because they’re the same binaries, you can use Ubuntu’s apt-get command to install software from Ubuntu’s repositories. You’ll have access to all the Linux command line software out there, although not every application may work perfectly–especially in the initial beta releases.
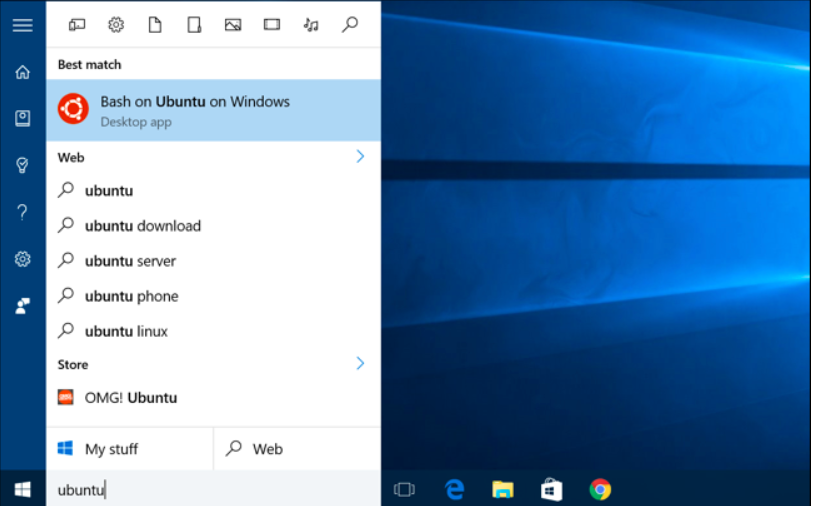
To open the Bash shell, open your Start menu and search for bash or Ubuntu. You’ll see a Bash on Ubuntu on Windows application. You can pin this application shortcut to your Start menu, taskbar, or desktop for easier access.
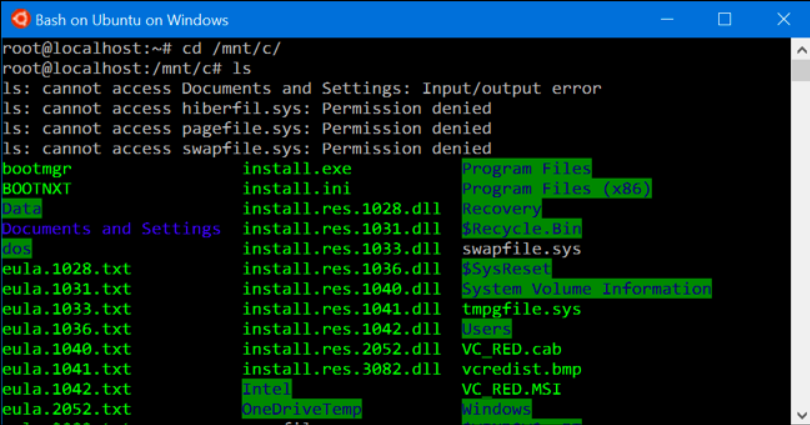
If you’re experienced using a Bash shell on Linux, Mac OS X, or other platforms, you’ll be right at home. You don’t need to use sudo, as you’re given a root shell. The “root” user on UNIX platforms has full system access, like the “Administrator” user on Windows. Your Windows file system is located at /mnt/c in the Bash shell environment.
Use the same Linux terminal commands you’d use to get around. If you’re used to the standard Windows Command Prompt with its DOS commands, here are a few basic commands on both Bash and Windows:
- Change Directory: cd in Bash, cd or chdir in DOS
- List Contents of Directory: ls in Bash, dir in DOS
- Move or Rename a File: mv in Bash, move and rename in DOS
- Copy a File: cp in Bash, copy in DOS
- Delete a File: rm in Bash, del or erase in DOS
- Create a Directory: mkdir in Bash, mkdir in DOS
- Use a Text Editor: vi or nano in Bash, edit in DOS
tip
For more details, see Beginner Geek: How to Start Using the Linux Terminal.
It’s important to remember that, unlike Windows, the Bash shell and its
Linux-imitating environment are case-sensitive. In other words,
File.txt with a capital letter is different from file.txt without a
capital.
tip
For more instructions, consult the beginner’s guide to the Linux command-line and other similar introductions to the Bash shell, Ubuntu command line, and
Linux terminal online.
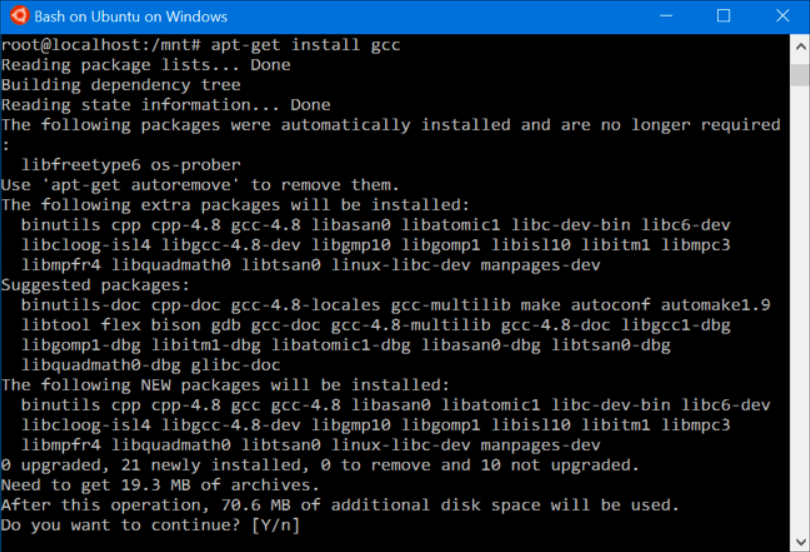
You’ll need to use the apt-get command to install and update the Ubuntu environment’s software. Be sure to prefix these commands with “sudo”, which makes them run as root–the Linux equivalent of Administrator. Here are the apt-get commands you’ll need to know:
- Download Updated Information About Available Packages: sudo apt-get update
- Install an Application Package: sudo apt-get install packagename (Replace “packagename” with the package’s name.)
- Uninstall an Application Package: sudo apt-get remove packagename (Replace “packagename” with the package’s name.)
- Search for Available Packages: sudo apt-cache search word (Replace "word" with a word you want to search package names and descriptions for.)
- Download and Install the Latest Versions of Your Installed Packages: sudo apt-get upgrade
Once you’ve downloaded and installed an application, you can type its name at the prompt and press Enter to run it. Check that particular application’s documentation for more details.
Install Ubuntu font for true Ubuntu experience
If you want a more accurate Ubuntu experience on Windows 10, you can also install the Ubuntu fonts and enable them in the terminal.
Download the Ubuntu Font Family from the Ubuntu’s website. Open the downloaded zip file and locate the
UbuntuMono-R.ttffile. This is the Ubuntu monospace font, which is the only one used in the terminal. It's the only font you need to install.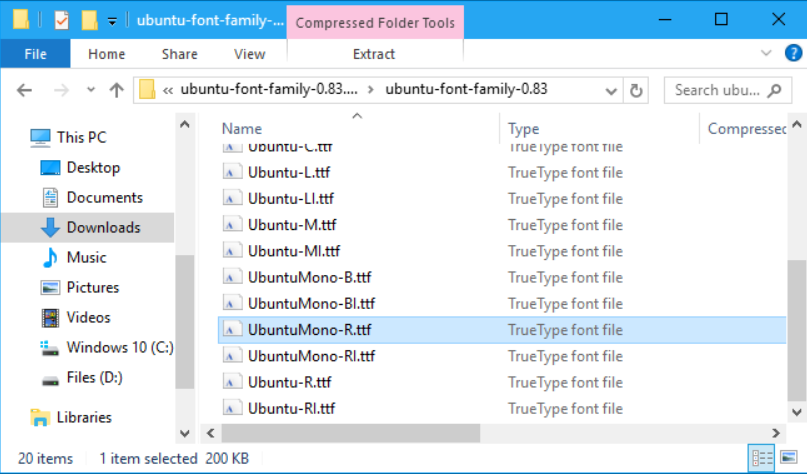
Double-click the
UbuntuMono-R.ttffile. You’ll see a preview of the font. Click Install to install it on your system.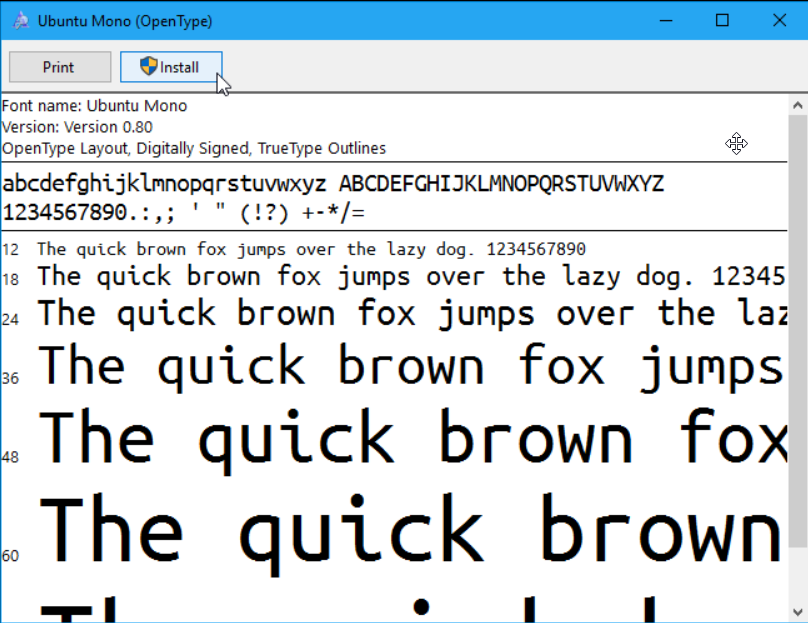
For more details, see Learning to Use the Registry Editor Like a Pro.
To make the Ubuntu monospace font become an option in the console, add a setting to the Windows registry.
Open a registry editor by pressing
Windows+Ron your keyboard, typingregeditand pressing Enter. Navigate to the following key:HKEY_LOCAL_MACHINE\SOFTWARE\Microsoft\Windows NT\CurrentVersion\Console\TrueTypeFont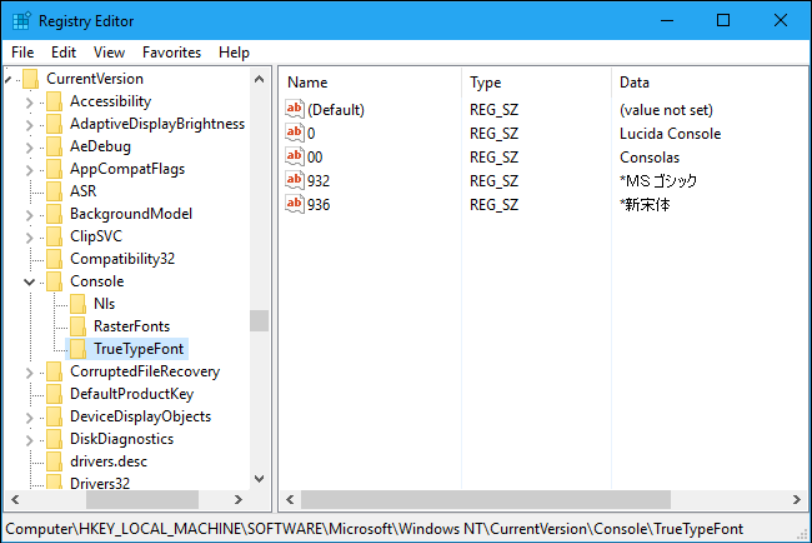
Right-click in the right pane and select New > String Value. Name it
000.Double-click the
000string you just created and enterUbuntu Monoas its value data.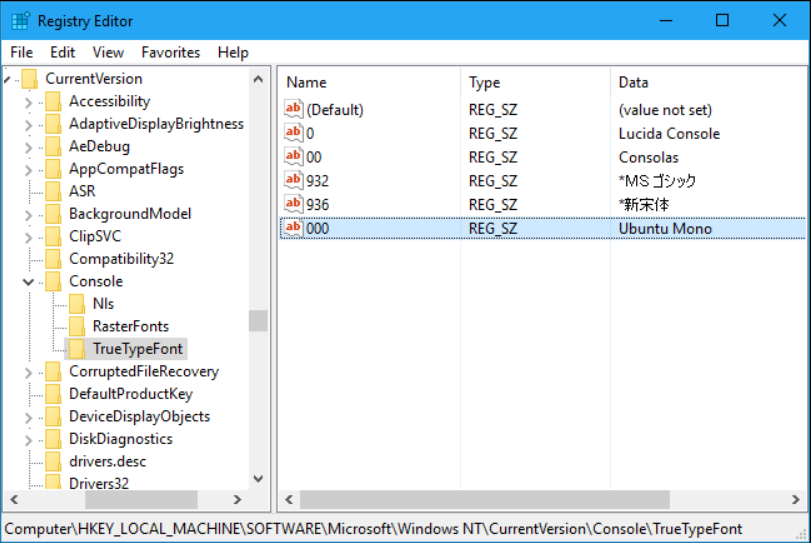
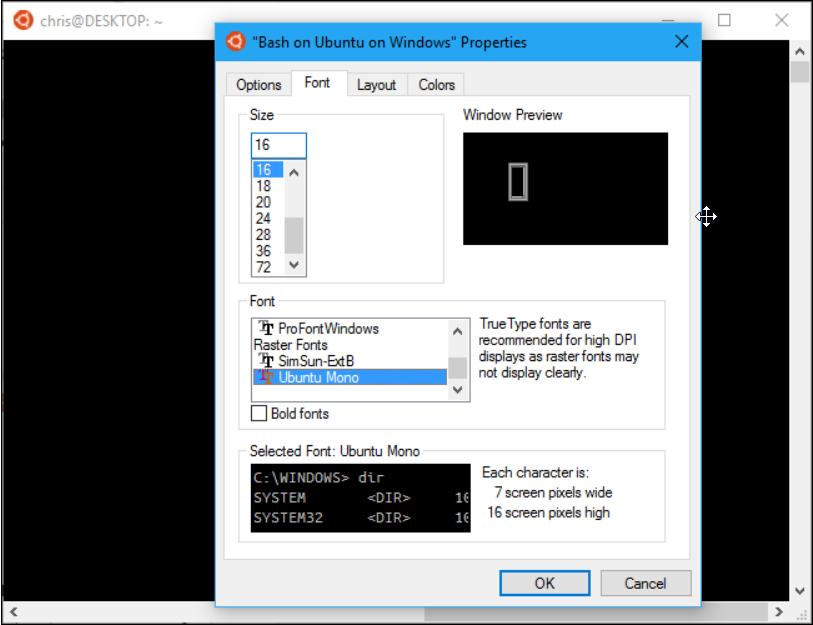
Launch a Bash window, right-click the titlebar, and select Properties.
Click the Font tab and select Ubuntu Mono in the font list.
The software you install in the Bash shell is restricted to the Bash shell. You can’t access it from the Command Prompt, PowerShell, or elsewhere in Windows. Software in the Bash shell also can’t interact directly with or launch Windows programs, although the Bash environment and Windows have access to the same files on your computer.
However, you can create Bash shell scripts (SH scripts) and run them with the Bash shell.