
Local Nexus guide
Why it is suggested to run local Nexus
Local Nexus installation is an optional step. Having local Nexus helps to avoid using shared public Nexus and pull random BCBs into your local Control Tower.
Another good alternative would be to use your company hosted Nexus server.
For your local development environment, it is possible to have all WorkFusion environment components within the workstation. IA Cloud Developer allows to achieve that except for a local Nexus repository. This guide explains how to install and configure for WorkFusion local Nexus.
Steps to install and configure
Download Nexus 2 Repository Manager
- Navigate to https://help.sonatype.com/repomanager2/download#Download-NexusRepositoryManager2OSS.
- Download Nexus 2 Repository Manager OSS (Open Source Edition) for Windows or macOS.
Install Nexus Repository Manager
Extract all the files present in the .zip folder.
Copy the nexus-(version) and sonatype-work folders to the C:\Program Files directory.
Open Terminal (Run as Administrator).
Go to C:\Program Files\ nexus-(version)\bin and execute the
nexus.bat consolecommand.C:\>cd Program Files C:\Program Files>cd nexus-2.14.14-01 C:\Program Files\nexus-2.14.14-01>cd bin C:\Program Files\nexus-2.14.14-01\bin> C:\Program Files\nexus-2.14.14-01\bin>nexus.bat consoleMake sure you wait until Nexus starts. In Terminal, wait for the
Started Sonatype Nexus OSSmessage.
Open Nexus Repository Manager
- Open your browser and type in the URL: http://localhost:8081/nexus/.
- Sign in with the default credentials:
- username: admin
- password: admin123
Create and configure Repositories
Go to Repositories, click on the Add icon > Hosted Repository, and create your local repository.
Enter a name for your repository and select defaults/custom settings. Typically, a repository for deployment into Control Tower is named wf-machine-config-bundle. You can also use this name.
Select Release for Repository Policy and Allow Redeploy for Deployment Policy.
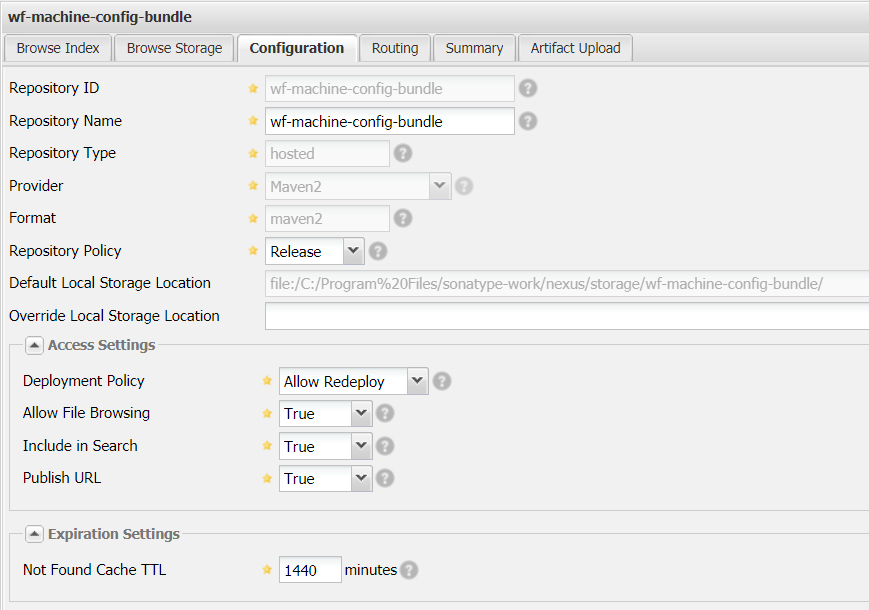
Your repository appears in the list of available repositories.
Repeat the same process to create the webharvest-plugins repository.
Enter the wf-machine-config-bundle repository URL in your
<bcb.repository.url></bcb.repository.url>tag of the project's root pom.xml.<bcb.repository.url>http://localhost:8081/nexus/service/local/repositories/wf-machine-config-bundle/content/</bcb.repository.url>Configure your local Maven's settings.xml file to provide credentials to deploy into local Nexus:
<server>
      <id>bcb-repository</id>
      <username>admin</username>
      <password>********</password>
</server>