Migrate trained model
The guide explains how to migrate trained ML model with statistics from one WorkFusion environment to another, for example, from DEV to UAT.
To save time and server resources it is possible to use already trained model on a different WorkFusion environment. This guide explains how to migrate a trained ML model with statistics to a different instance for one single task.
caution
To migrate a complex Business Process with automation nested into subprocess, it is required to use a different approach that is not a part of this guide.
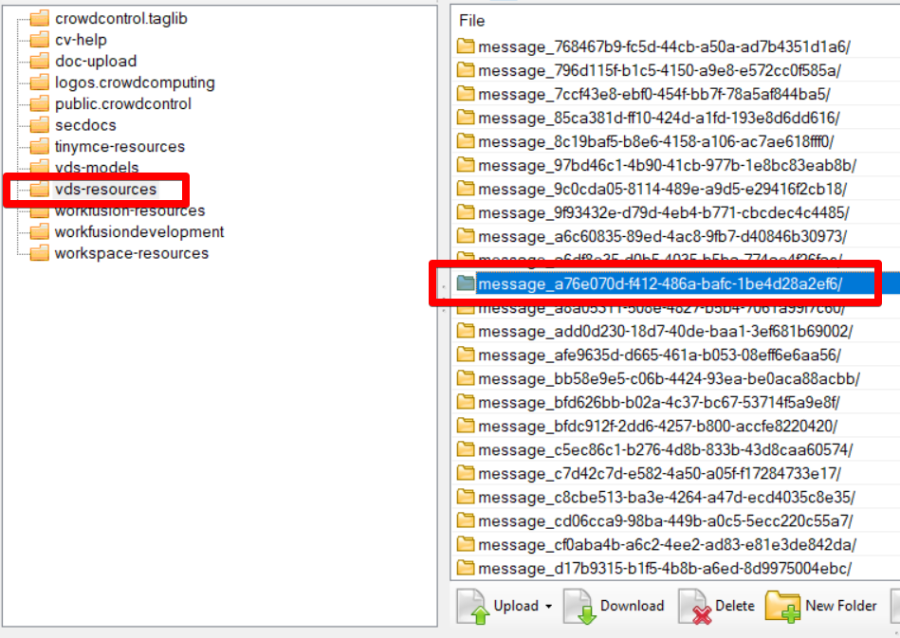
As soon as a ML model has been trained it will be stored in a S3 bucket folder: s3://vds-resources/. Each trained model has a statistics file that is evaluation-results.zip. The location for the file is s3://vds-resources/<experiment-group-id>/output/evaluation-results.zip.
note
Since version 10.1, the evaluation-results.zip statistics file is generated only in the dev environment and is no longer provided in the production.
The main actions include the following:
- Upload trained ML model to a new instance.
- Migrate model from the vds-models bucket.
- Migrate a Manual Task.
- Migrate statistics.
- Review the Automation Use Case on a new instance and make sure it is compatible with the Automation Use Case deployed on the old instance. If not, follow additional steps to migrate the Automation Use Case below.
Upload trained ML model to new instance
Copy a model which should be migrated from source WorkFusion environment and upload it to a target environment S3 folder: s3://vds-resources/.
Migrate model from vds-models bucket
To migrate a clean model from the vds-models bucket, do as follows:
Locate a model name and version required to migrate.
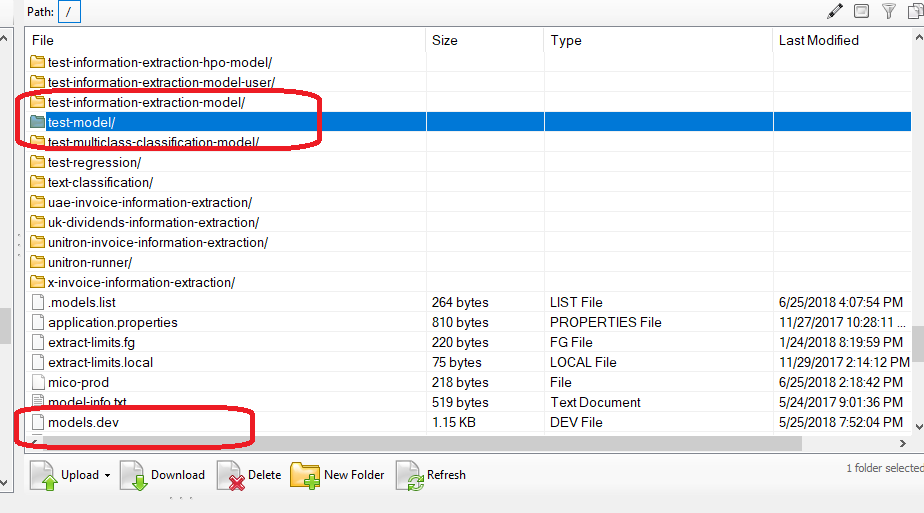
Open the vds-models bucket, open a model name, and find the required version for migration.
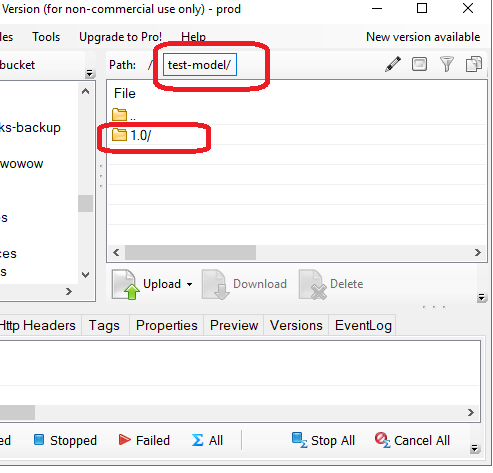
Using S3 Browser, double-check that multipart upload and download are turned off (disabled).
Upload the hypermodel content to the destination S3 vds-models bucket.
Update the
model-flat.prodfile in the S3 vds-models bucket with hyper_model_name:version. Don't forget to keep one last line empty.Wait about 3–5 minutes and then check the
{CONTROL_TOWER_HOST}/gateway-service/listHyperModelCheckURL. The model with version should appear in JSON data.If the S3 client is not available, use the following command to migrate models from the SSH client using the s3cmd tool:
"s3cmd sync --recursive [DIRECTORY] s3://[BUCKET]/[PATH]/"To review the uploaded model, apply the command:
s3cmd ls [s3://BUCKET[/PREFIX]]
Migrate Manual Task
To copy or move a Business Process, locate the Business Process without AutoML, or replace the AutoML use case inside with a Manual Task which needs to be automated. To do that:
- Create a new copy of a Business Process with a different name.
- Open Designer, remove the AutoML use case, and paste the Manual Task instead.
- Save and prepare the Business Process for migration.
The best way to migrate a task from one WorkFusion environment to
another (for example, from DEV to PROD) is to create a Package and import it.
A Package is a ZIP archive containing: XML file with Task export
information (design, settings), All Data Stores that are used in a Task,
meta information.
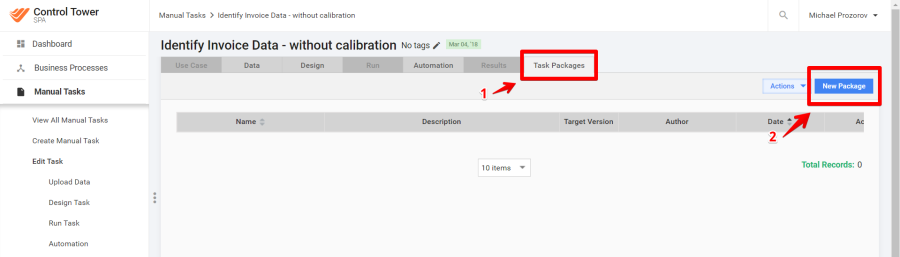
Go to View all Manual Tasks > the Packages tab. Click New Package.
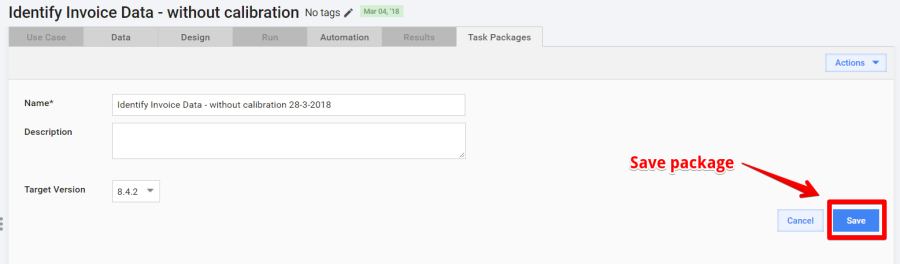
Enter a meaningful Name and Description for the Package. Select the Target Version for the current Package. Click Save.
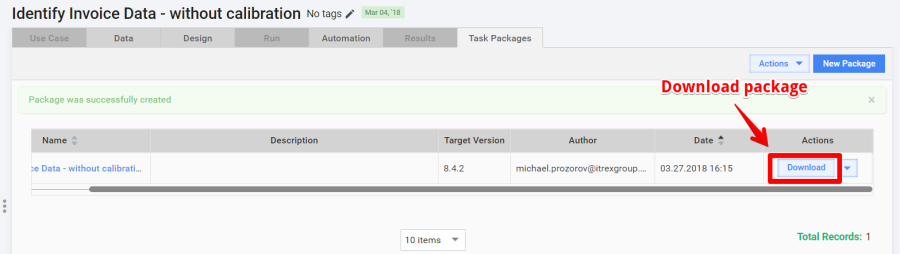
Download the Package to your local machine, click the appropriate Download button in the Actions grid column. As a result, the Package is downloaded as a ZIP file.
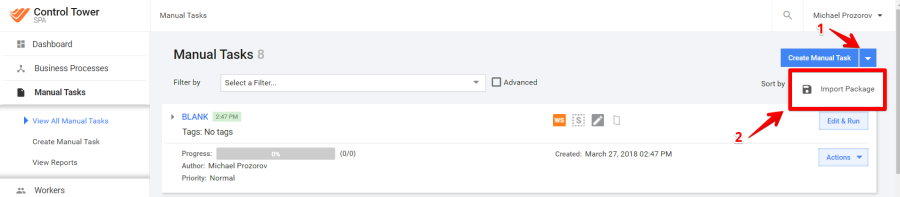
Log in to the target WorkFusion environment, for example PROD or UAT. Go to View all Manual Tasks > the Packages tab and click Import Package in the top right corner.
Upload the Package ZIP archive downloaded from the source environment and click the Preview Package button. The Package Import page is shown.
Resolve all possible conflicts. Use the link available in the beginning of the current module. If there are no conflicts, click the Import Package button in the bottom left corner.
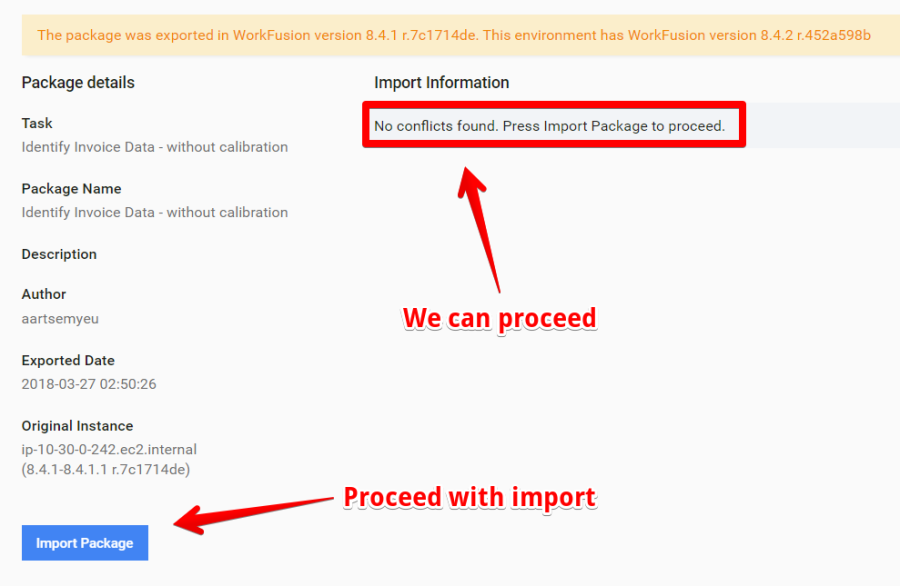
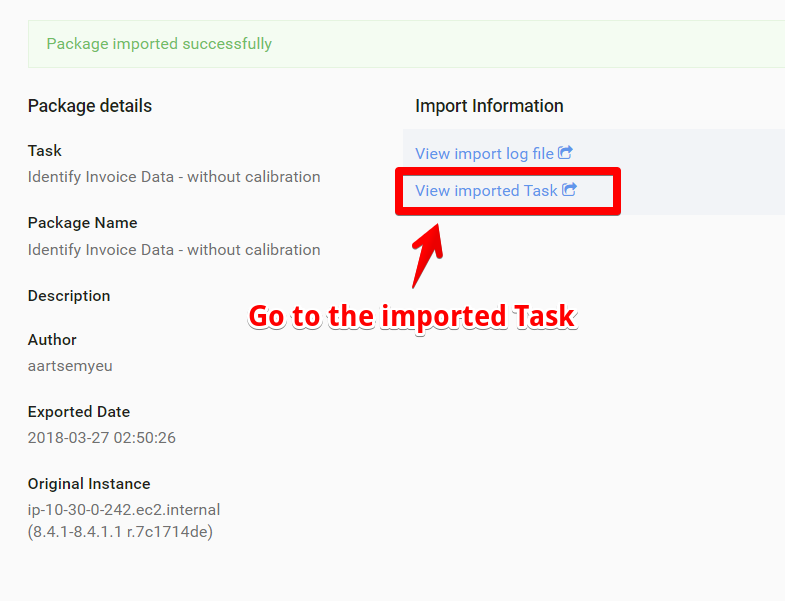
If the Package is successfully imported, you see the import result message.
Go to the imported Task and open the Automation tab. After the third step, you see the migrated statistics.